Appearance
Salesforce
Salesforce is a cloud-based software company that provides customer relationship management (CRM) service and also a complementary suite of enterprise applications focused on customer service, marketing automation, analytics, and application development.
Key Features of Salesforce:
- CRM Focus: Centralizes customer data and interactions to improve sales, service, and marketing efficiency.
- Cloud-Based: Accessible from anywhere with a browser—no on-premises hardware or maintenance required.
- AppExchange: A vast marketplace of apps and integrations to extend Salesforce’s functionality.
- Trailhead: Free, gamified learning platform for users, admins, and developers to master Salesforce skills.
- Customization and Flexibility: Customize workflows, objects, fields, and UI to match unique business processes.
- Einstein AI: Built-in AI for predictive analytics, automation, and personalized customer insights.
- Multi-Tenancy: Secure, scalable architecture that serves multiple customers on a shared infrastructure.
- Community and Events: Active global community, forums, and events like Dreamforce to support learning and networking.
- Philanthropy: Deep commitment to corporate social responsibility via its 1-1-1 model (equity, time, and product).
- Industry Solutions: Tailored CRM offerings for sectors like healthcare, finance, manufacturing, and education.
Further information
Read more detailed information on Salesforce here.
Trigger:
Update field in records: Triggers when a field is updated in a record.
Actions:
- Create attachment: Creates an attachment of a specified object by given parent ID.
- Find record: Finds a record of a specified object by a field and value.
Connect with Salesforce:
INFO
Pop-up windows must be allowed for this browser session to enable the connection of this third-party app with Workflow Automation.
Log in to your Salesforce developer account account.
Go to your Salesforce Dashboard.
Click the gear icon in the top right corner and click Open Advanced Setup in the dropdown menu.

In the Platform Tools section of the sidebar navigation navigate to Apps > App Manager.
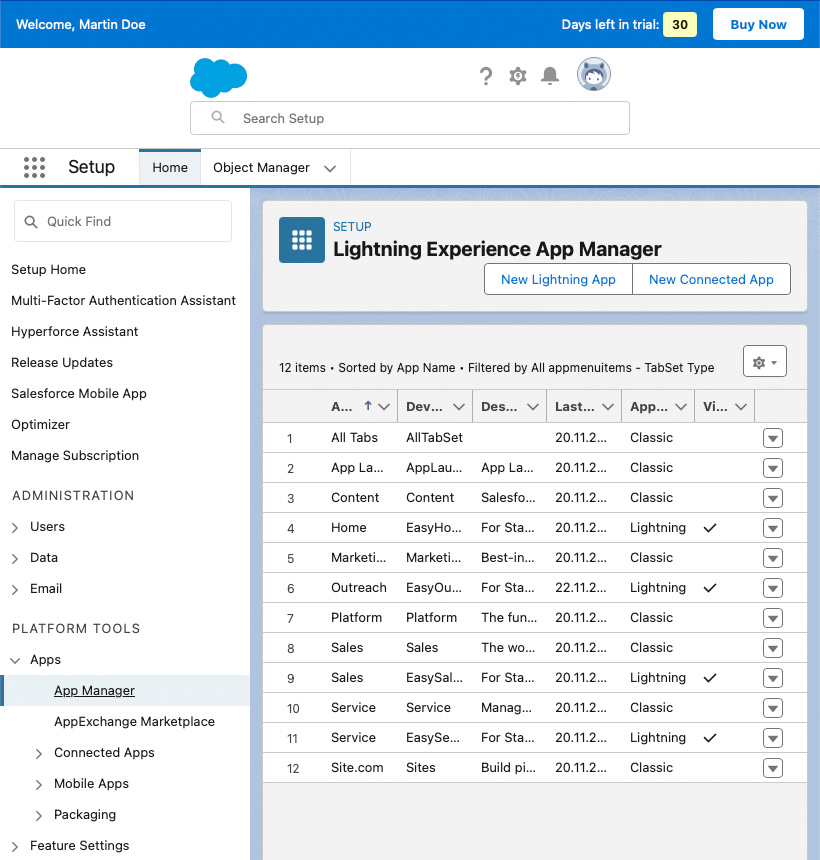
Click the New Connected App button.
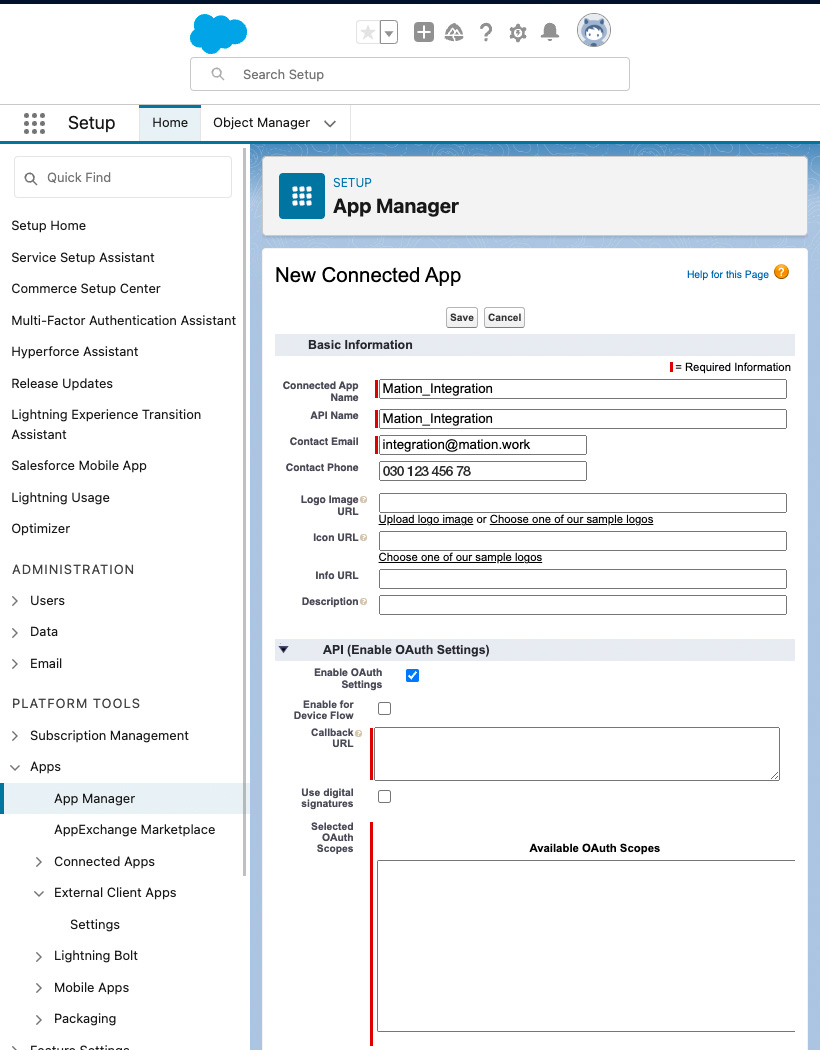
Enter Connected App Name, API Name, Contact E-Mail, and check the Enable OAuth Settings checkbox.
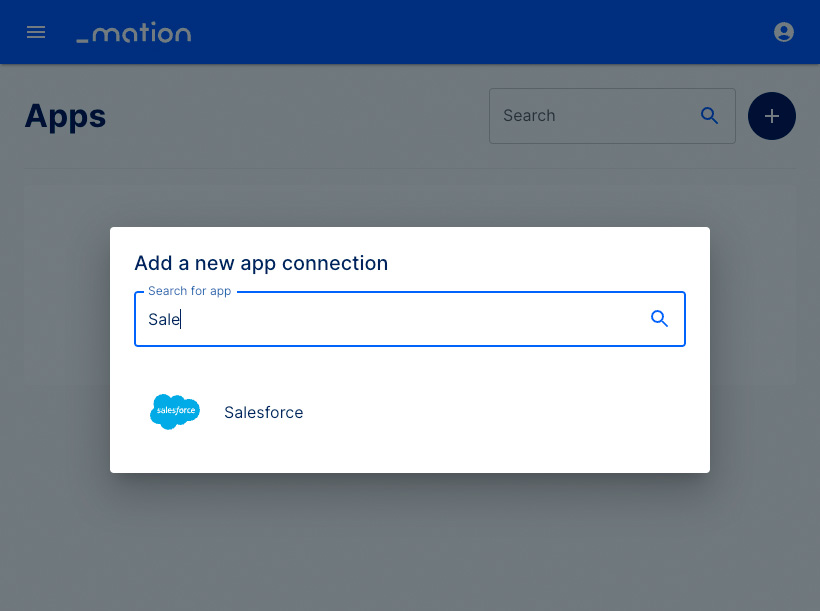
Go to Workflow Automation and navigate to Apps. Click the + Add Connection button. In the popup, select Salesforce from the list.
Copy the
OAuth Redirect URLfrom Workflow Automation.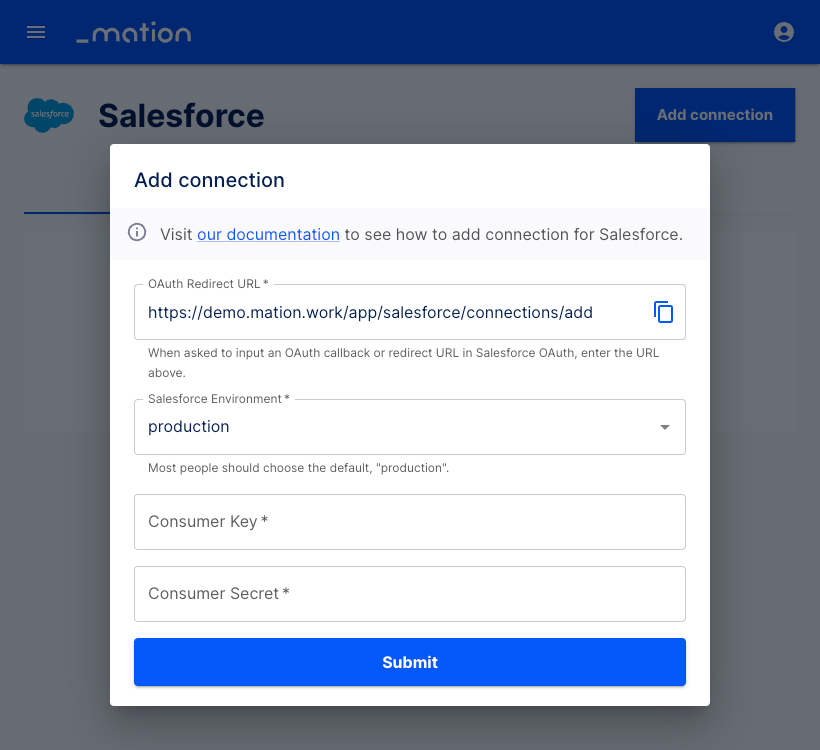
Paste the
OAuth Redirect URLinto the Callback URL field on Salesforce.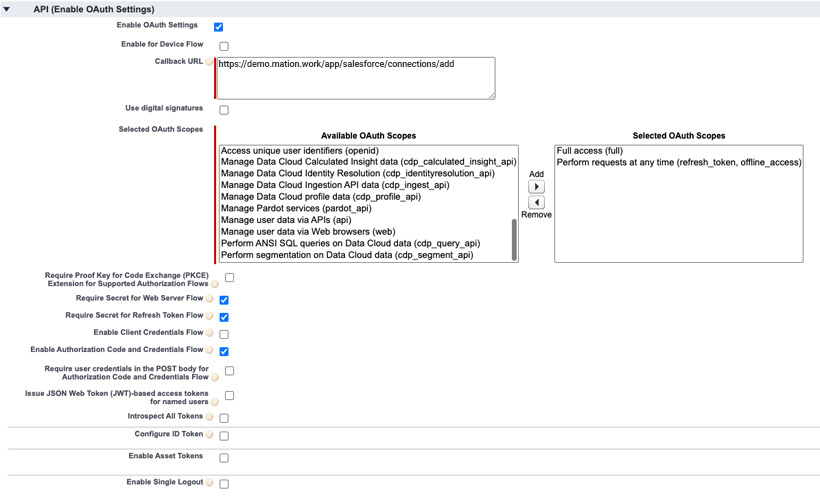
Add the
Full access(full)andPerform requests at any time (refresh_token_offline_access)scopes in the Selected OAuth Scopes section and click the Add button to the right of the Available OAuth Scopes list.Uncheck the
Require Proof for Code Exchange (PKCE) Extension for Supported Authorization Flowscheckbox!Enable the
Enable Authorization Code and Credentials Flowcheckbox.WARNING
You MUST uncheck the
Require Proof for Code Exchange (PKCE) Extension for Supported Authorization Flowscheckbox and enable theEnable Authorization Code and Credentials Flowcheckbox, otherwise the connection can't be established!Scroll down to the bottom of the page and click the Save button at the bottom of the page.
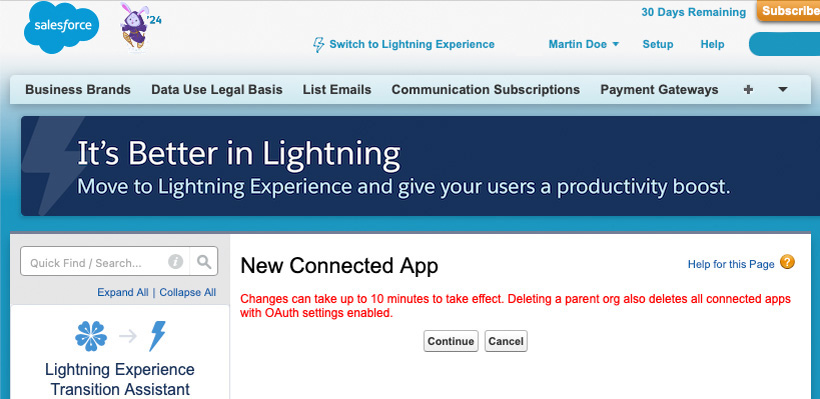
Acknowledge the information and click the Continue button.
In the API (Enable OAuth Settings) section, click the Manage Consumer Details button.

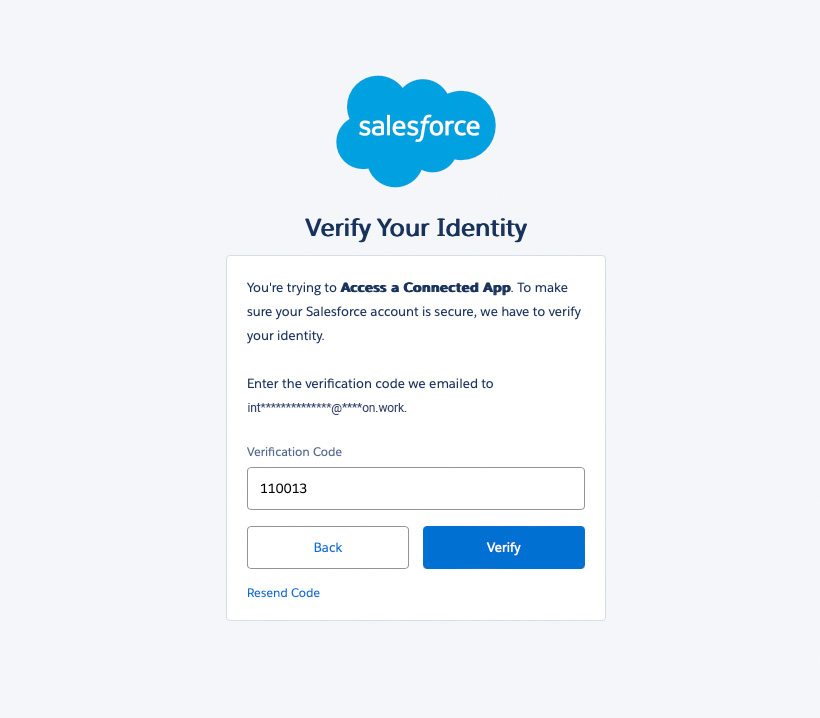
Check your e-mail inbox for the Verification Code and paste it into Verification Code field on Salesforce and click the Verify button.
Copy the
Consumer Keyvalue from Salesforce and paste it into the Consumer Key field on Workflow Automation.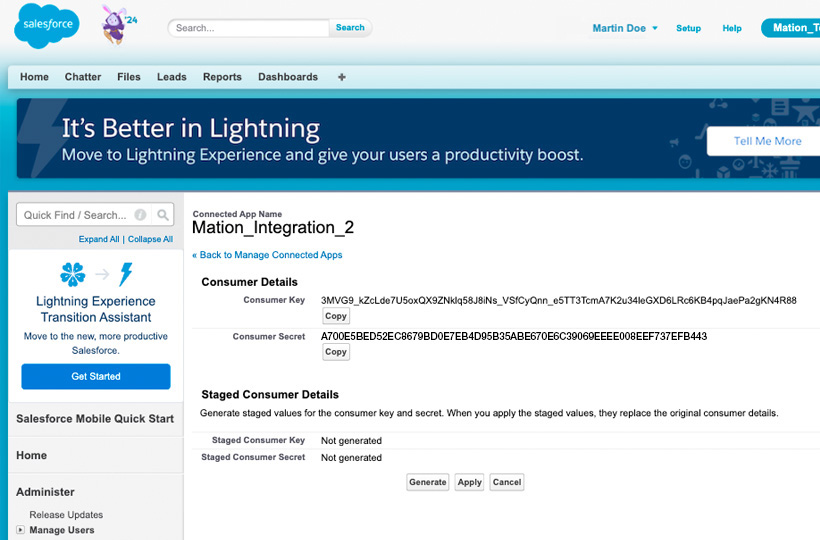
Copy the
Consumer Secretvalue from Salesforce and paste it into the Consumer Secret field on Workflow Automation.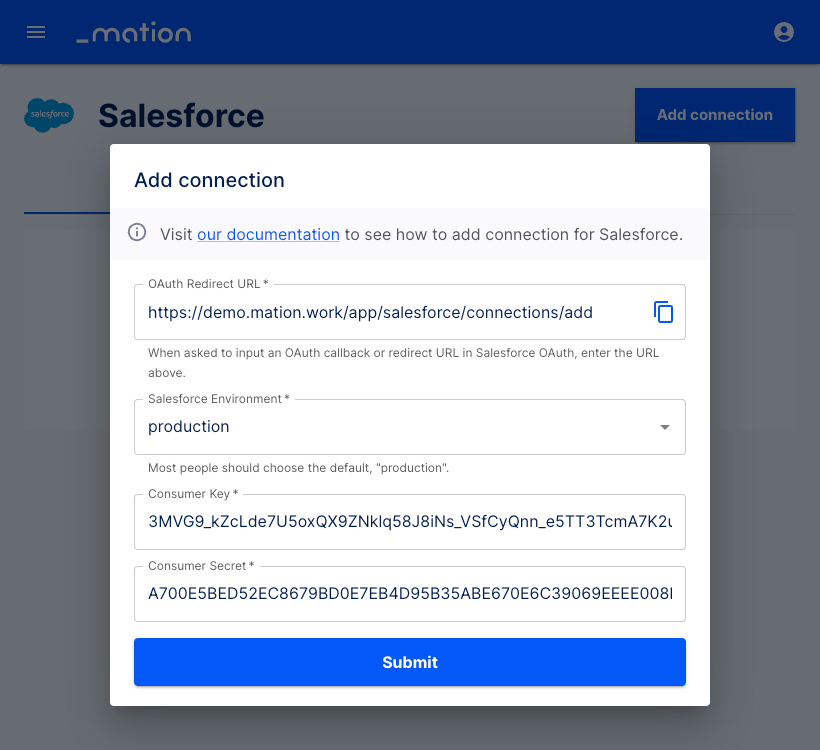
Click the Submit button on Workflow Automation.
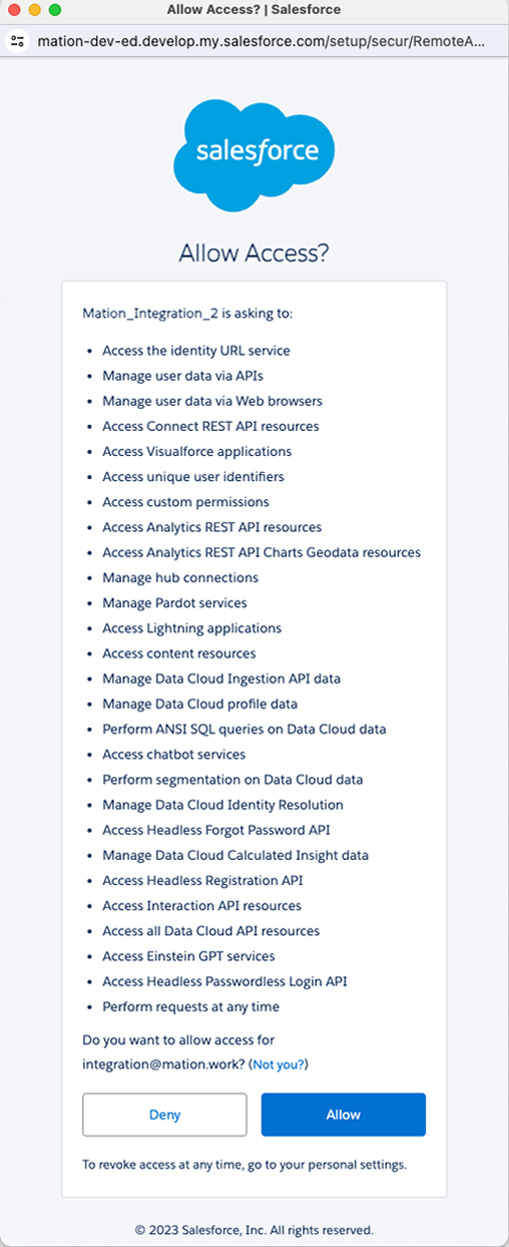
A pop-up window appears. Click the Allow button.
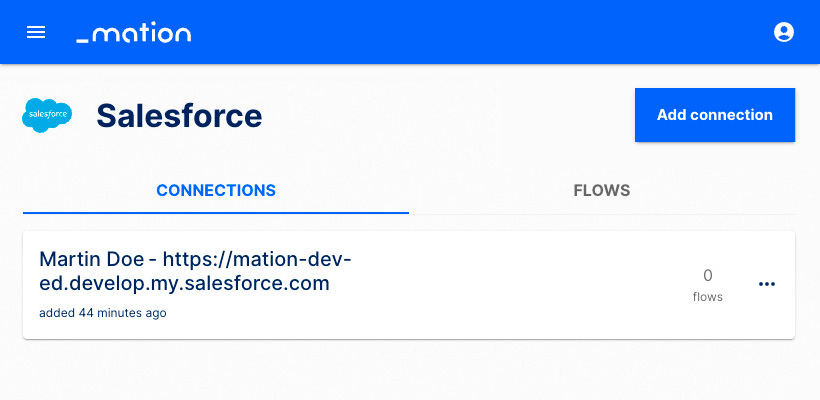
Your Salesforce connection is now established.
Start using your new Salesforce connection with Workflow Automation.