Appearance
Google Forms
Google Forms is a survey administration app that is part of the Google Drive office suite along with Google Docs, Google Sheets, and Google Slides. It allows users to create custom forms for surveys and questionnaires at no cost. The collected information is automatically connected to a spreadsheet. The spreadsheet is populated with the survey and quiz responses to facilitate data analysis.
Key features of Google Forms:
- Customizable Forms: Users can build a form with a simple interface, adding questions and selecting response formats such as multiple choice, drop-downs, or short answers.
- Templates: There are various templates available for common forms like RSVPs, quizzes, and feedback surveys, which can be customized as needed.
- Real-time Response Information: As soon as participants submit their responses, the data is immediately available for review.
- Automatic Summaries: Google Forms provides automatic summaries of all responses with graphs and charts.
- Collaborative Editing: Multiple people can work on the same form at the same time, much like other tools in the Google Drive suite.
- Integration with Google Sheets: All responses can be viewed in real-time in a Google Sheet and are neatly organized, allowing for further analysis and data manipulation.
- Quizzes: Forms can be set up as quizzes, with automatic grading and feedback for respondents.
- Branching and Skip Logic: Based on answers, you can direct respondents to different questions or pages, controlling the flow of the survey.
- File Uploads: You can allow respondents to upload files with their responses, which is useful for applications like job submissions or assignments.
- Accessibility: Google Forms are accessible through any web browser and are mobile-friendly, allowing respondents to easily fill out a form on a smartphone or tablet.
- Security and Privacy: Forms can be made public or restricted to certain users, and Google's security measures help protect the data collected.
- Customizable Themes: Users can choose different colors, fonts, and images to match the theme of the form with the topic or company branding.
- Data Validation: For certain types of questions, like email addresses or numbers, you can set criteria that the answers must meet to be accepted.
Google Forms is widely used in education for quizzes and surveys, in businesses for feedback, registration, and event planning, and by individuals who need to gather information in an organized and efficient manner. It is favoured for its simplicity, ease of use, and integration with other Google services.
Further information
Read more detailed information on Google Forms here.
Trigger:
New form responses: Triggers when a new form response is submitted.
Connect with Google Forms:
INFO
Pop-up windows must be allowed for this browser session to enable the connection of this third-party app with Workflow Automation.
Log in to your Google account.
Go to API Library in Google Cloud console.
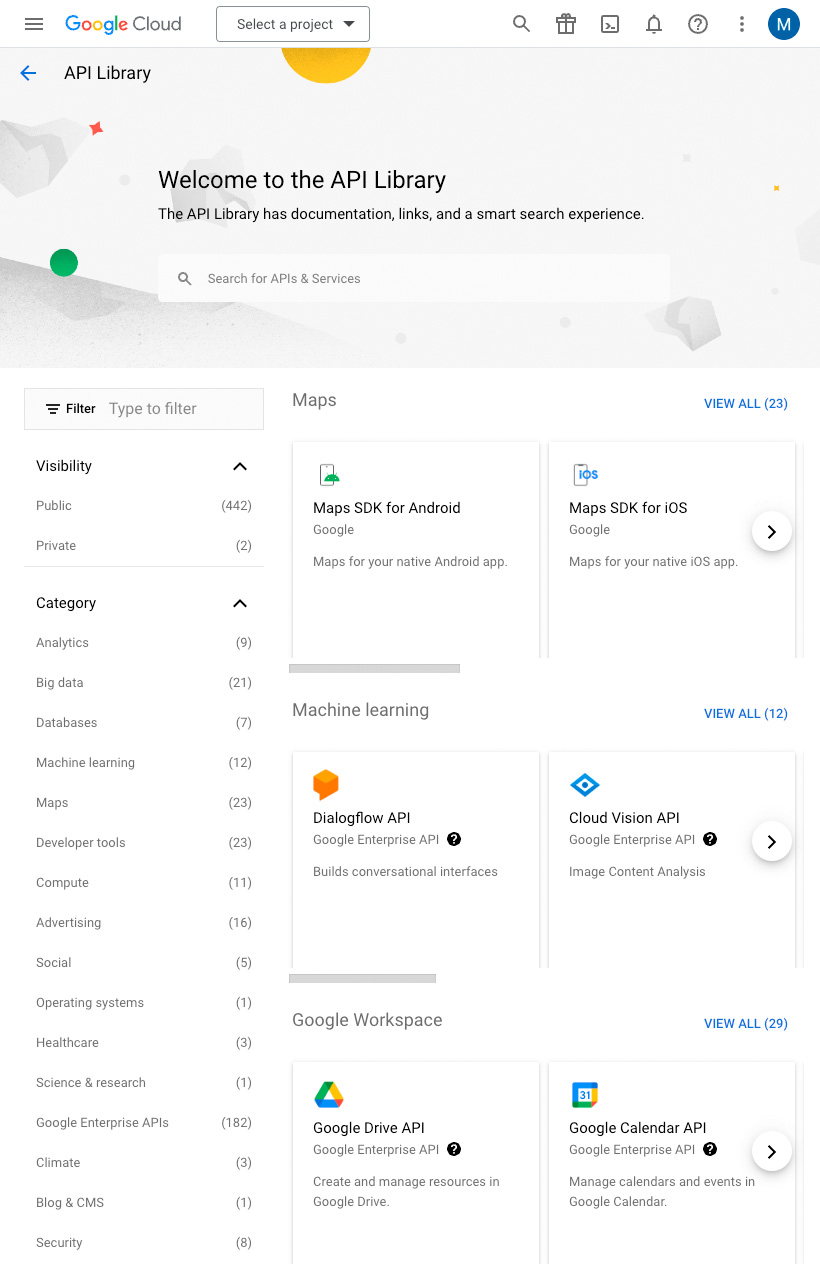
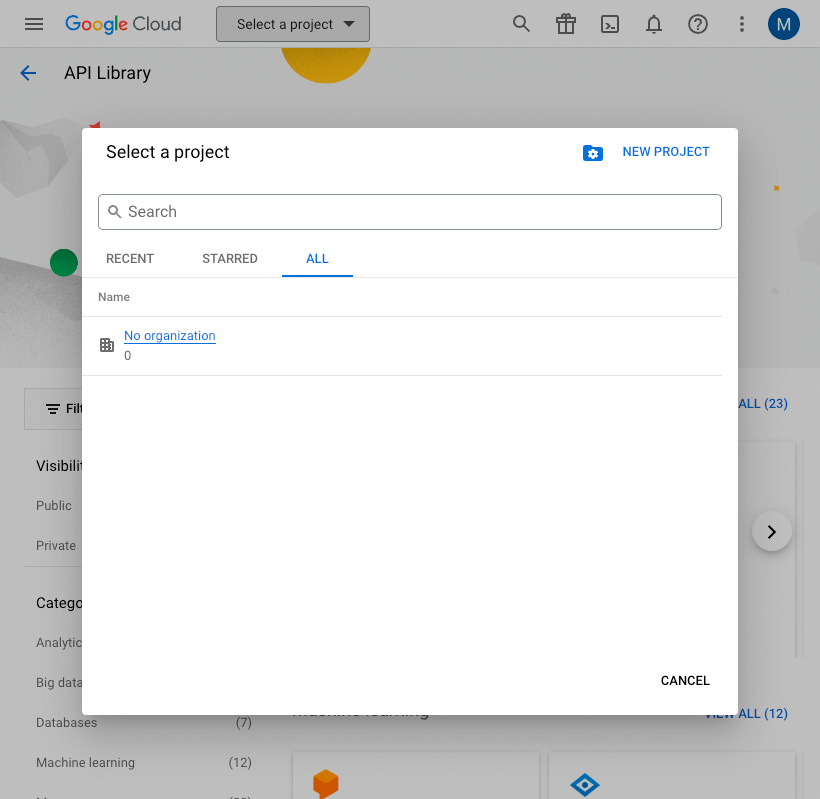
Click the Select a project drop-down menu at the top of the page, and click the New Project button.
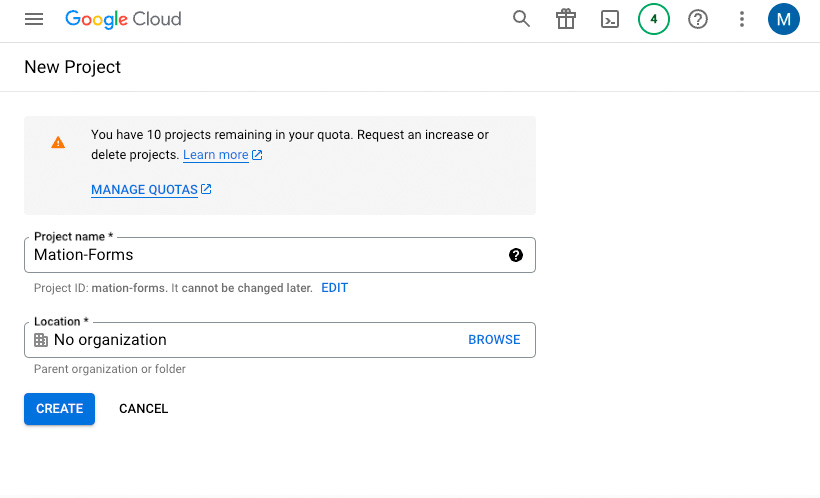
Enter a name for your project and click the Create button.
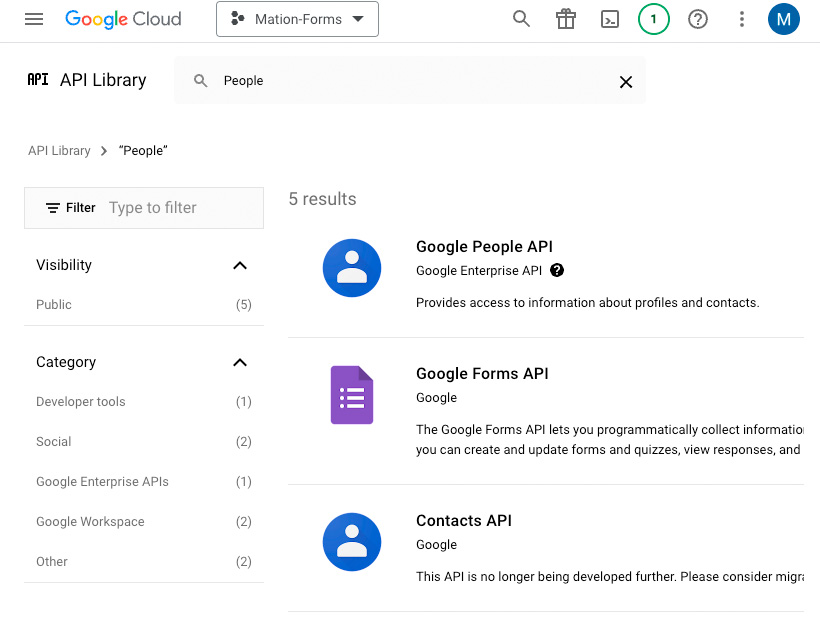
Go to API Library in Google Cloud console.
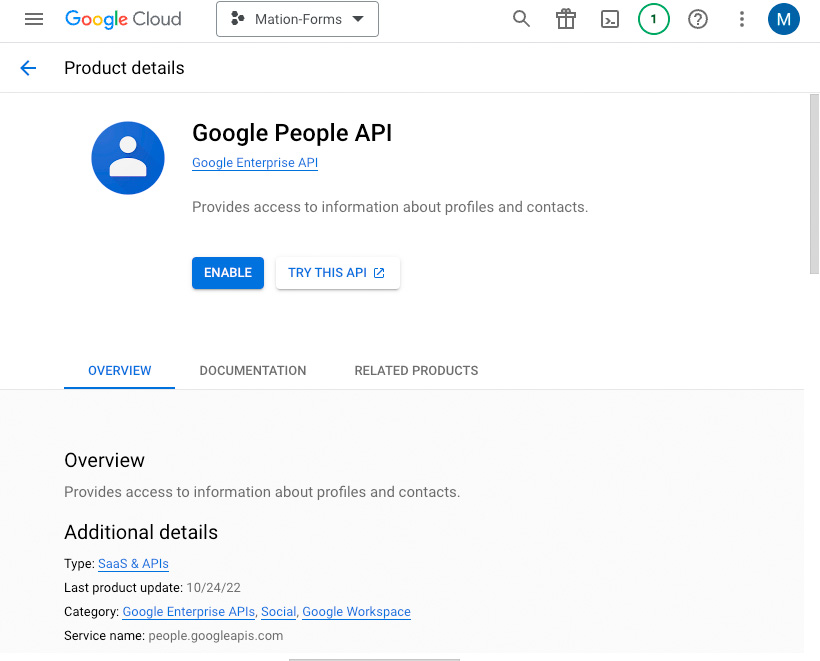
Search for People API in the search bar and click on it.

TIP
In case you've already connected another Google service using the same API skip the following steps and proceed to step 9.
Click on Google People API in the list.
Click the Enable button to enable the API.
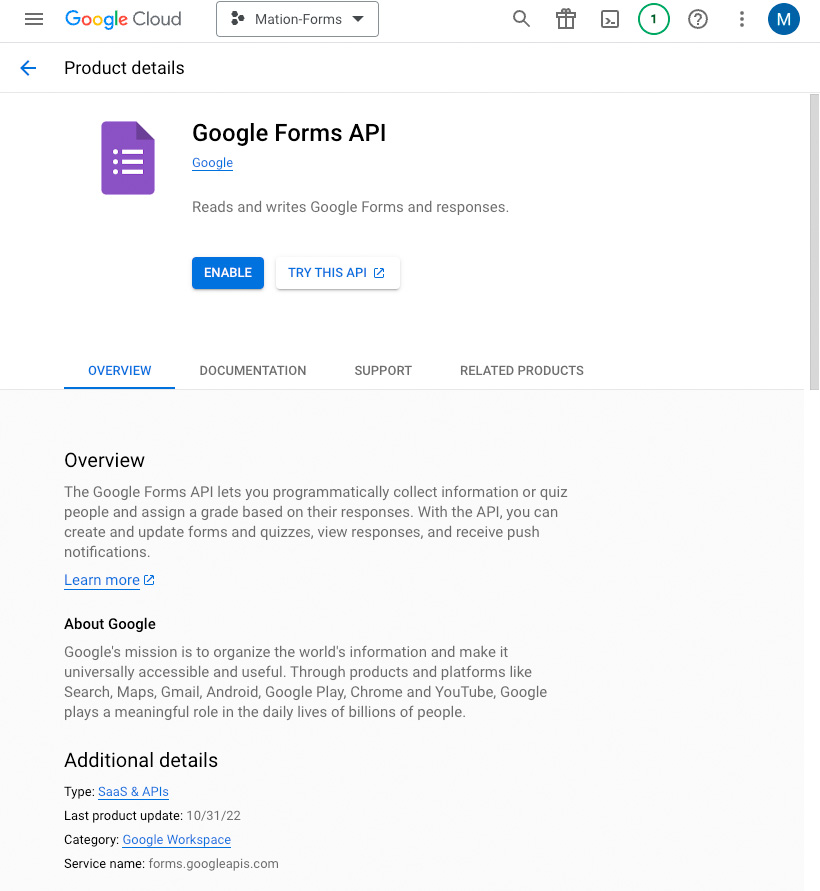
Repeat steps 5, 6, 7, and 8 for the Google Forms API.


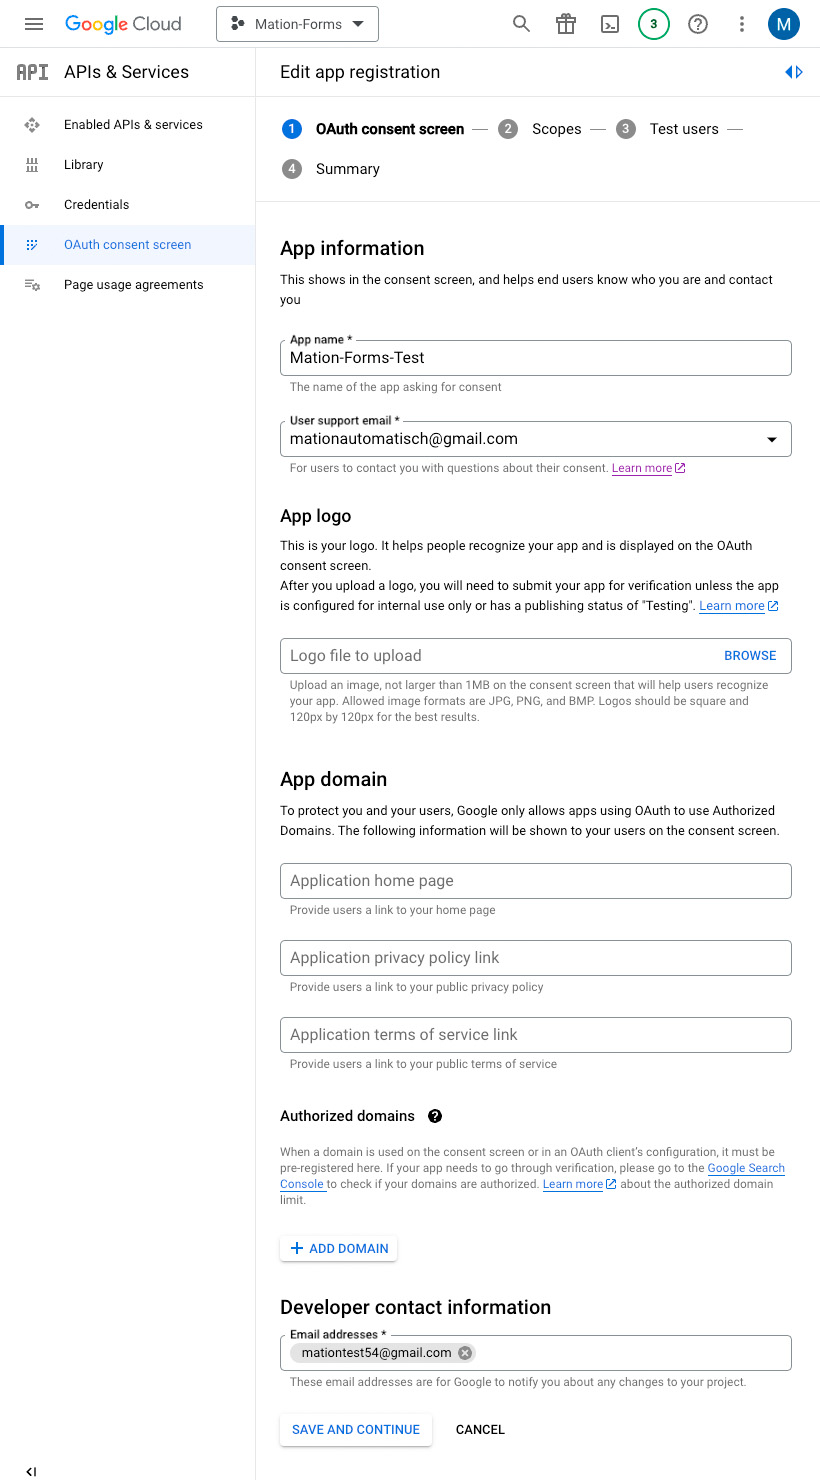
Go to OAuth consent screen in the Google Cloud Console.
Select External to start your app in test mode. Click the Create button.

Fill in App name, User support email, and Developer contact information. Click the Save and Continue button.
Skip adding or removing scopes and click the Save and Continue button.

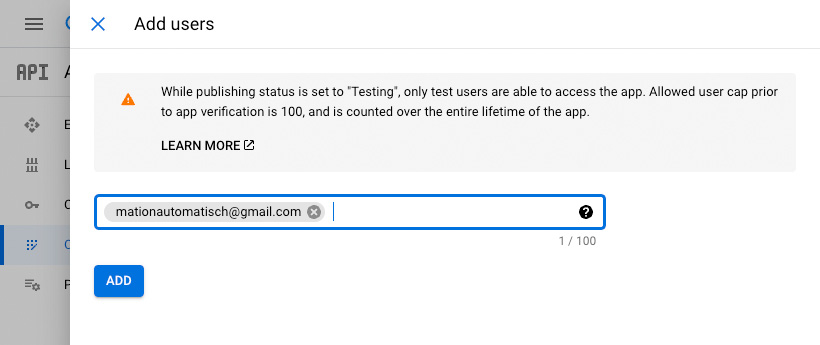
Click the Add Users button to add a test email address, since only test users can access the app while the publishing status is set to "Testing".
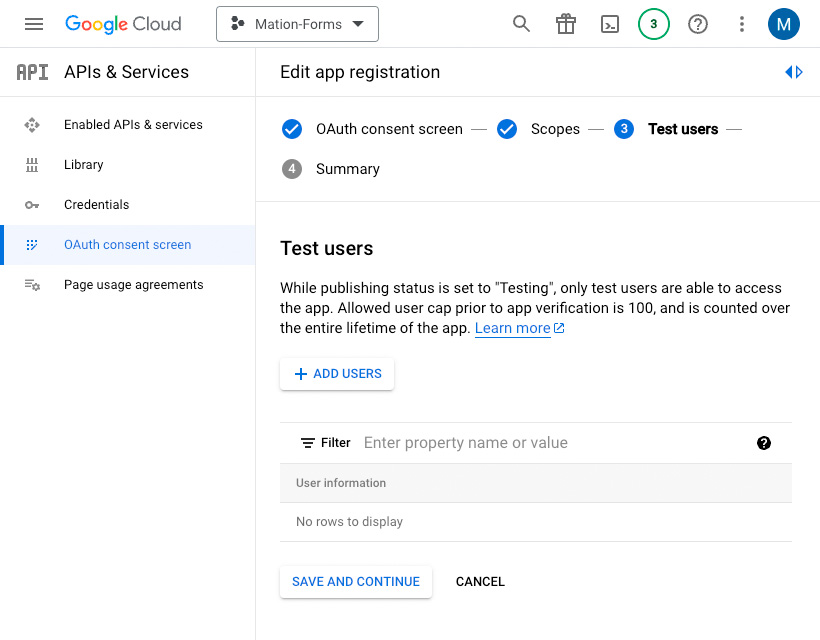
Enter an email address and click the Add button in the Add Users window.
WARNING
Make sure to use the same email address you're logged into Google with as the test user email address.
Click the Save and Continue button to complete the configuration of the consent screen.

Go to Credentials.
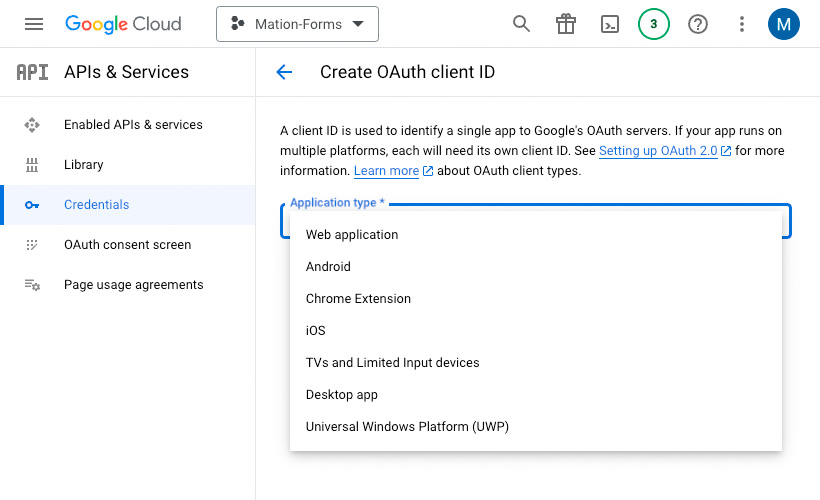
Click the Create Credentials button and select the OAuth client ID option.
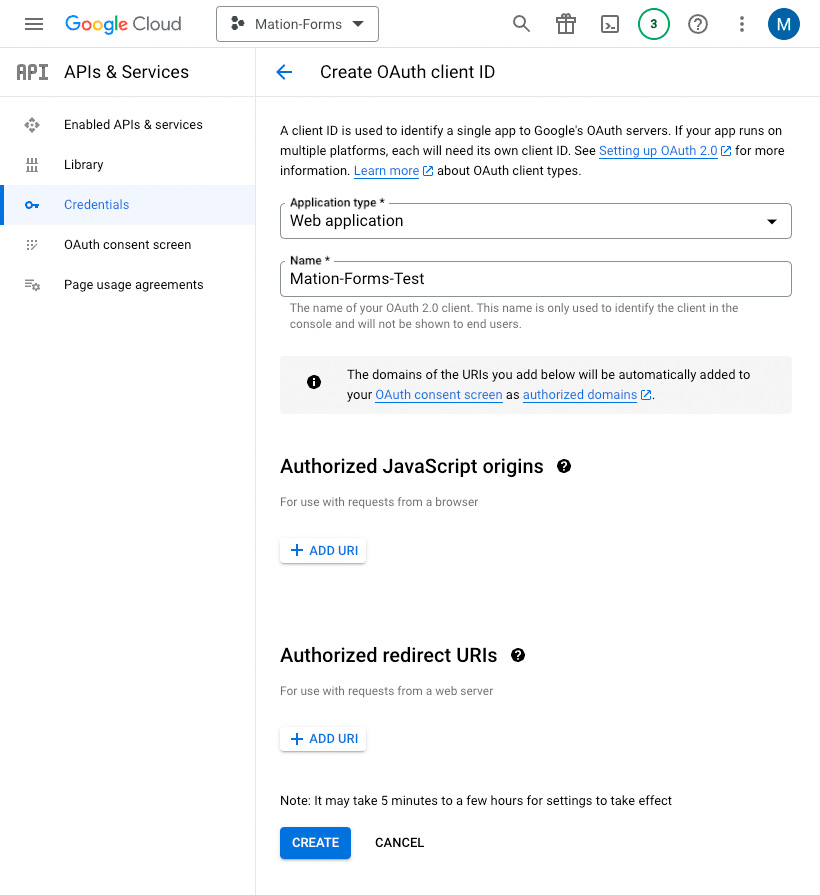
Select the application type as Web application.
Fill in the Name field.
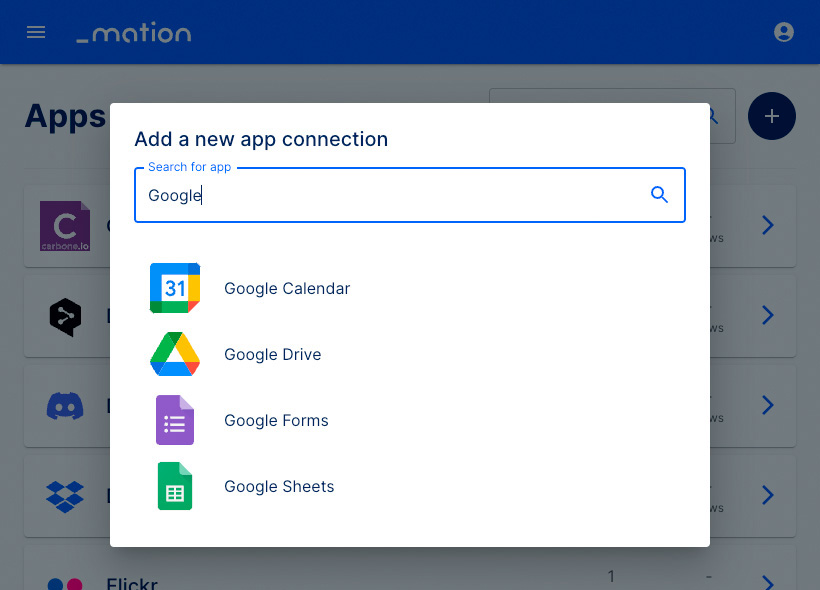
Go to Workflow Automation and navigate to Apps. Click the + Add Connection button. In the popup, select Google Forms from the list.
Copy the
OAuth Redirect URLvalue.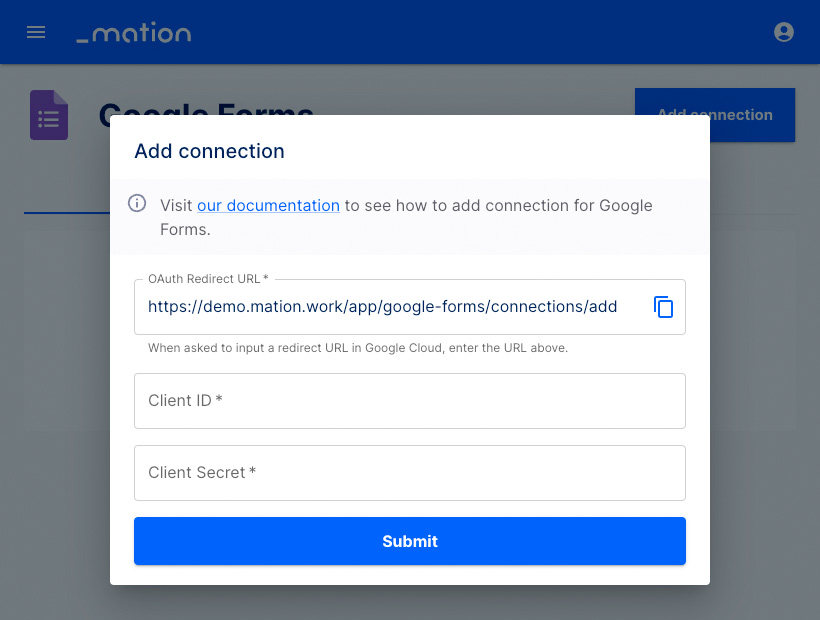
Go back to Google Cloud Console and click the Add URI button in the Authorized redirect URIs section.

Paste the
OAuth Redirect URLvalue into the Authorized redirect URIs field and click the Create button.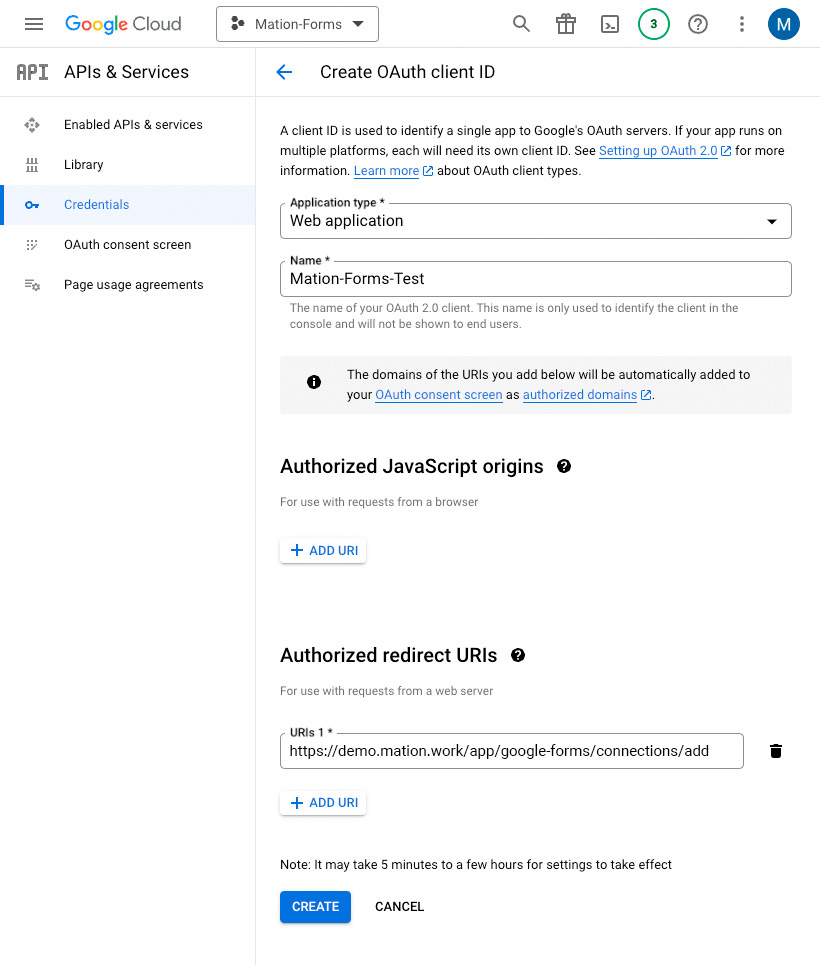
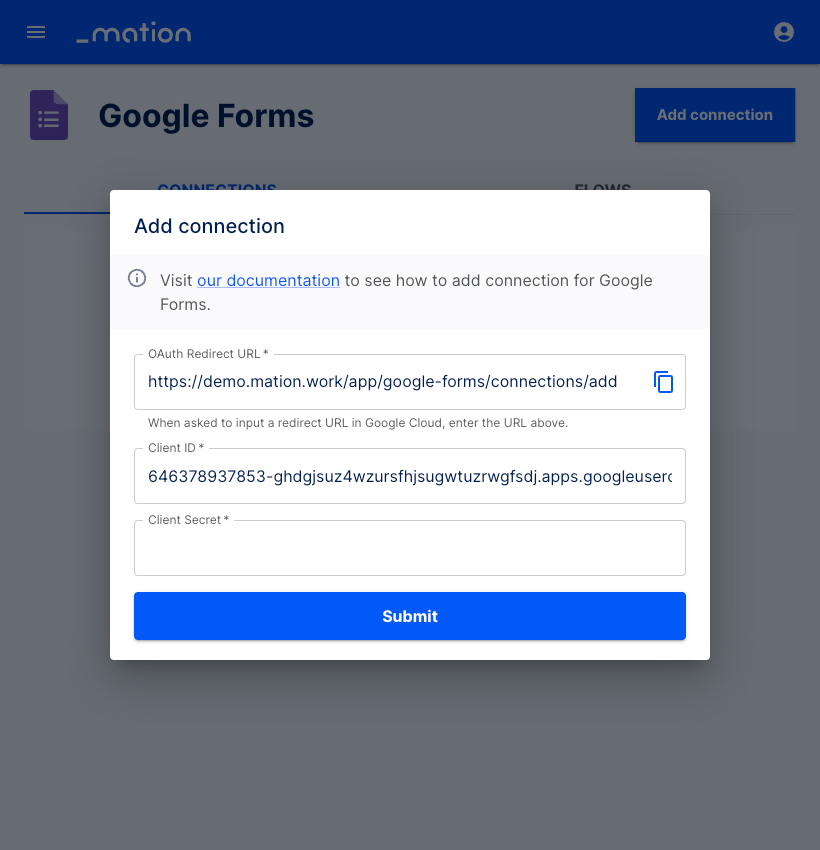
Copy the
Client IDvalue from the following pop-up and paste it into the Client ID field on Workflow Automation.
Copy the
Client Secretvalue from the same pop-up on Google and paste it into the Client Secret field on Workflow Automation.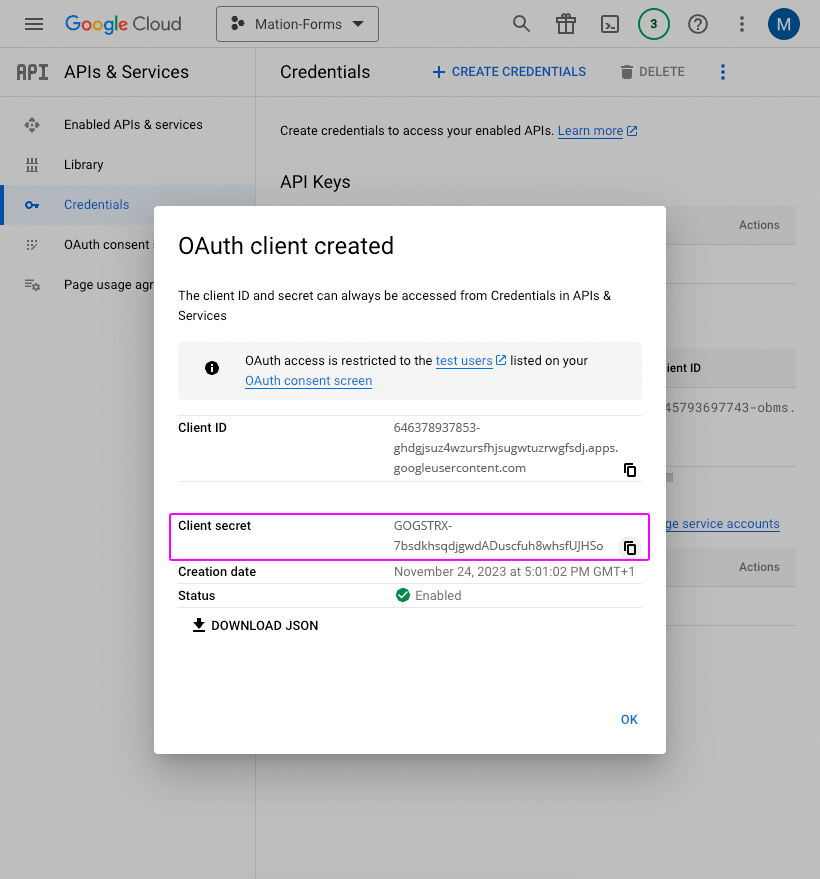
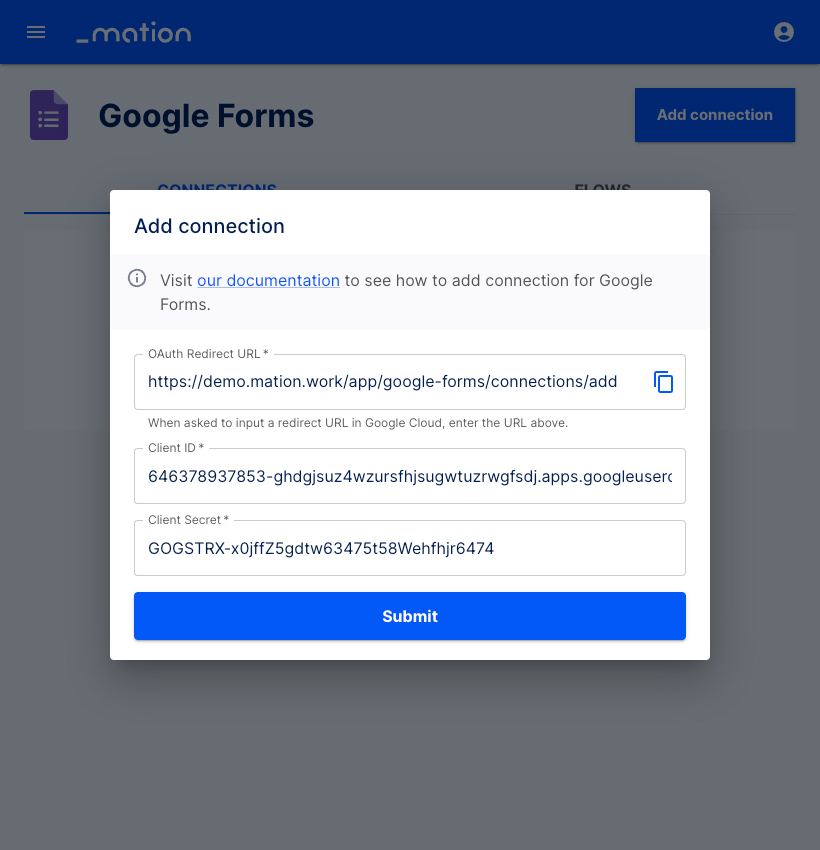
Click the Submit button.
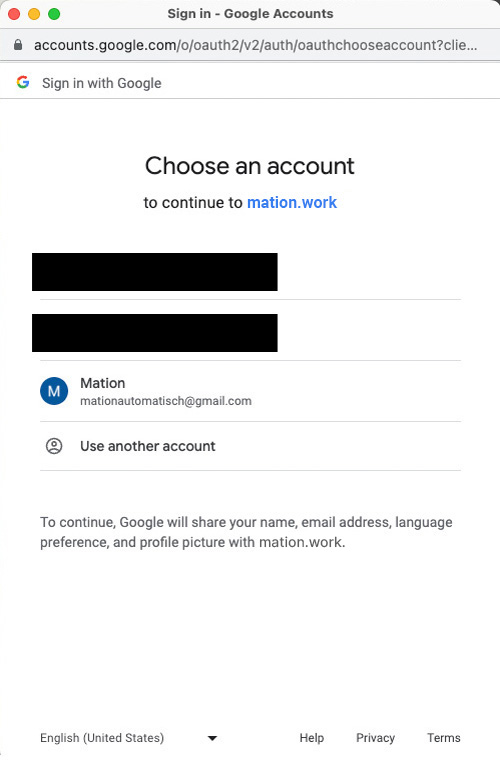
A pop-up window appears. Select your Google account.
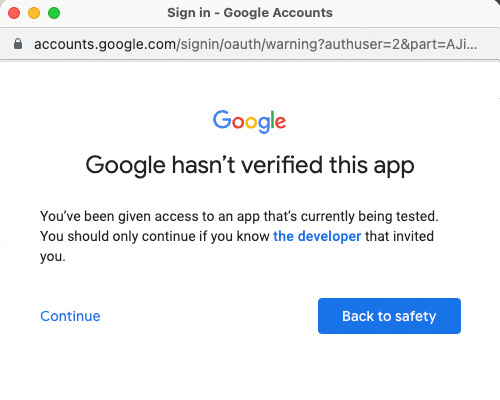
Click the Continue button.
Check the Select all checkbox. Scroll down to the bottom of the pop-up window and click the Continue button.
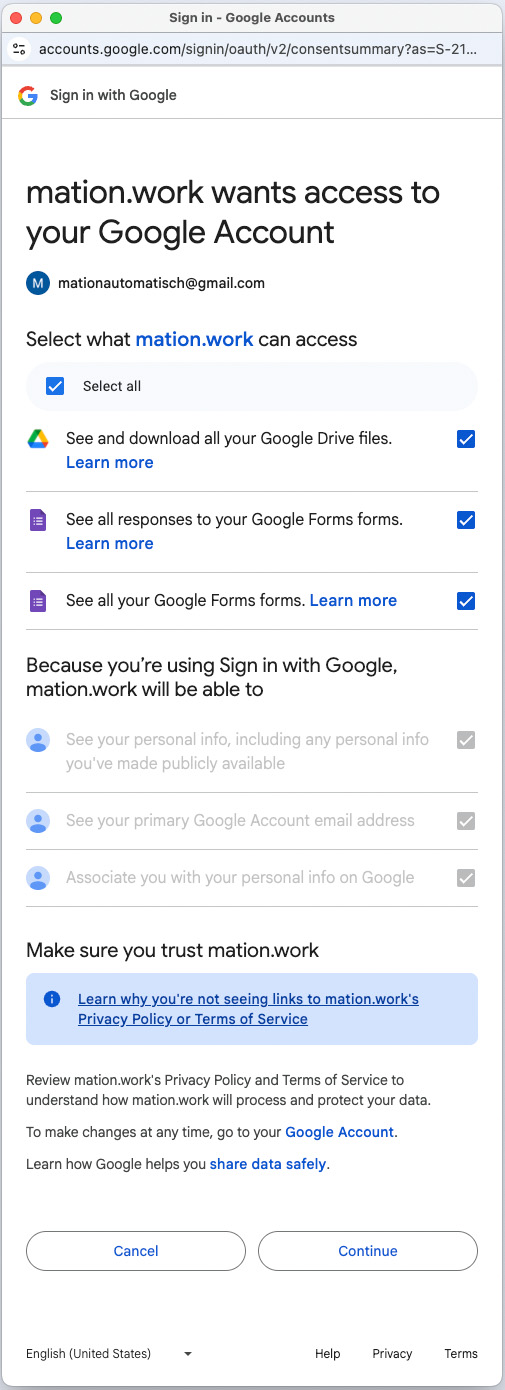
Your Google Forms connection is now established.
Start using your new Google Forms connection with Workflow Automation.