Appearance
Gmail
Gmail is a free email service from Google offering a clean interface, powerful spam filtering, and 15GB of cloud storage. It features smart organization tools like labels, categories, and search, making it easy to manage emails efficiently. Gmail integrates seamlessly with Google Workspace apps like Drive, Meet, and Calendar, enabling smooth communication and collaboration. Accessible on web and mobile, it also supports offline access, custom themes, and strong security with two-factor authentication.
Key Features of Gmail:
- 15GB Free Storage: Generous cloud storage shared across Gmail, Drive, and Photos.
- Smart Spam Filtering: Automatically blocks spam, phishing, and malicious content.
- Powerful Search: Quickly find emails using Google’s advanced search technology.
- Labels & Categories: Organize messages with customizable labels and smart categories.
- Conversation View: Groups related emails into a single thread for easier reading.
- Google Integration: Seamless access to Google Calendar, Drive, Meet, and more.
- Cross-Device Access: Use Gmail on web, Android, and iOS with real-time sync.
- Built-in Chat & Video: Communicate via Google Chat and Meet directly within Gmail.
- Security Features: Protects accounts with two-factor authentication and encryption.
- Offline Mode: Access, read, and draft emails without an internet connection.
- Custom Themes: Personalize the look of your inbox with themes and layout options.
Further information
Read more detailed information on Gmail here.
Actions:
- Create draft: Create a new draft email message.
- Reply to email: Respond to an email.
- Send email: Send a new email message.
- Send to trash: Send an existing email message to the trash.
- Star an email: Star an email message.
Trigger:
New emails: Triggers when a new email is received in the specified mailbox.
Connect with Gmail:
INFO
Pop-up windows must be allowed for this browser session to enable the connection of this third-party app with Workflow Automation.
Log in to your Google account.
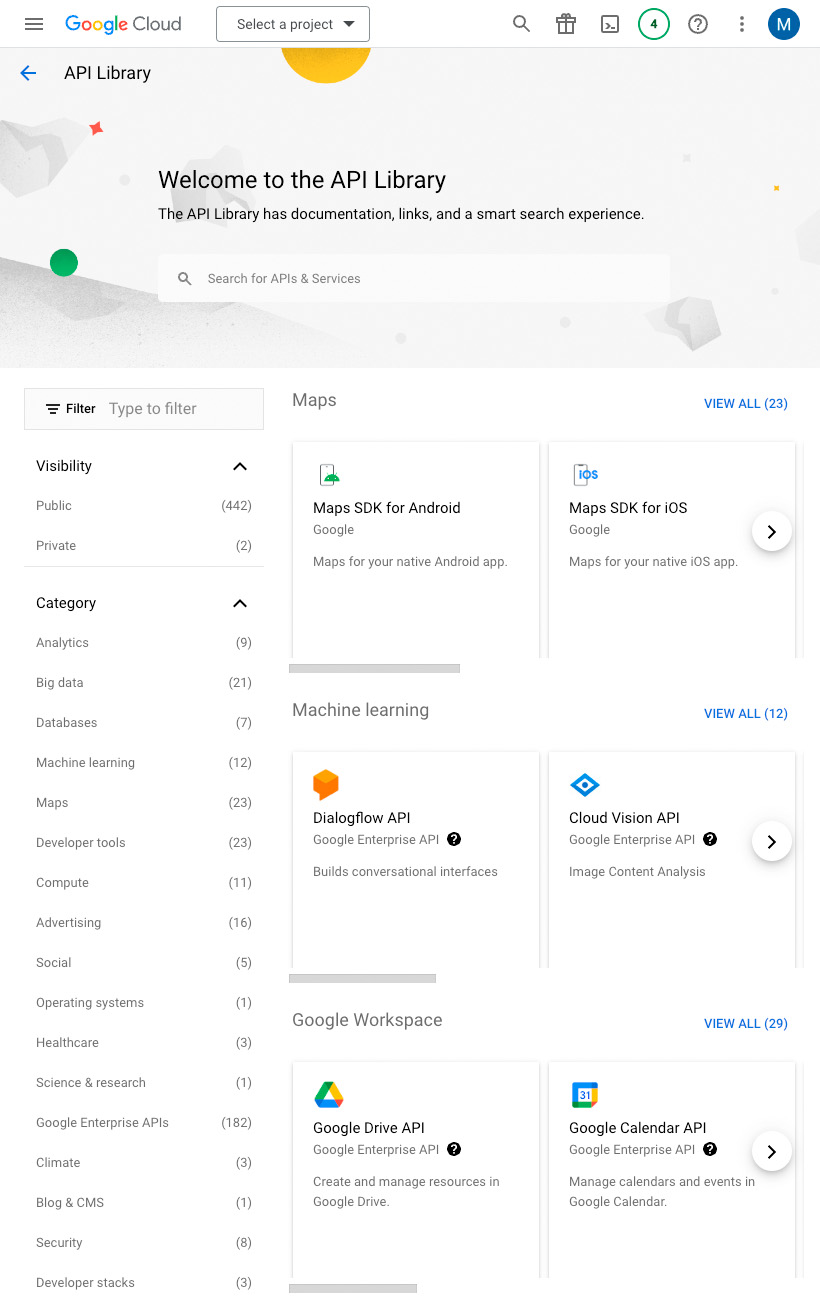
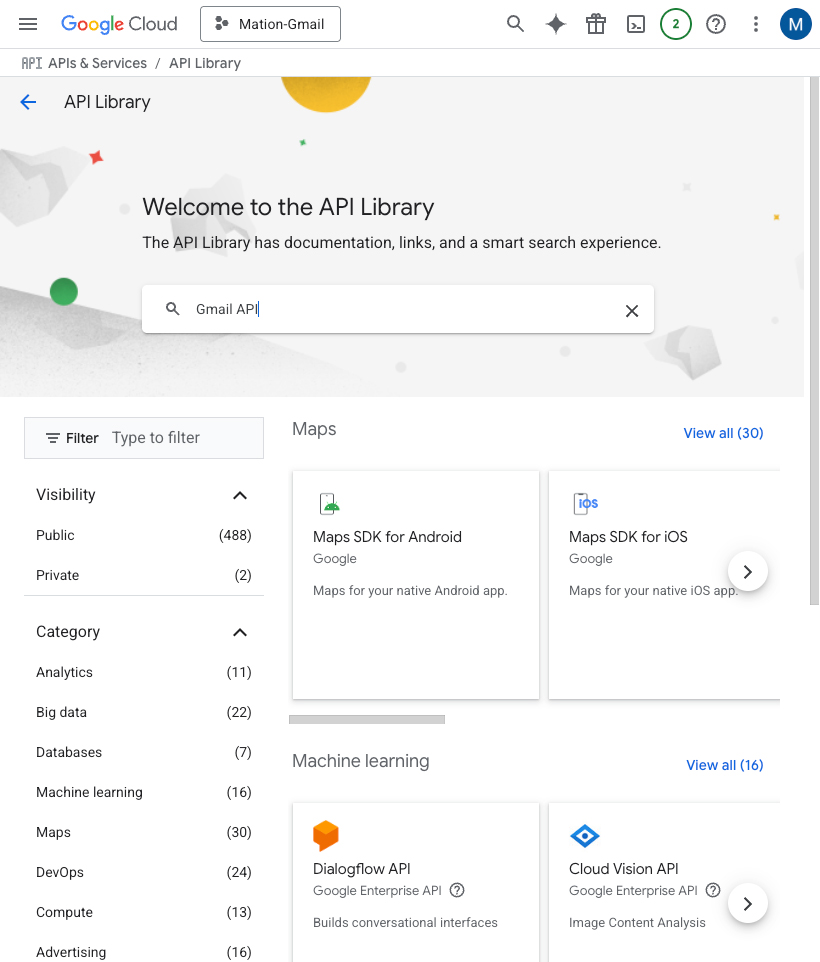
Go to API Library in Google Cloud console.
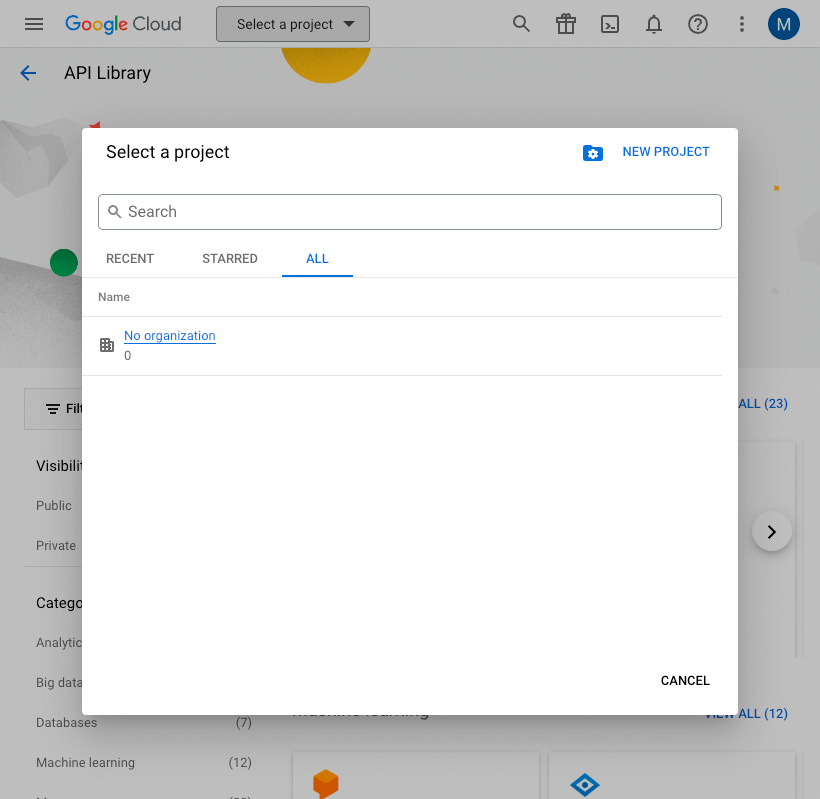
Click the Select a project drop-down menu at the top of the page, and click the New Project button.
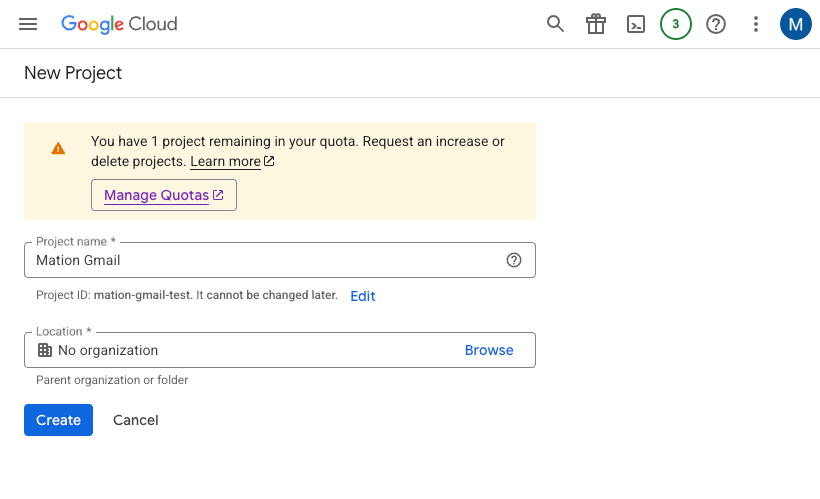
Enter a name for your project and click the Create button.
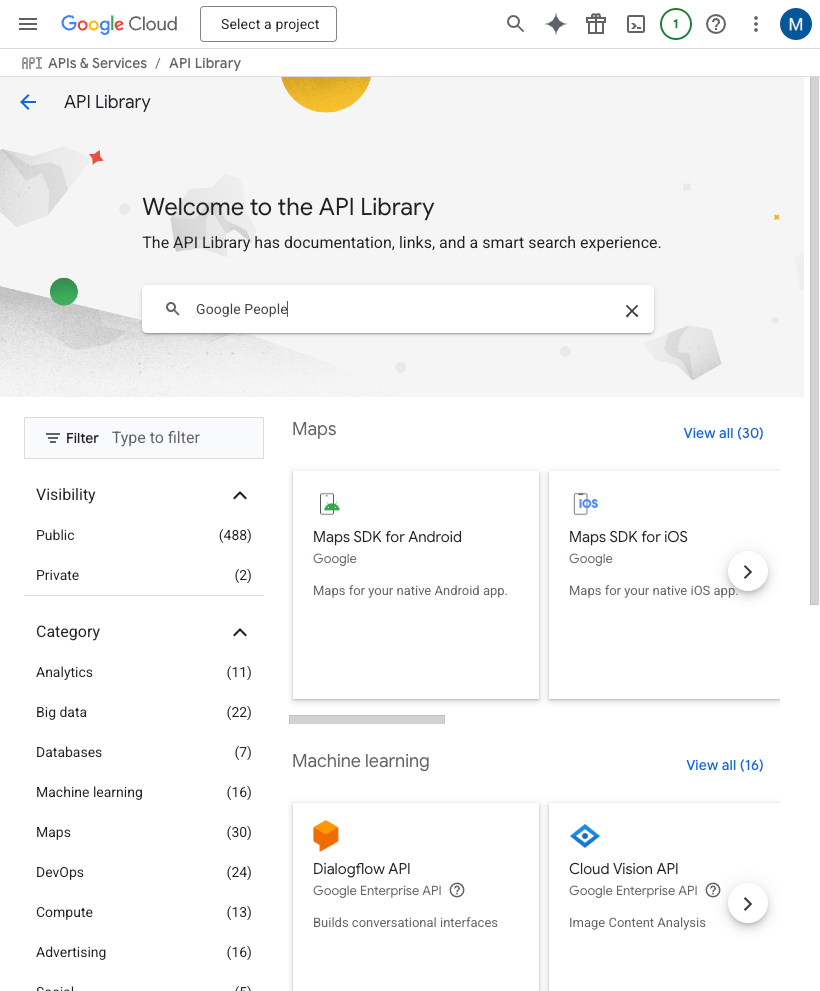
Go to API Library in Google Cloud console.
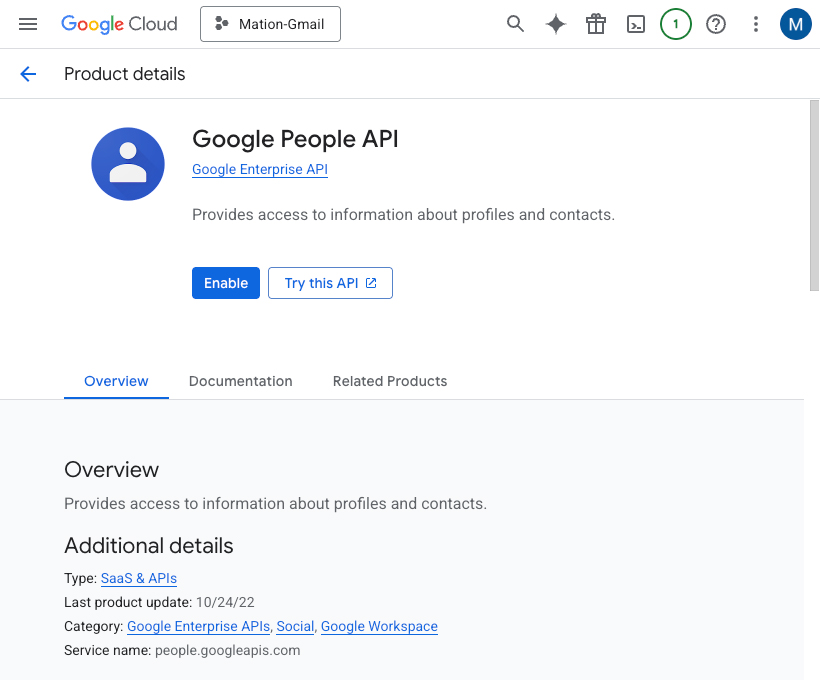
Search for Google People API in the search bar and click on it.
TIP
In case you've already connected another Google service using the same API skip the following steps and proceed to step 9.
Click on Google People API in the list.

Click the Enable button to enable the API.
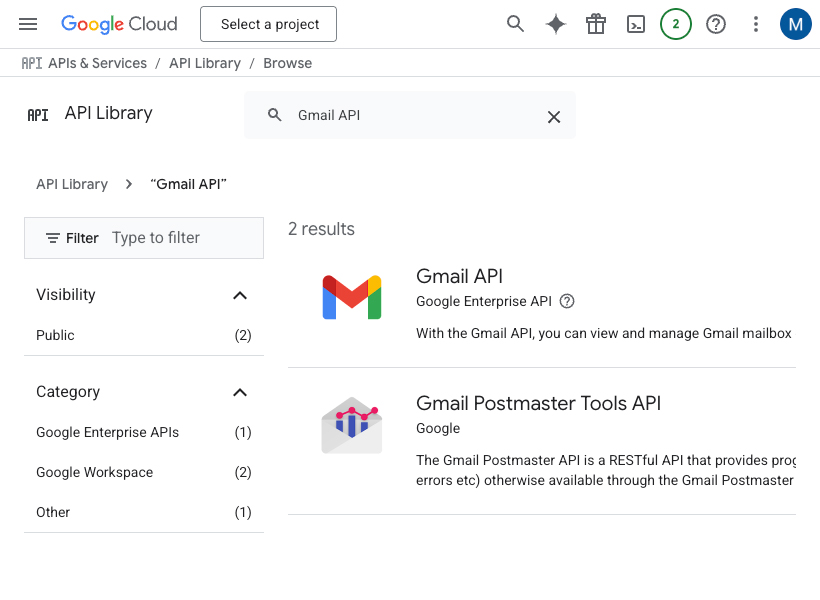
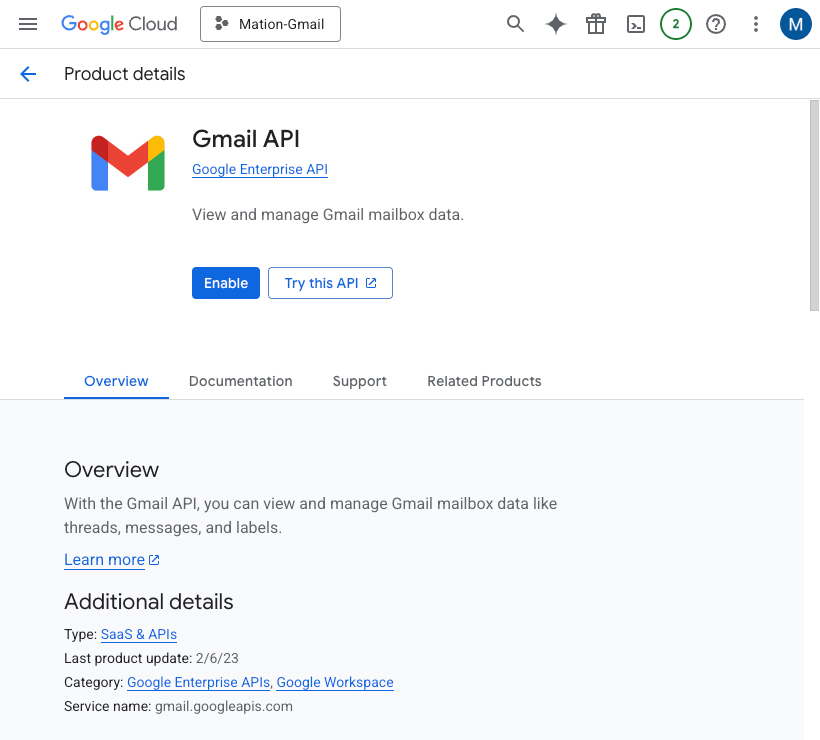
Repeat steps 5, 6, 7, and 8 for the Gmail API.
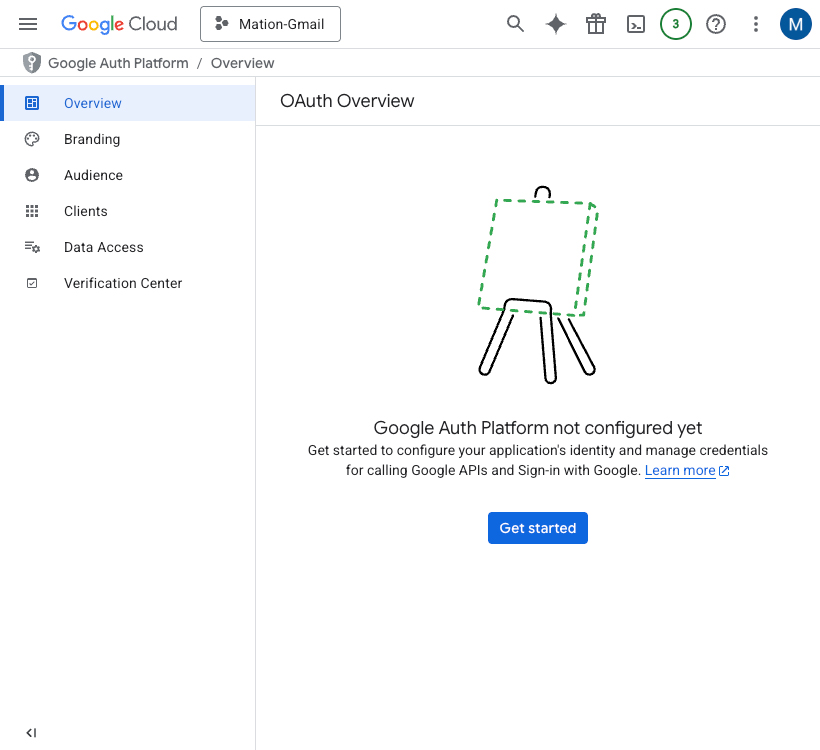
Go to OAuth consent screen in Google Cloud console.
Click the Get started button.
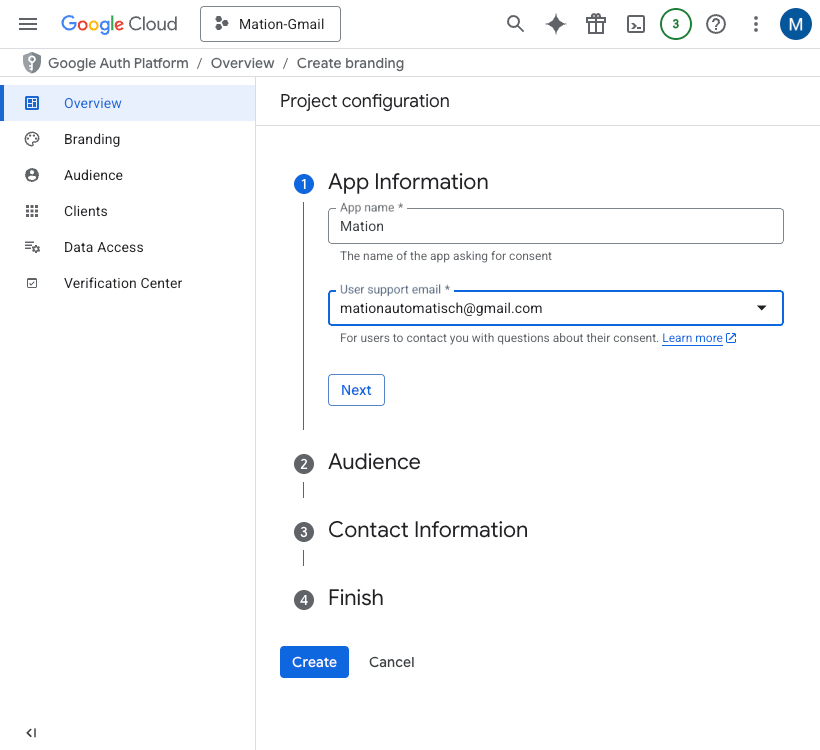
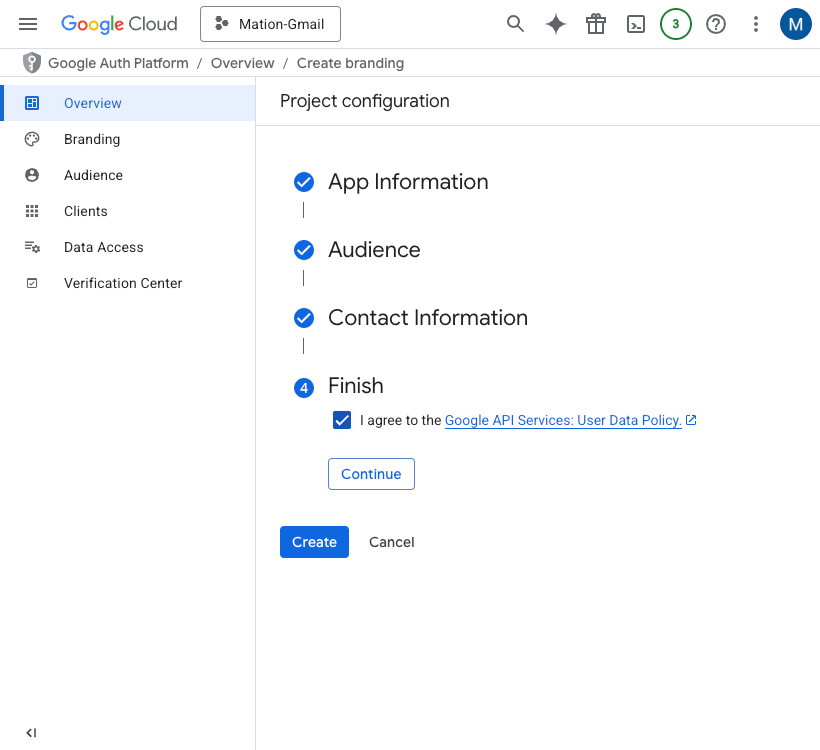
In the App Information step, enter an App name and a User support email address in the respective fields, then click the Next button.
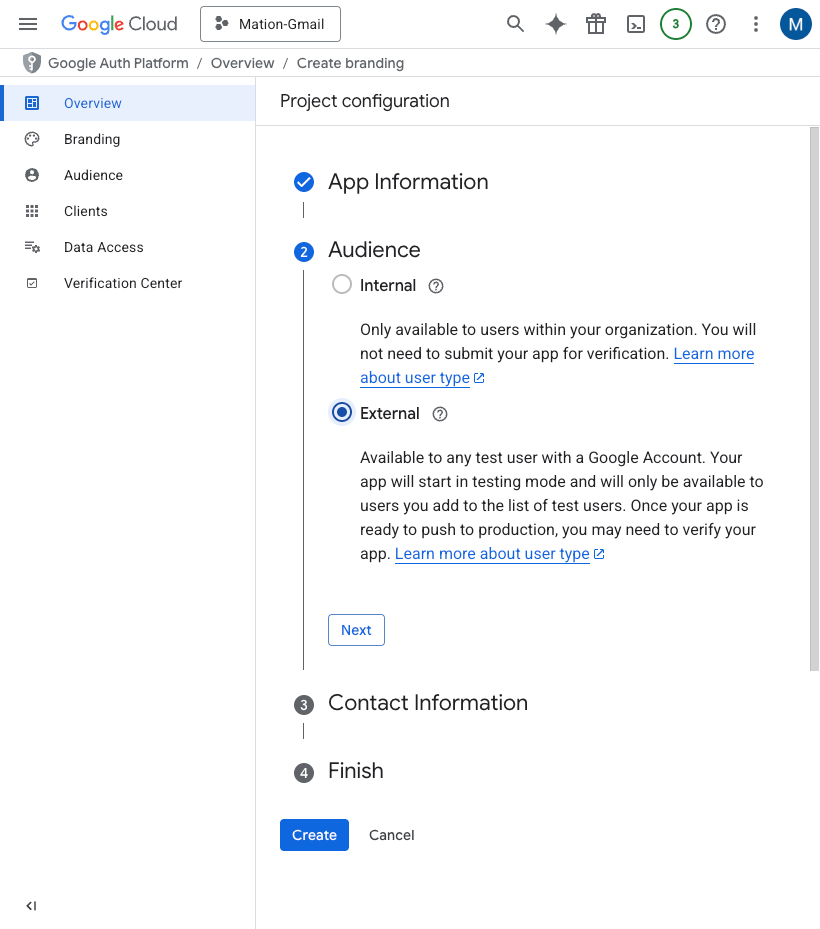
In the Audience step, click the External radio button, then click the Next button.
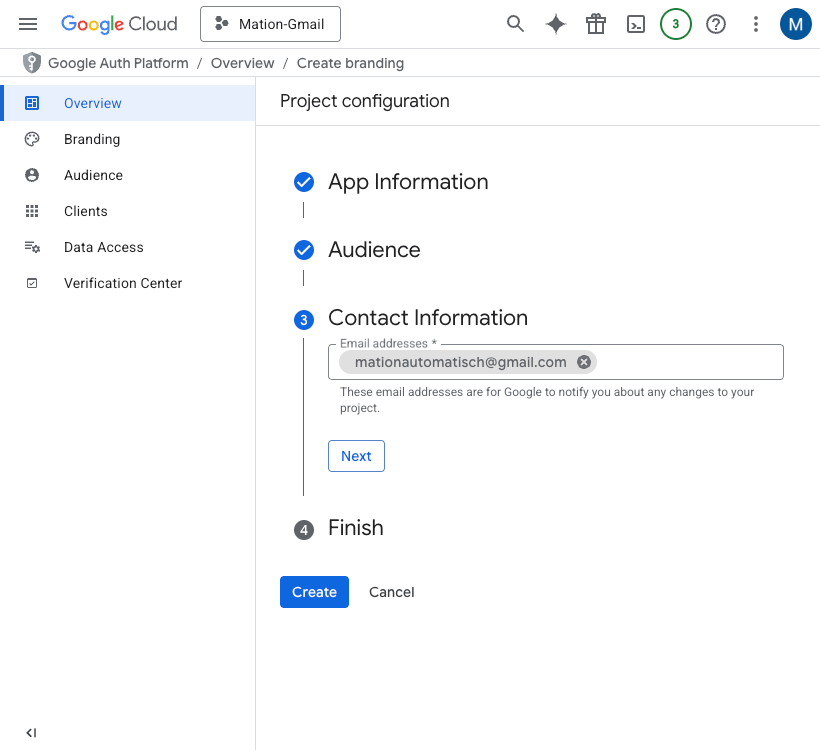
In the Contact Information step, enter your email address, then click the Next button.
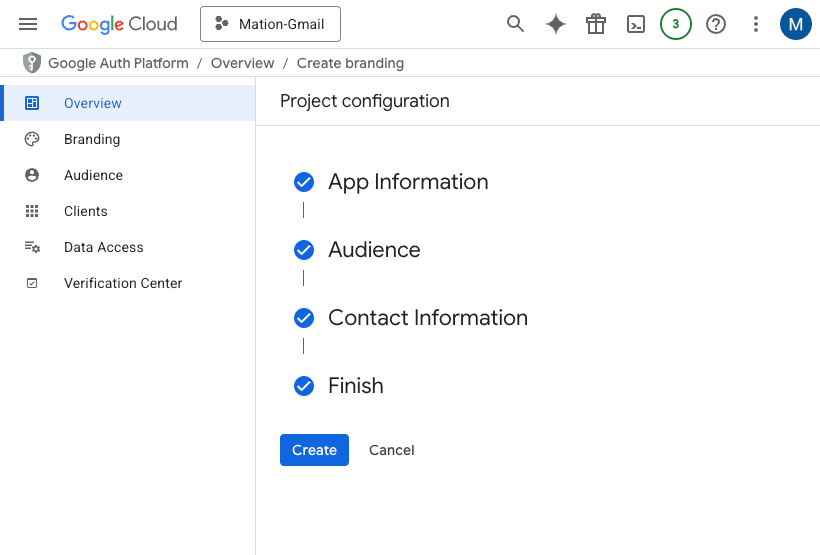
In the Finish step, check the checkbox, then click the Continue button.
Click the Create button.
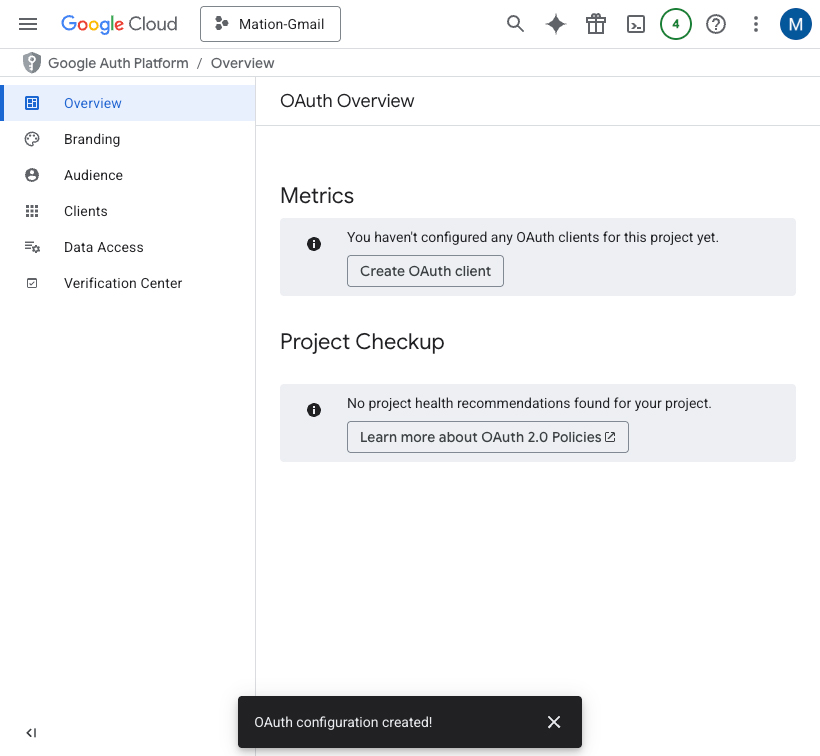
The OAuth configuration has been created.
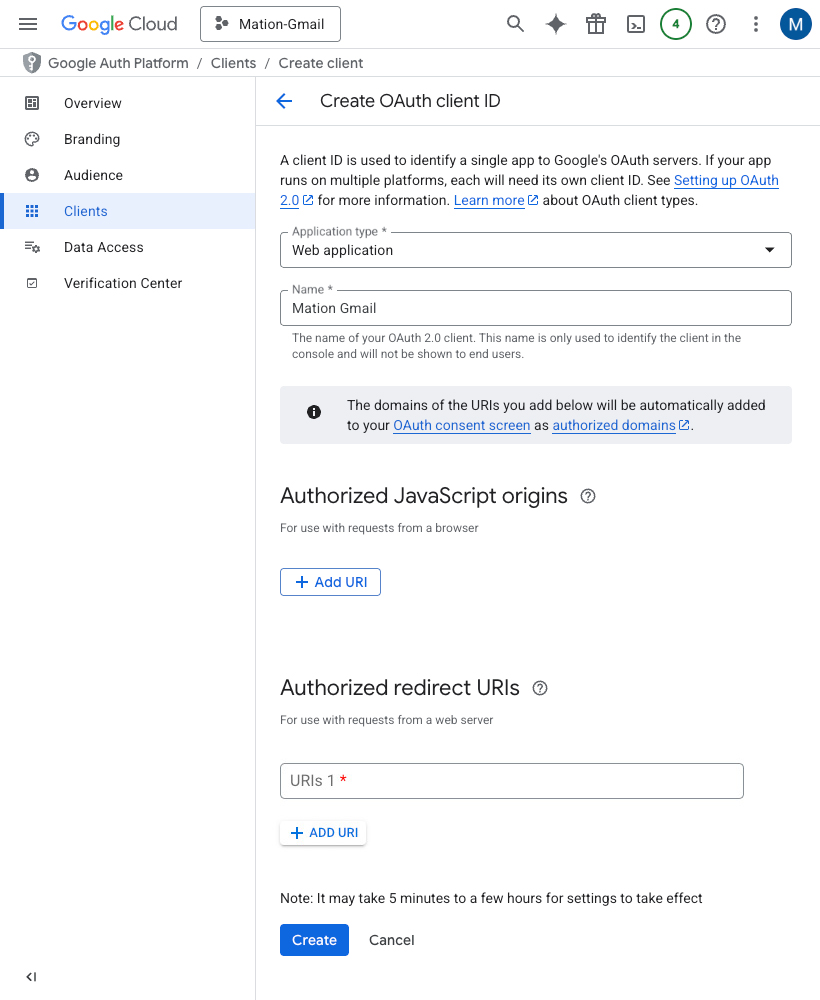
Click the Create OAuth client button.
Select Web application as the application type.
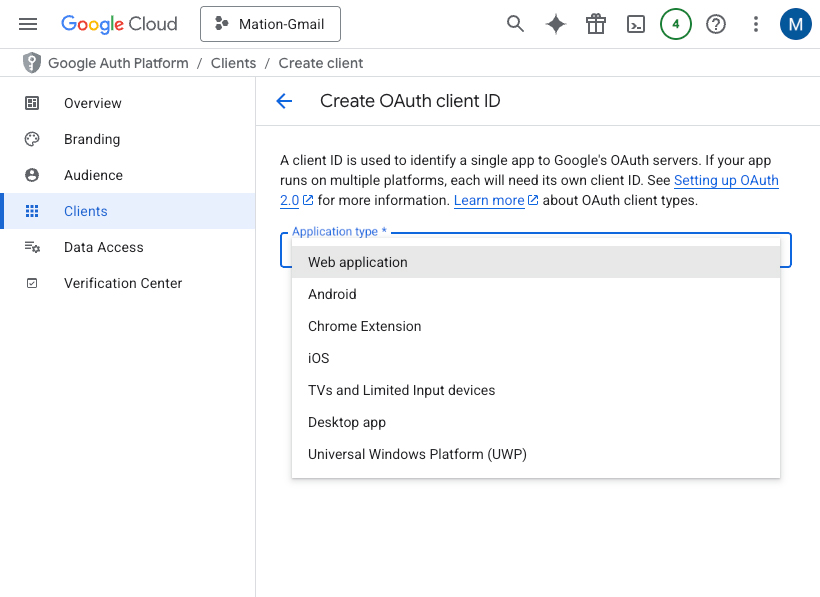
Fill in the Name field.

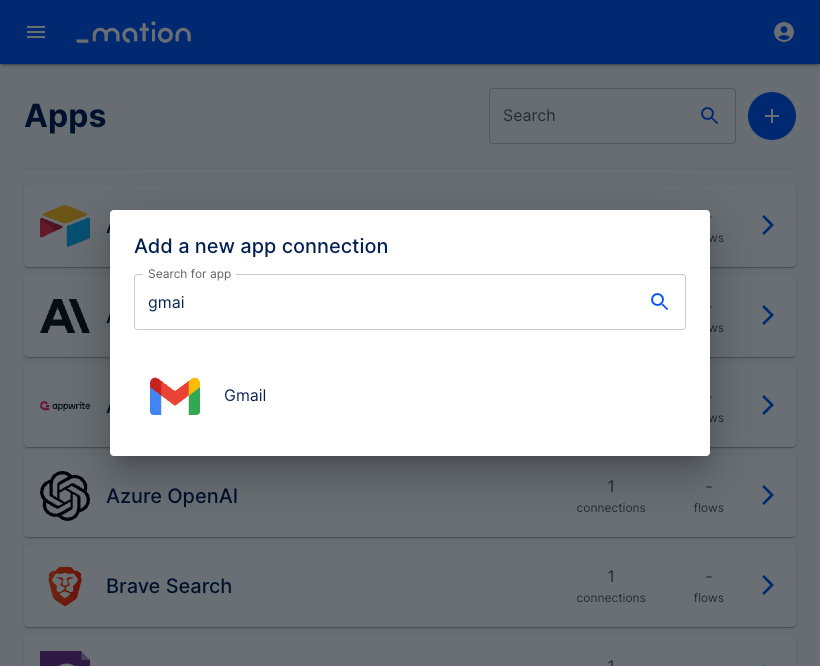
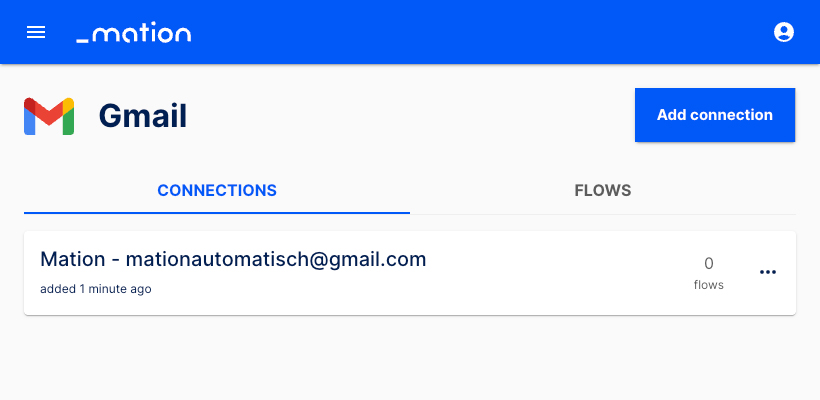
Go to Workflow Automation and navigate to Apps. Click the + Add Connection button. In the popup, select Gmail from the list.
Copy the
OAuth Redirect URLvalue.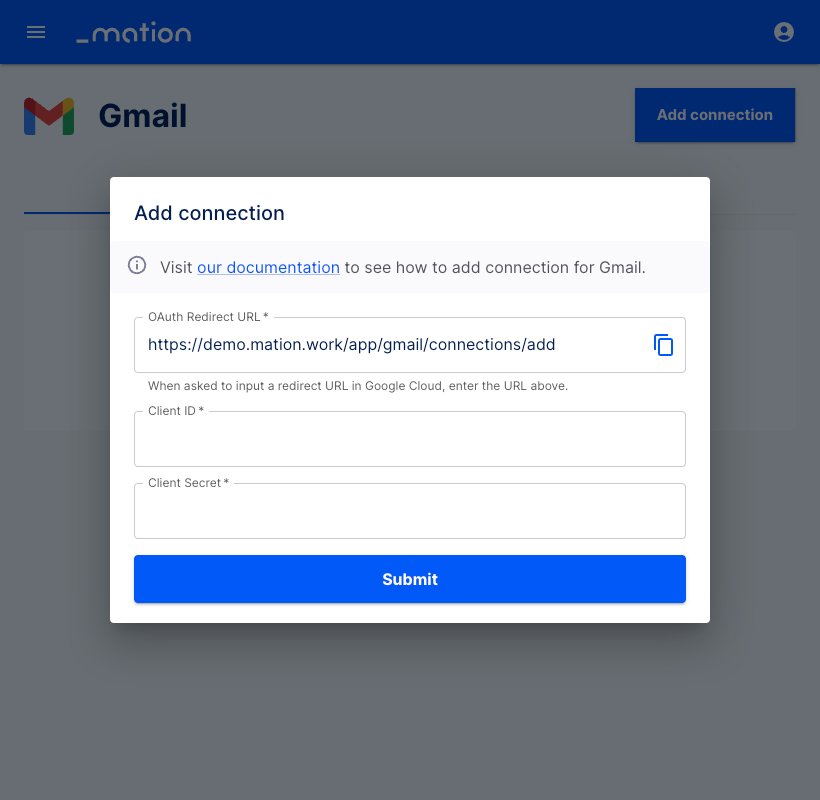
Go back to Google Cloud Console and click the Add URI button in the Authorized redirect URIs section.
Paste the
OAuth Redirect URLvalue into the Authorized redirect URIs field and click the Create button.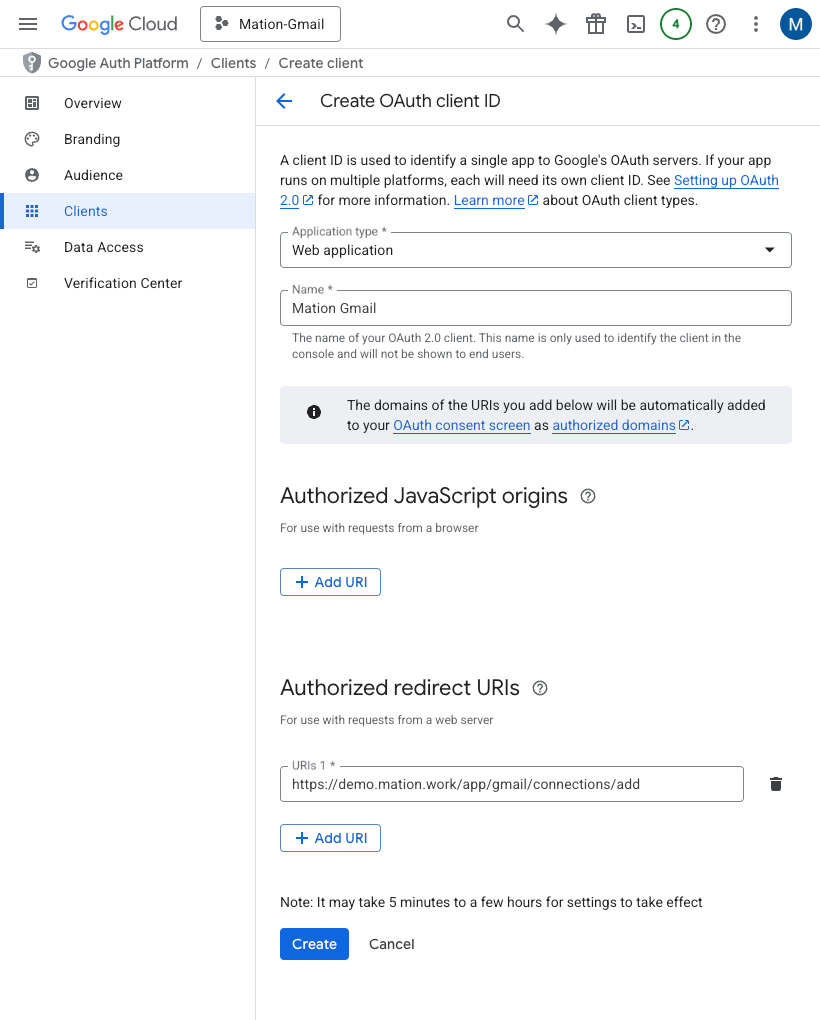
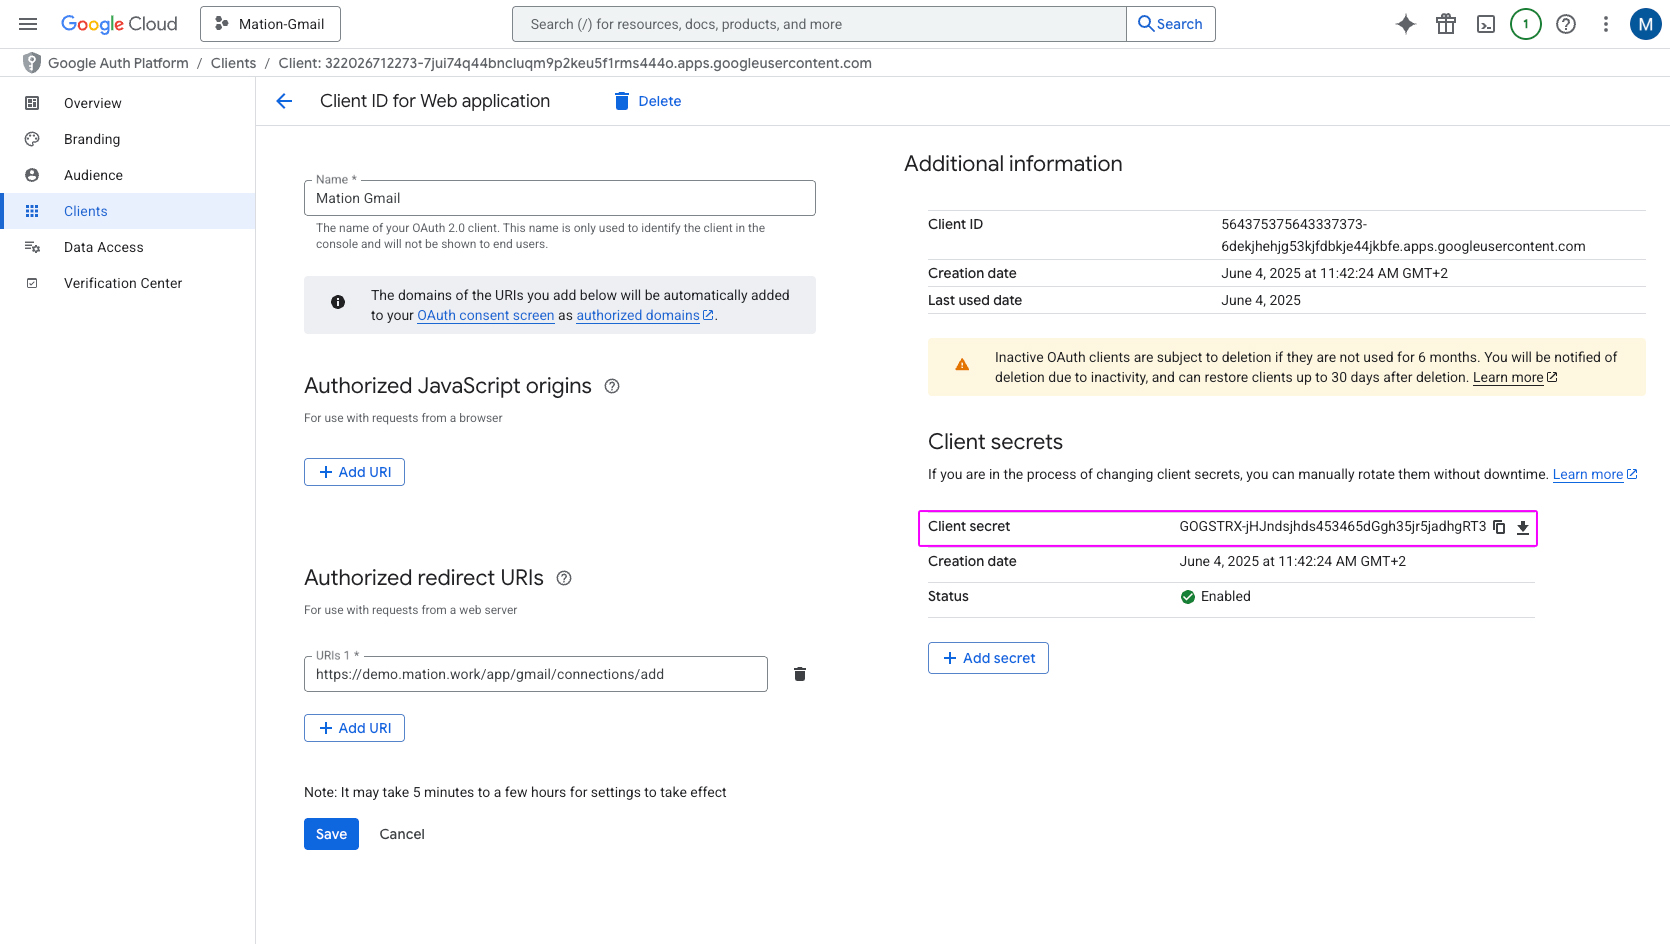
Copy the
Client IDvalue from the following pop-up.
Paste the
Client IDvalue into the Client ID field on Workflow Automation.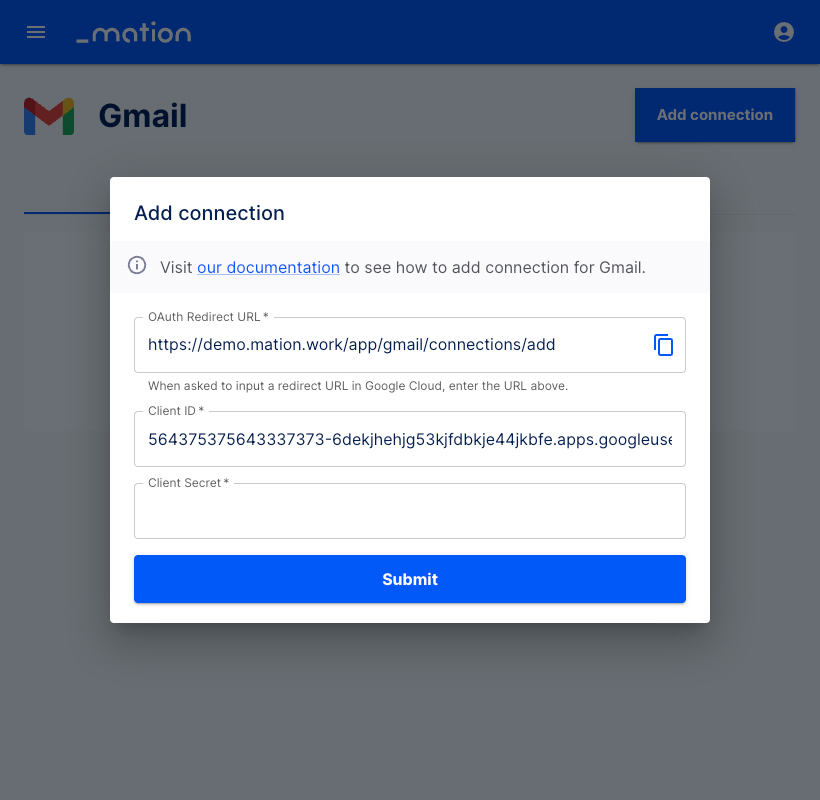
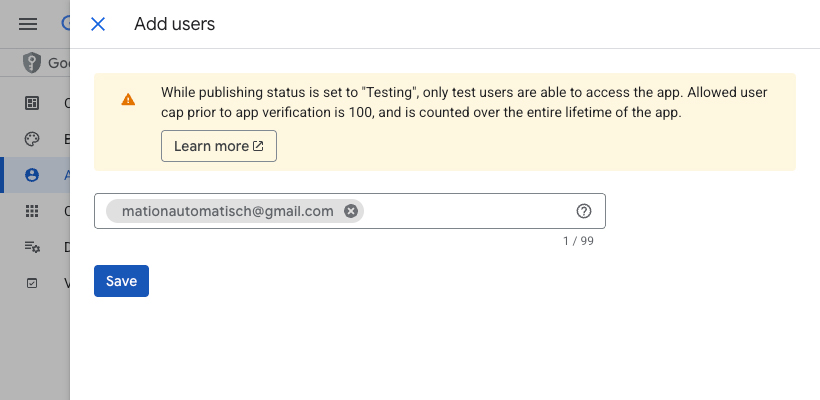
Navigate to Audience and click the + Add users button in the Test users section.

Enter the test user email address, then click the Save button.
WARNING
Make sure to use the same email address you're logged into Google with as the test user email address.
Navigate to Clients and copy the Client Secret.
Go to Workflow Automation and paste the
Client Secretvalue into the Client Secret field.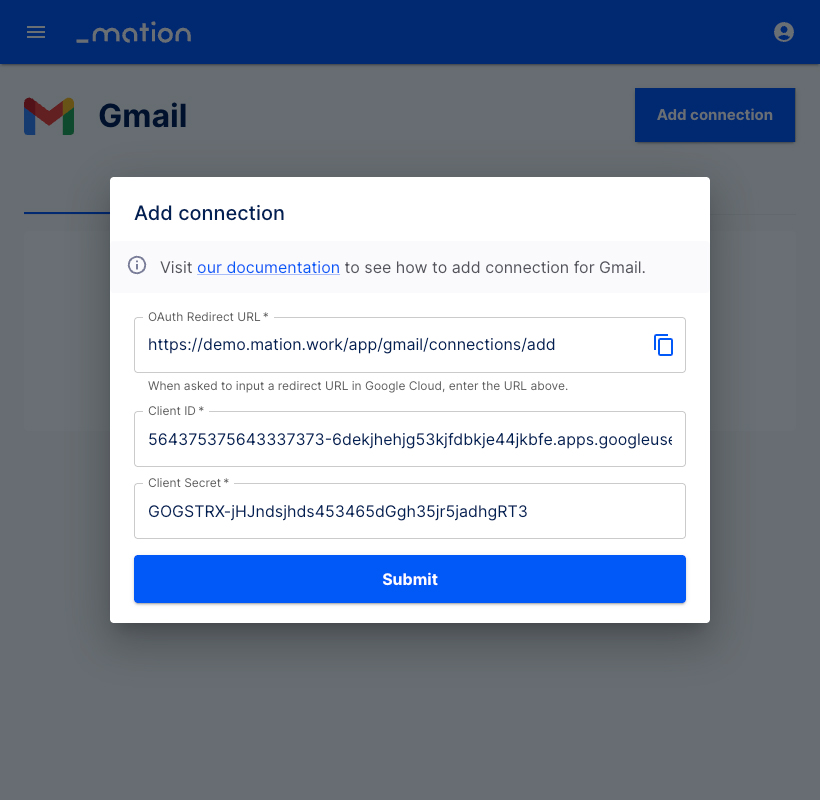
Click the Submit button.
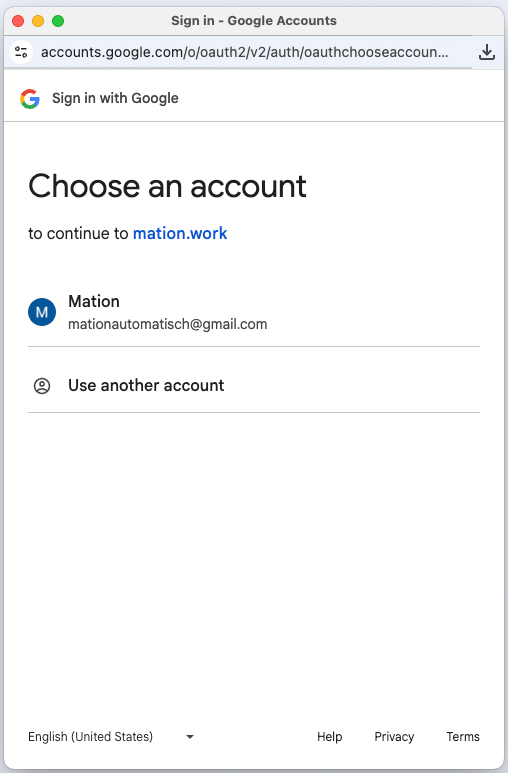
A pop-up window appears. Select your Google account.
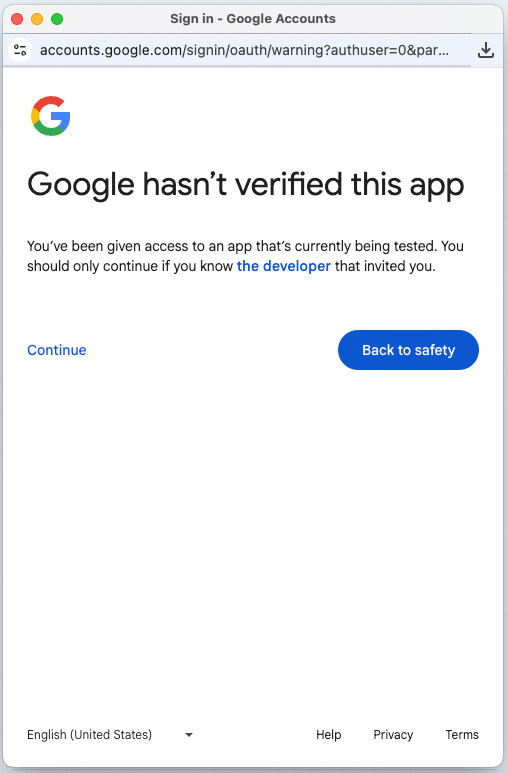
Click the Continue button.
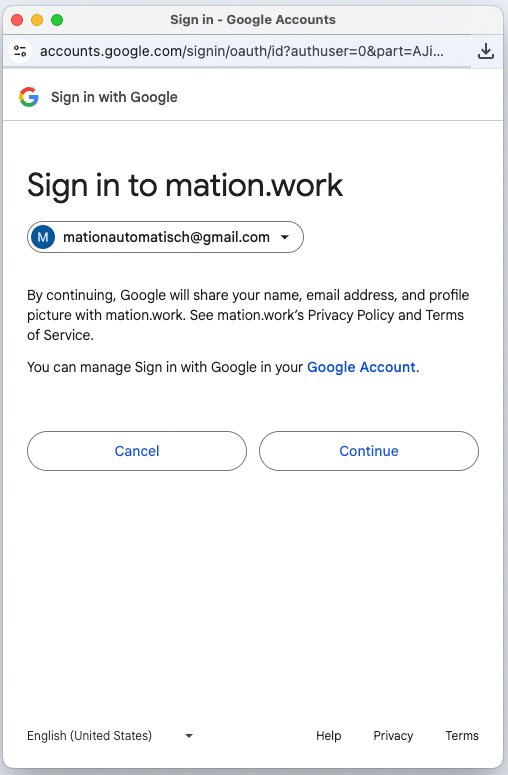
Click the Continue button.
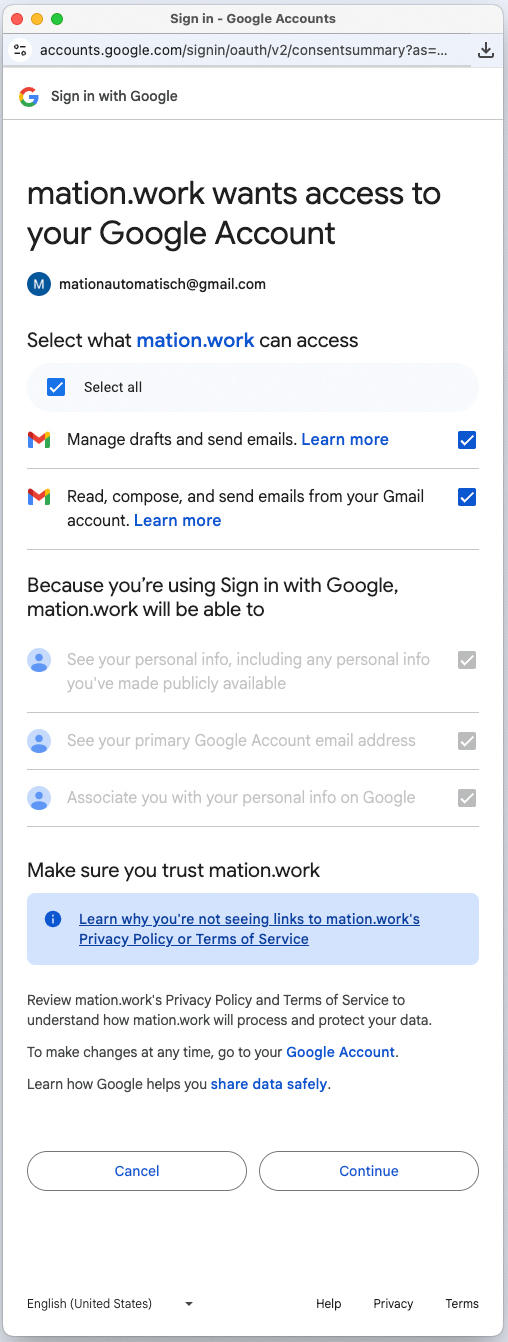
Check the Select all checkbox and click the Continue button.
Your Google Calendar connection is now established.
Start using your new Google Calendar connection with Workflow Automation.