Appearance
Create a form
Building forms with Workflow Automation is easy. The best way to learn is to start with a general example, followed by a simple use case.
NOTE
Forms can only be used within flows, they do not function independently. You need to create a flow to preview your form.
Build the form
In this example, we're setting up a form that includes all available field types and options.
INFO
This form itself has no real use case, its only purpose is to illustrate how to add all available field types.
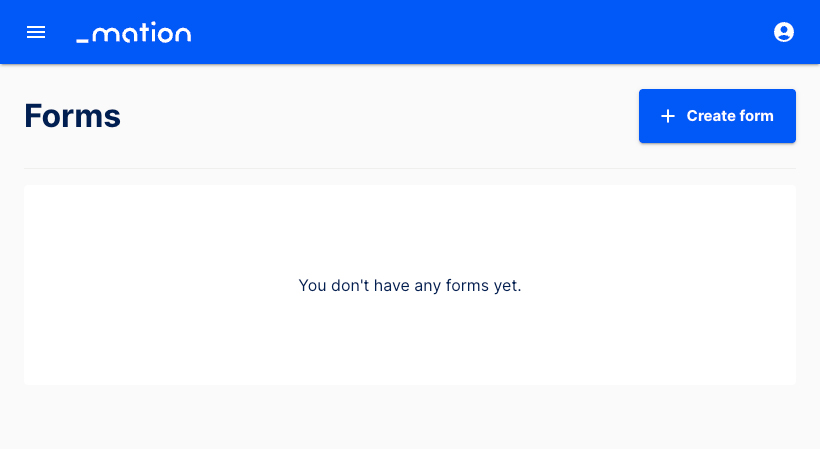
Go to the Forms page. Click the + Create form button to create a new form.
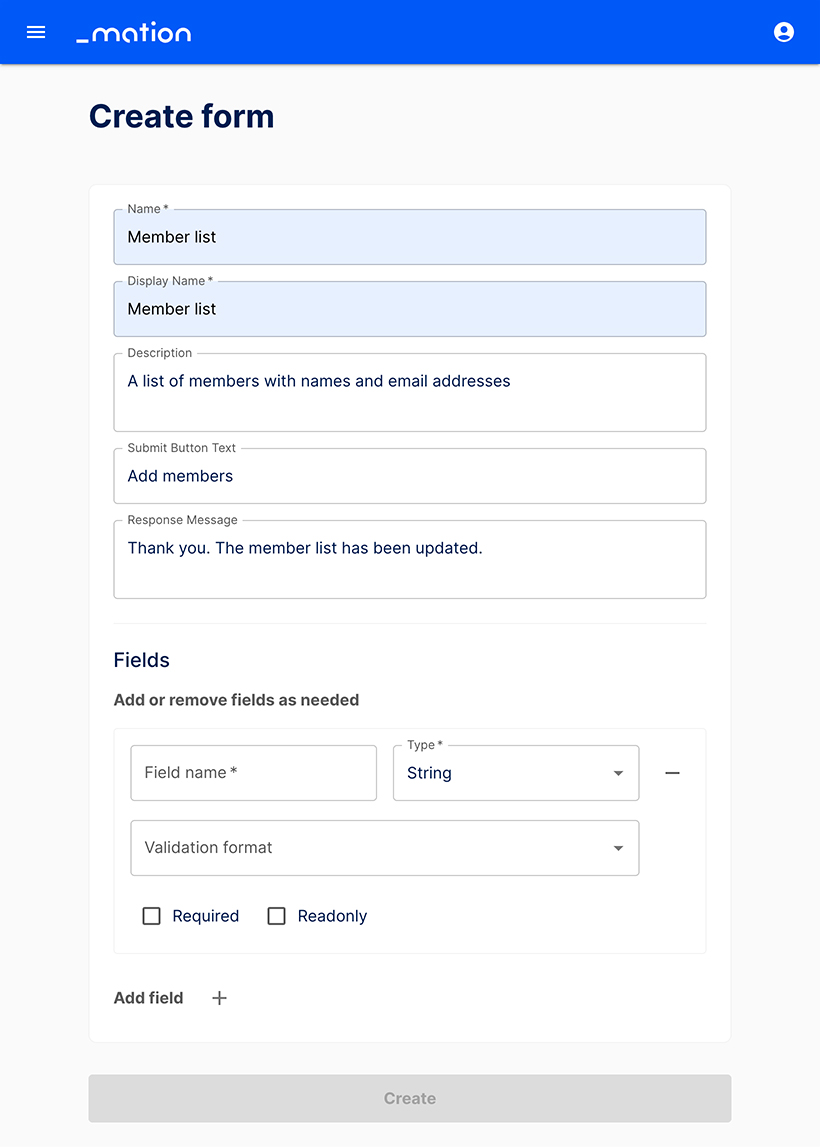
Start by filling in the basic fields. Name and Display Name are required fields.
INFO
Required form fields (marked with an asterisk) must be completed for the form to work.
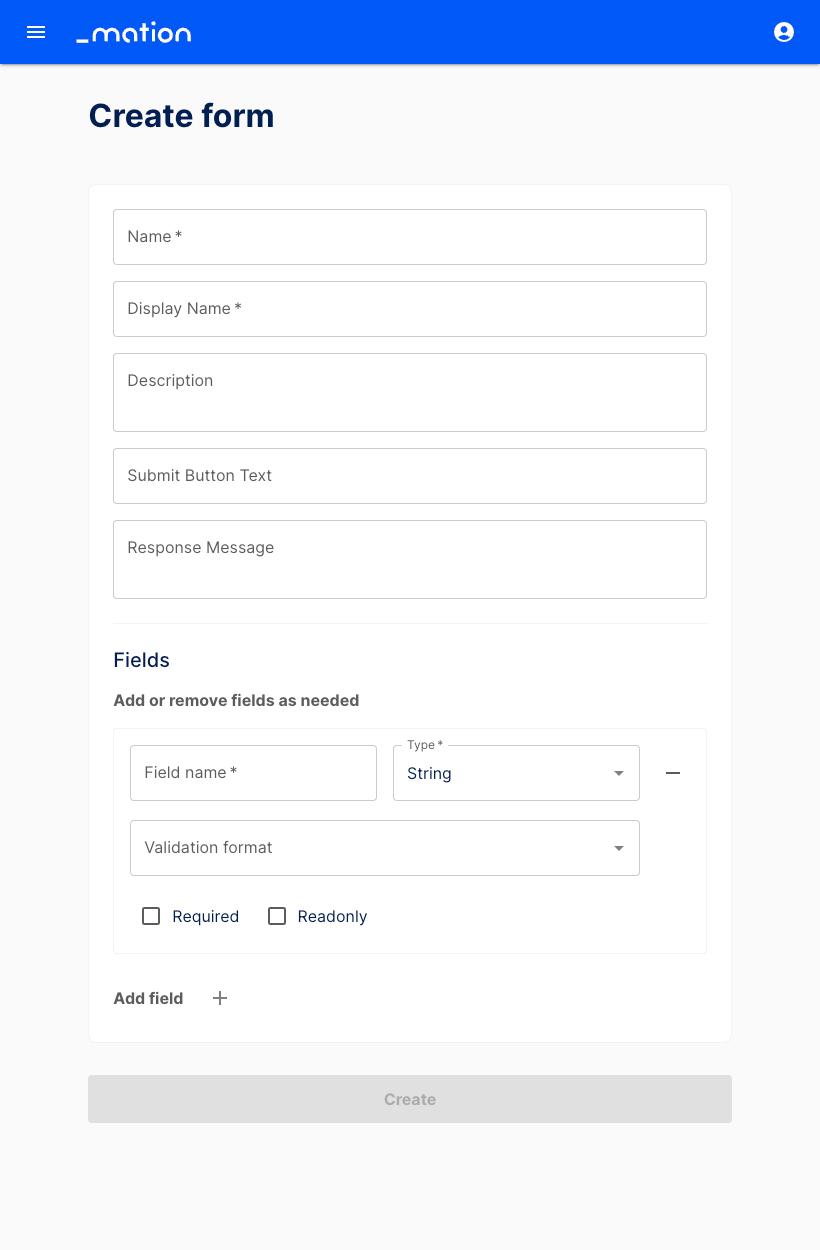
Assign a Name. This is the name under which the form will appear in the Dashboard.
Specify a Display Name, this is the form title shown when the flow runs.
Add a brief Description of the form’s purpose, so users know what to expect.
Enter the Submit Button Text, for example "Send", "Submit", or "Next".
Provide the Response Message, e.g. "Form successfully sent".
Set up the first form field. Enter a Field name (e.g. "Last name"), then select a Type. Options include String (default), Checkbox, Dropdown, Multiline, Date, Time, Date & Time, and Array.
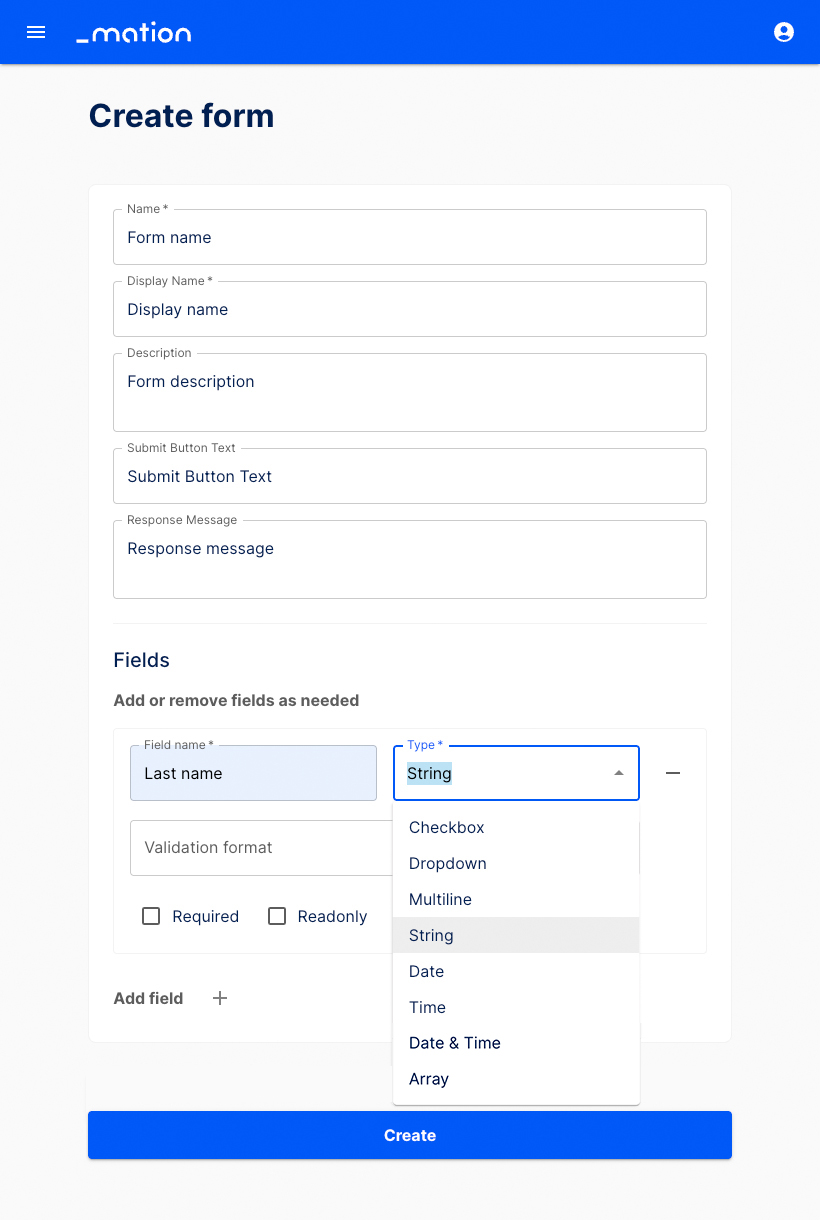
All field Types include the Required and Readonly checkbox options.
The String field type also offers an additional Validation format dropdown, allowing you to validate input as Email, URL, Phone number, Number, Letters and numbers only, Custom pattern (Regex), or leave it unvalidated.
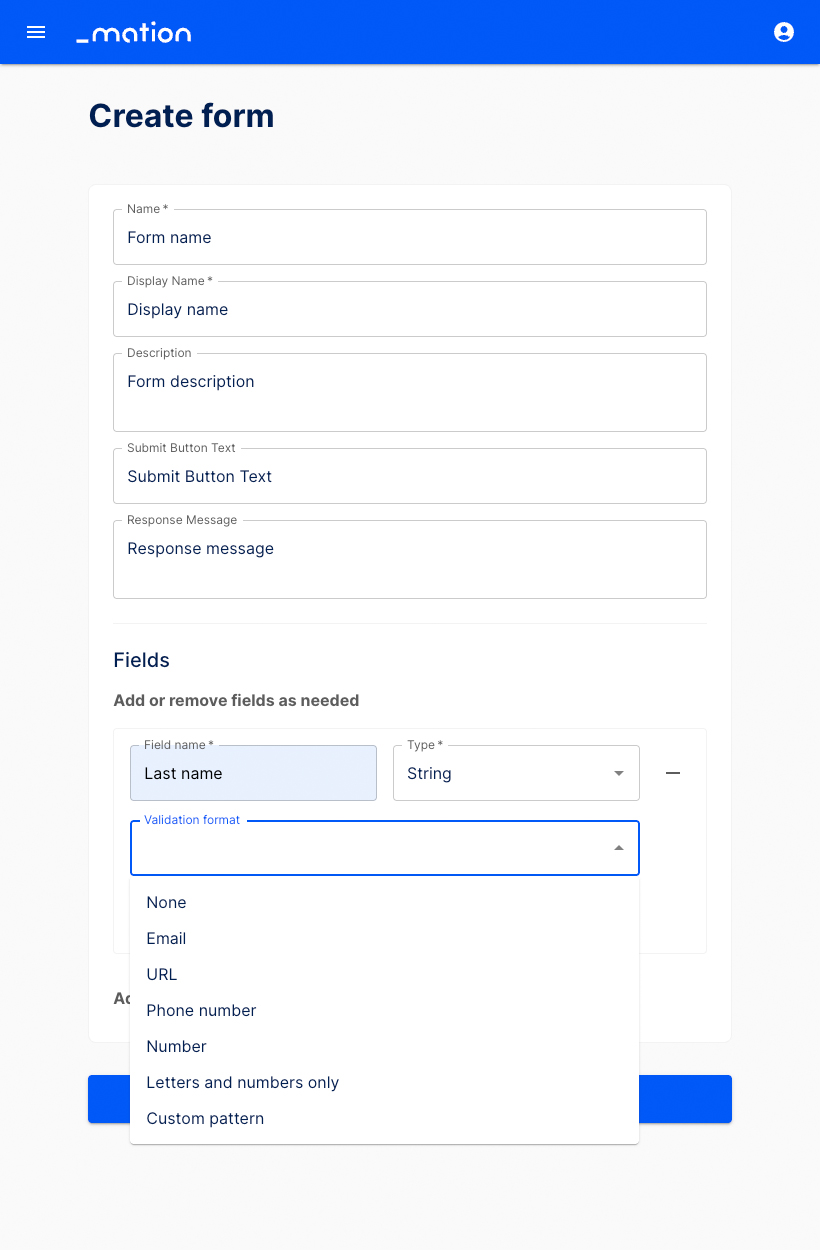
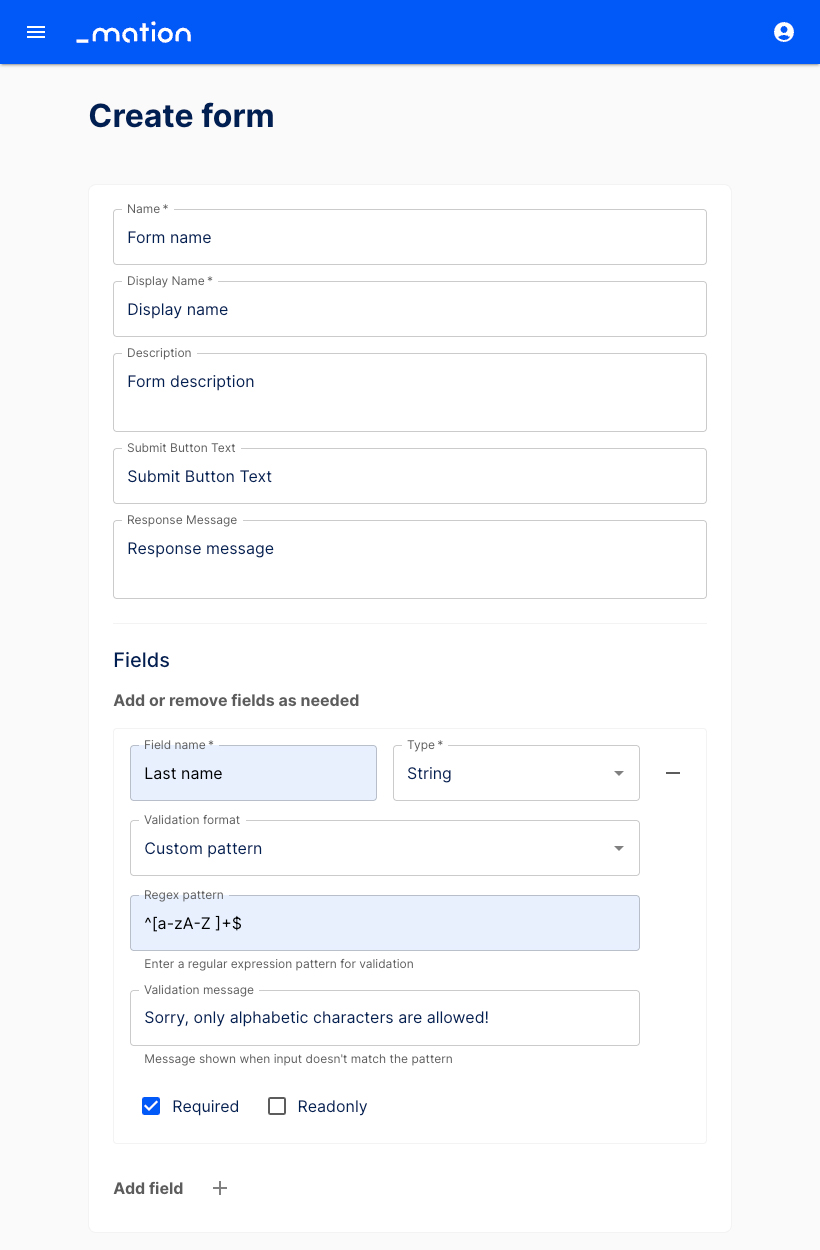
Let's validate the text input. Choose Custom pattern, then add a Regex pattern, e.g.
^[a-zA-Z ]+$to allow only for letters. Add a validation message, like "Sorry, only alphabetic characters are allowed!". Select the Required checkbox.TIP
Learn more about Regex patterns here.
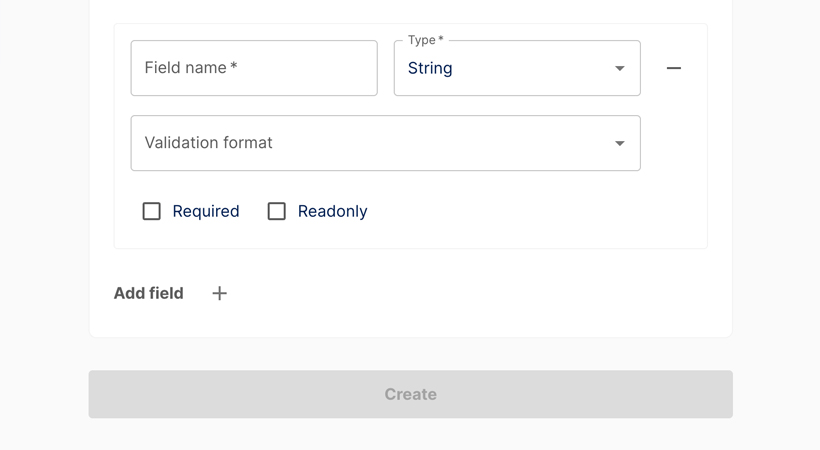
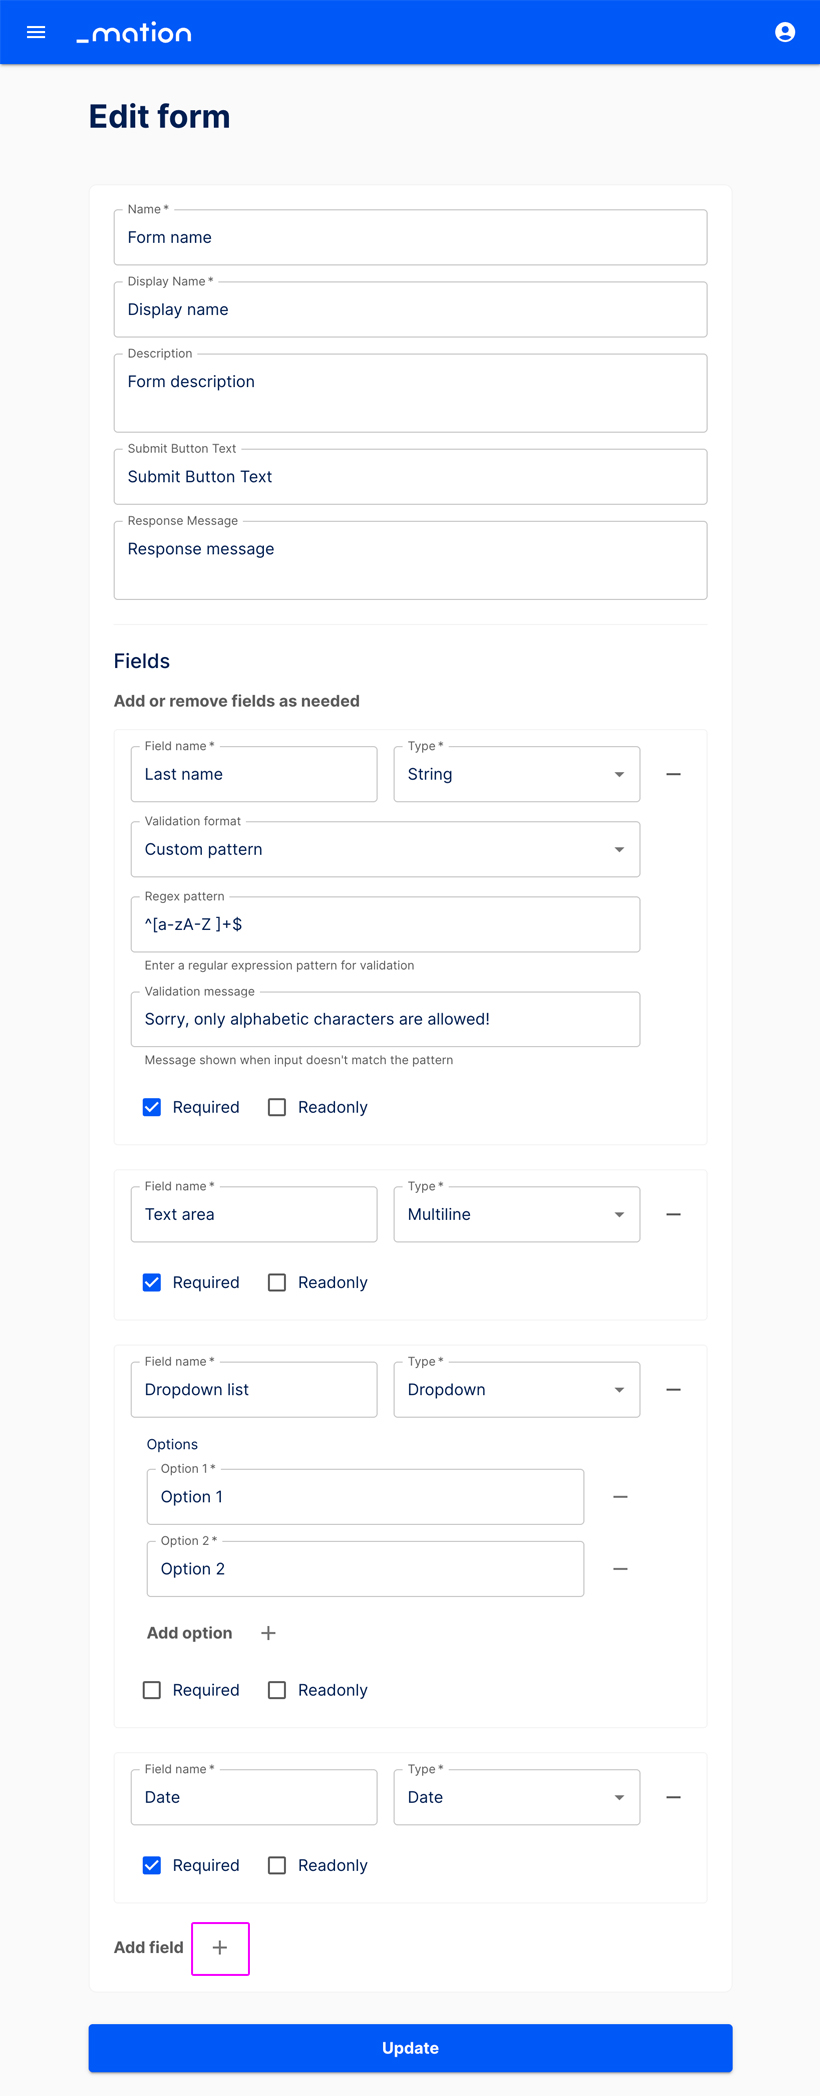
Then, click the Add field + button below to insert a new field.

A blank form section appears.
INFO
The Create button at the bottom is disabled and will only become active once the new form field is configured correctly.
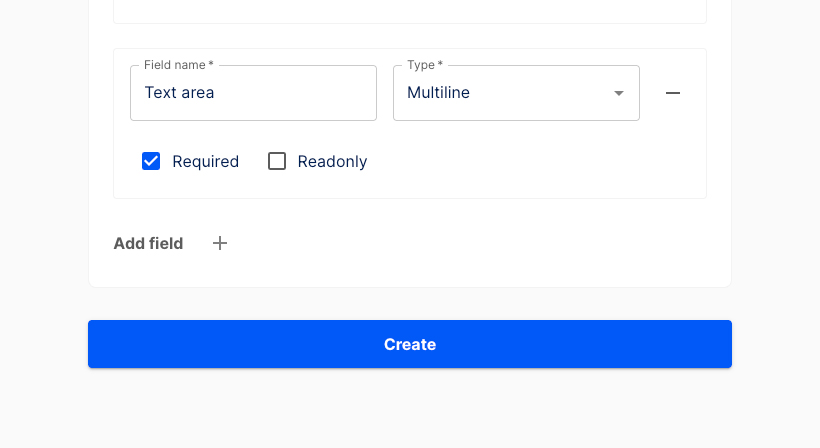
Let's add a Multiline text field and name it Text area, for example. This is the form field that will contain the written message. Check the Required checkbox.
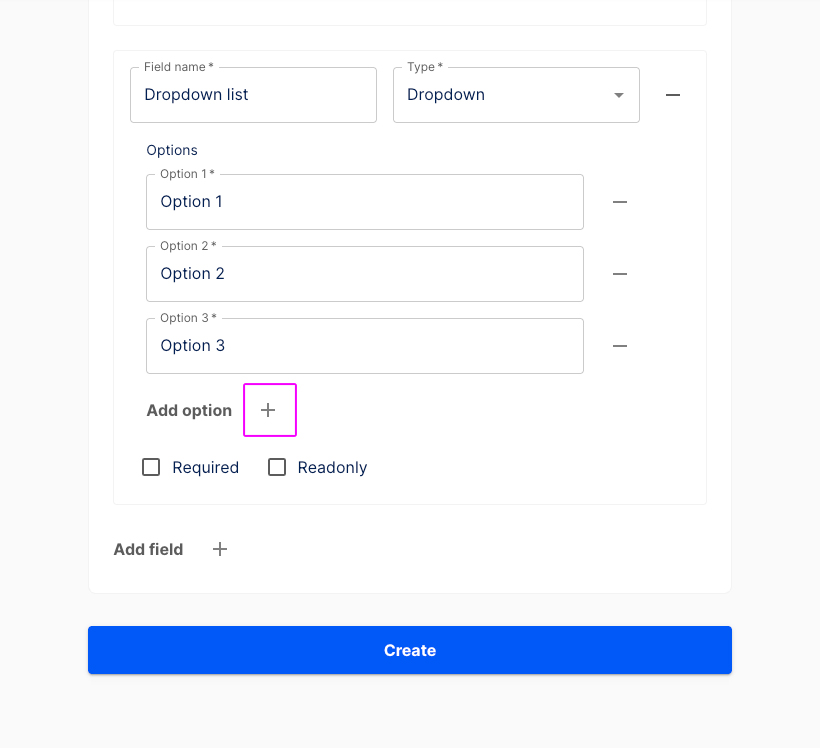
Use the Add field + button at the bottom again. Another blank form section appears. Insert a Field name (e.g. "Dropdown list") and select Dropdown as the field type. Then click the Add option + button and add a few options to choose from.
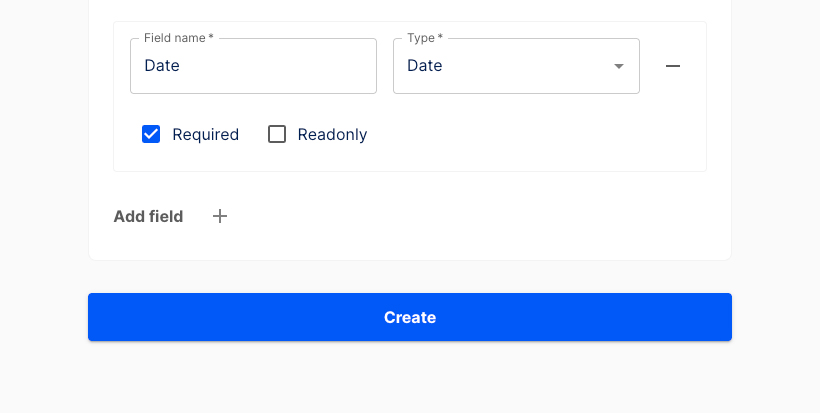
Press the Add field + button underneath. Another empty form section is shown. Enter a Field name (e.g. "Date"), choose Date as the field type and make it required.
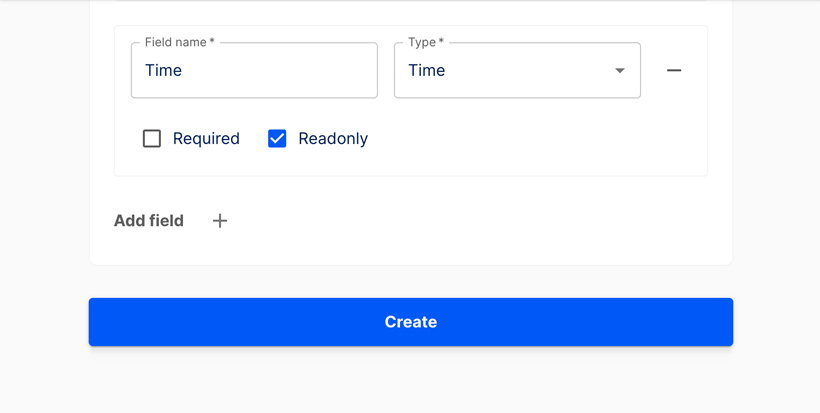
Click the Add field + button below. Another blank form section is displayed. Add a Field name (e.g. "Time"), select Time as the field type and check the Readonly checkbox.
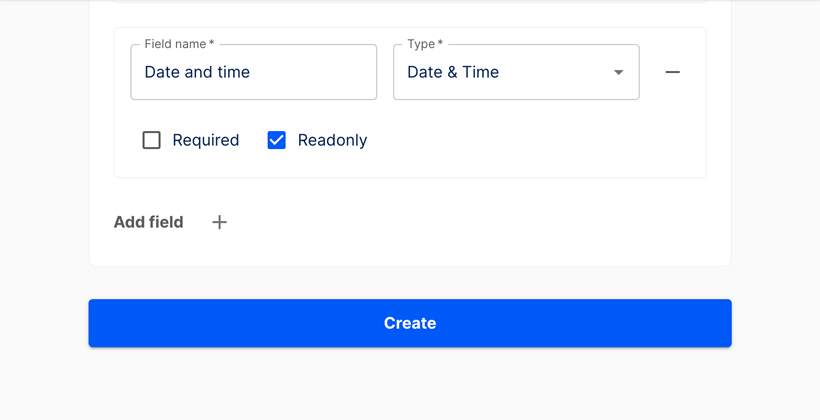
Hit the Add field + button again. Another blank form section appears. Enter a Field name (e.g. "Date and time"), choose Date & Time as the field type and make it Readonly.
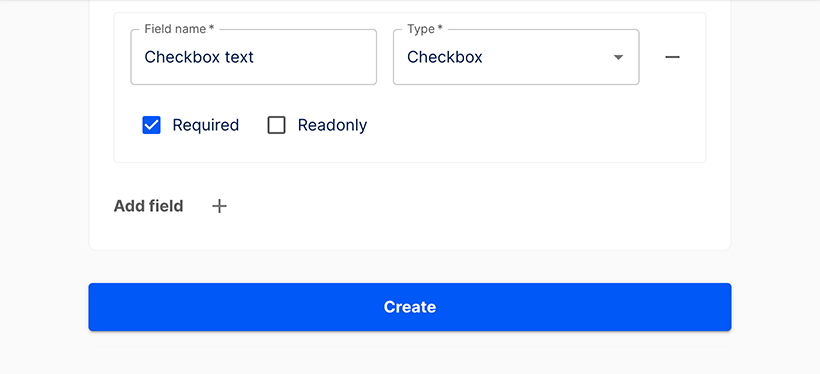
Click the Add field + button at the bottom again. Another blank form section opens up. Insert a Field name (e.g. "Checkbox text") and select Checkbox as the field type. Tick the Required checkbox.
INFO
The Field name is the text displayed to the right of the checkbox.
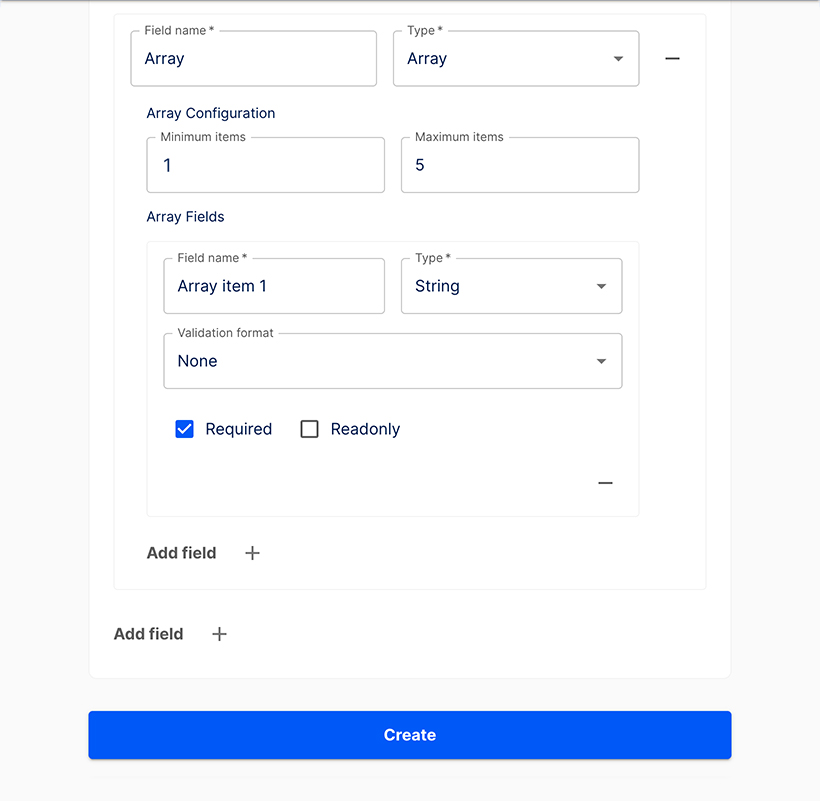
Select the Add field + button at the bottom again. Another blank form section appears. Enter a Field name (e.g. "Array") and select Array as the field type.
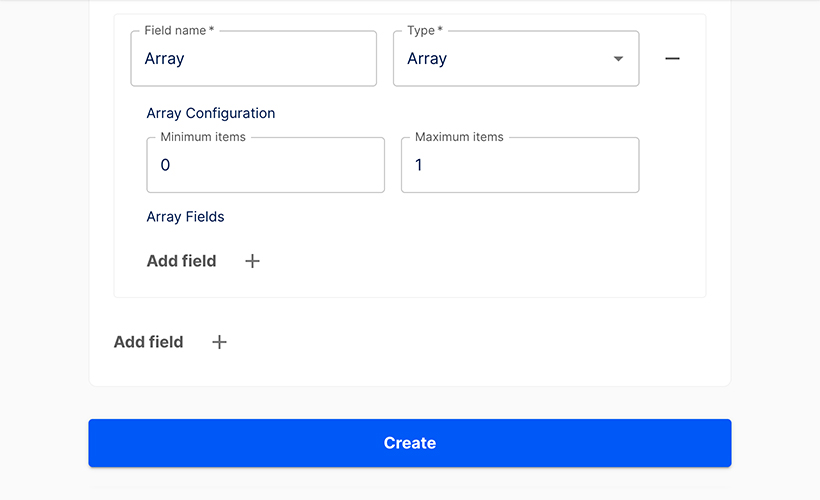
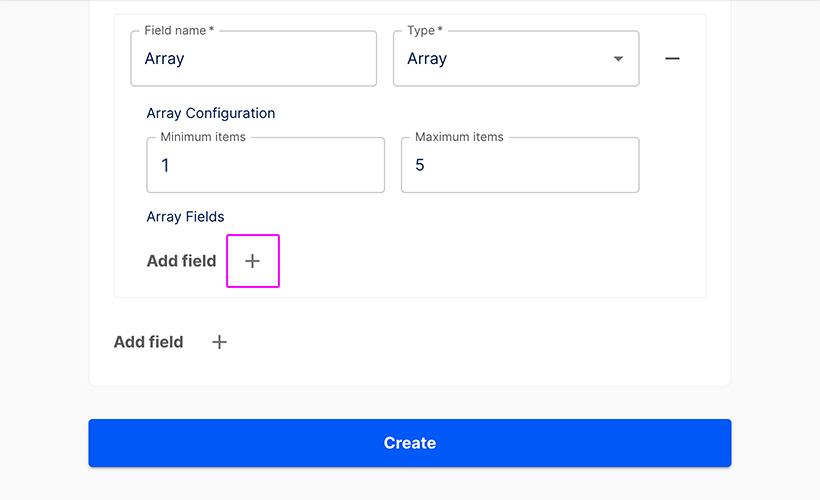
Configure the array by setting the number of items. The default minimum is 0, and the default maximum is 1. For example, set the minimum to 1 and the maximum to 5 to allow up to 5 array sets. Then, click the Add field + button to configure the Array fields.
INFO
In the Array Configuration, set the minimum to at least 1 item to display the array directly in the form. If the minimum is 0, only the Field name and a + (plus) button will be shown.
Enter a Field name, select the Type, and optionally select a Validation format. If needed tick the required checkbox to make the field mandatory.
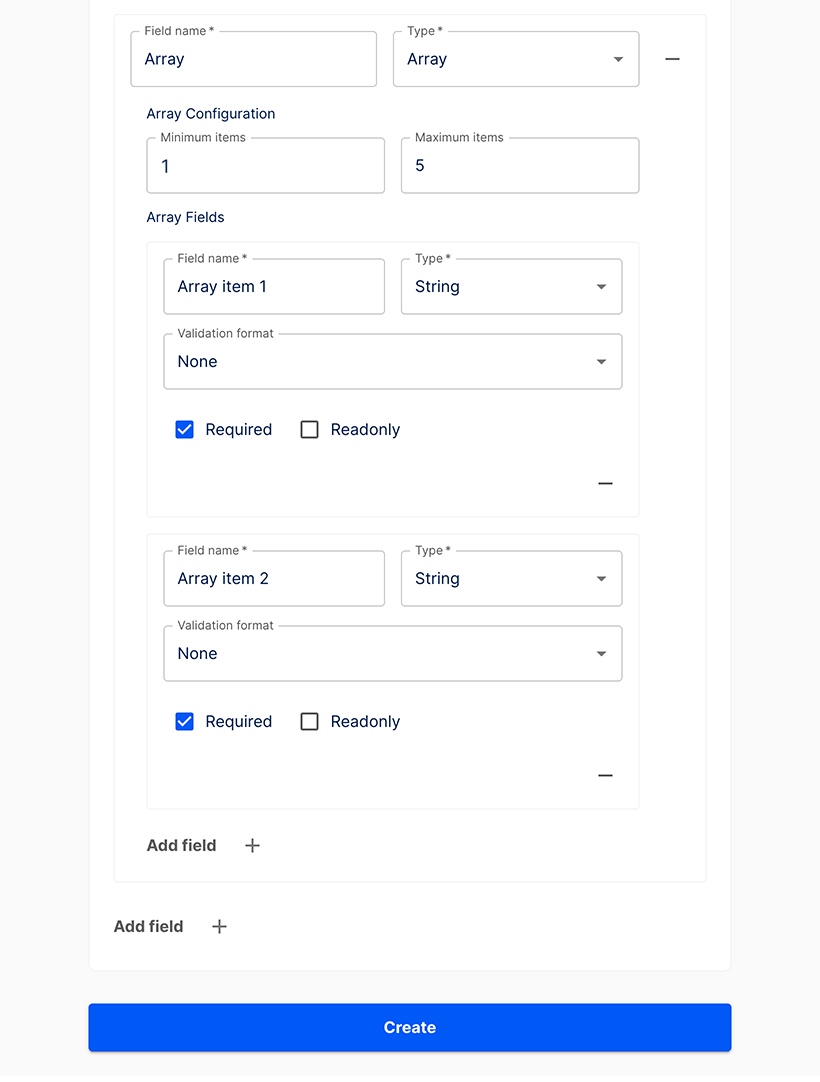
Press the Add field + button again to configure a second Array field.
INFO
Add as many fields to your array as needed. Click the - (minus) button to remove an Array field.
Click the Create button.
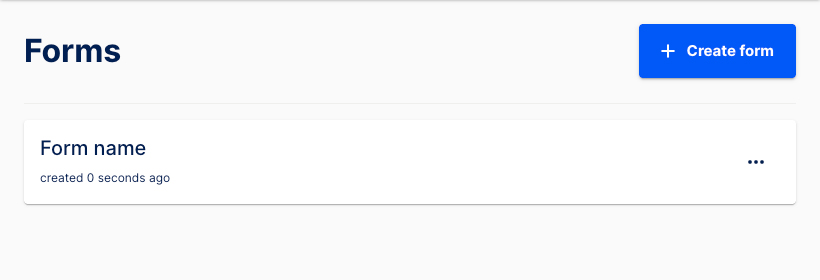
The new form has been successfully created. You’ve been redirected to the Forms page, where it is now listed.
Prefilled and hidden fields
- This view displays a sample Newsletter Signup form with no prefilled data.
- You can prefill fields by adding tokens to the URL.

- You may include either visible or hidden information in the URL.
- As an example, tokens can be used to prefill the Name and Email fields and automatically select the checkbox by default.

- Tokens added to the URL are reflected in the form. The Name and Email address fields are prefilled, and the checkbox is checked automatically.
- You can also add a token to include information that remains hidden while the user fills out the form.

- Click the Register now button to submit the form.
- Navigate to Executions to verify the form has been successfully transmitted.
- Select your flow from the list.
- Go to DATA OUT.
- The tokens submitted throught the URL have been transmitted successfully.
Response messages
Understanding response message hierarchy
The step-level response message overrides the one on form-level. The system default is shown when custom response messages have not been defined.
- Step-level override: An individual response message defined in an Action step.
- Form-level override: A custom response message configured in the Create form setup.
- System default: A static response message hard-coded into the platform.
Response message at form-level
- Click the + Create form button.
- Fill in the required fields.
- Enter your custom response message in the Response Message field, e.g. "Thank you for signing up!".
- Click the Create button.
- The new custom response message has been set up successfully. It will override the system default.
Response message at step-level
Prerequisites
This guide assumes you have a Slack account and a channel configured to receive data. A basic newsletter form named Form to Slack with two required text fields and a checkbox has already been set up.
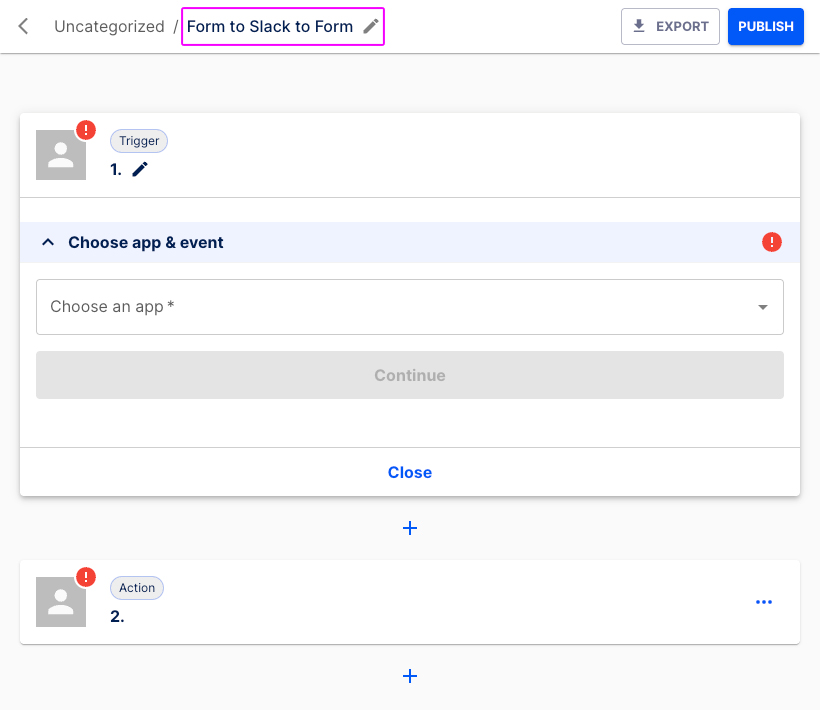
Navigate to Flows and click the + Create flow button.
Enter a name, e.g. "Form to Slack to Form".
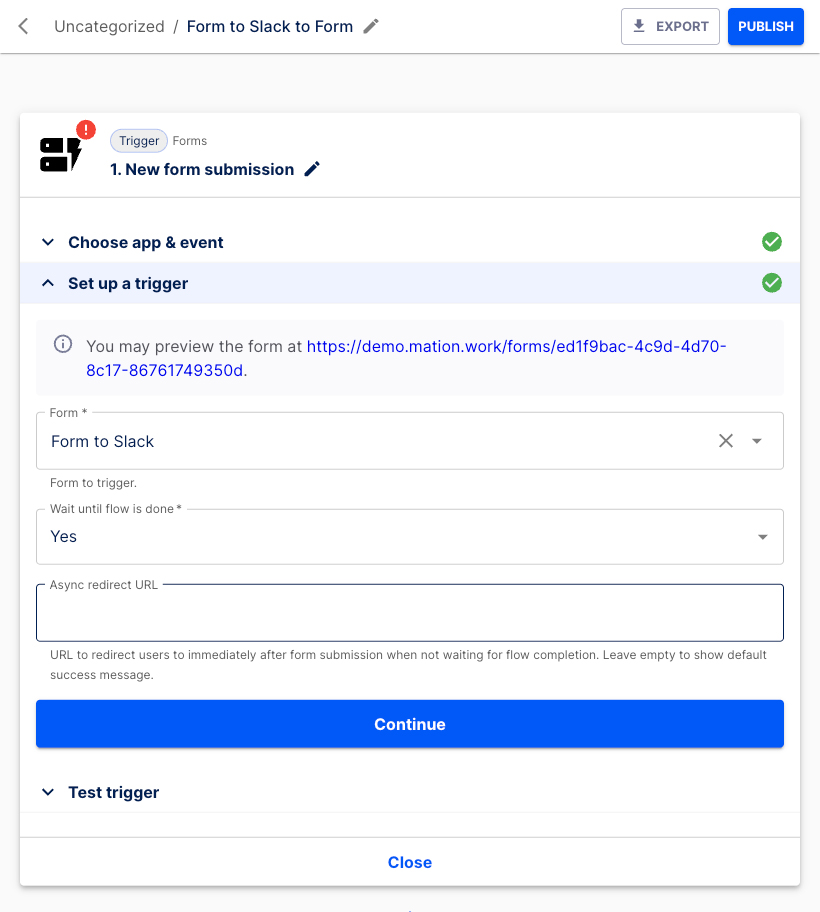
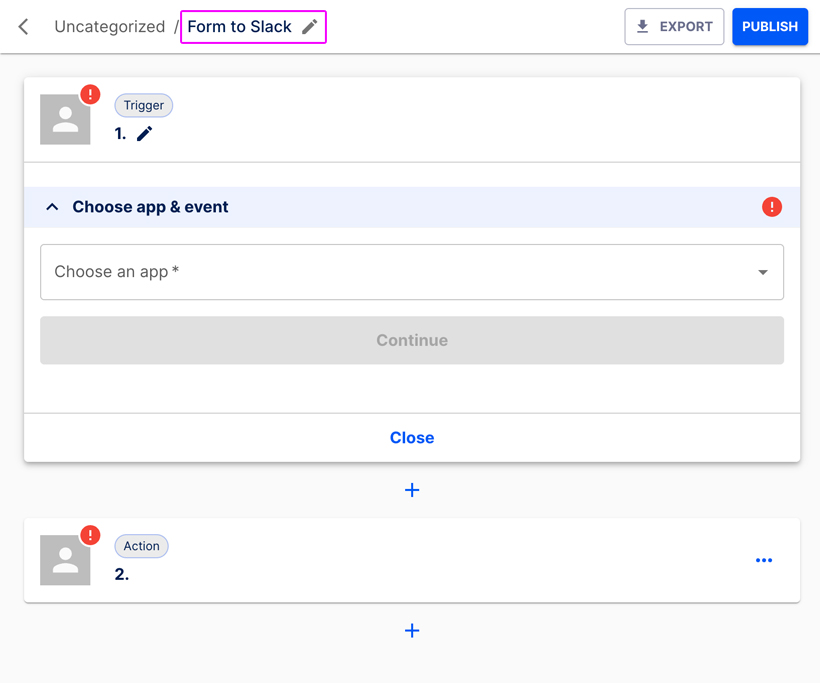
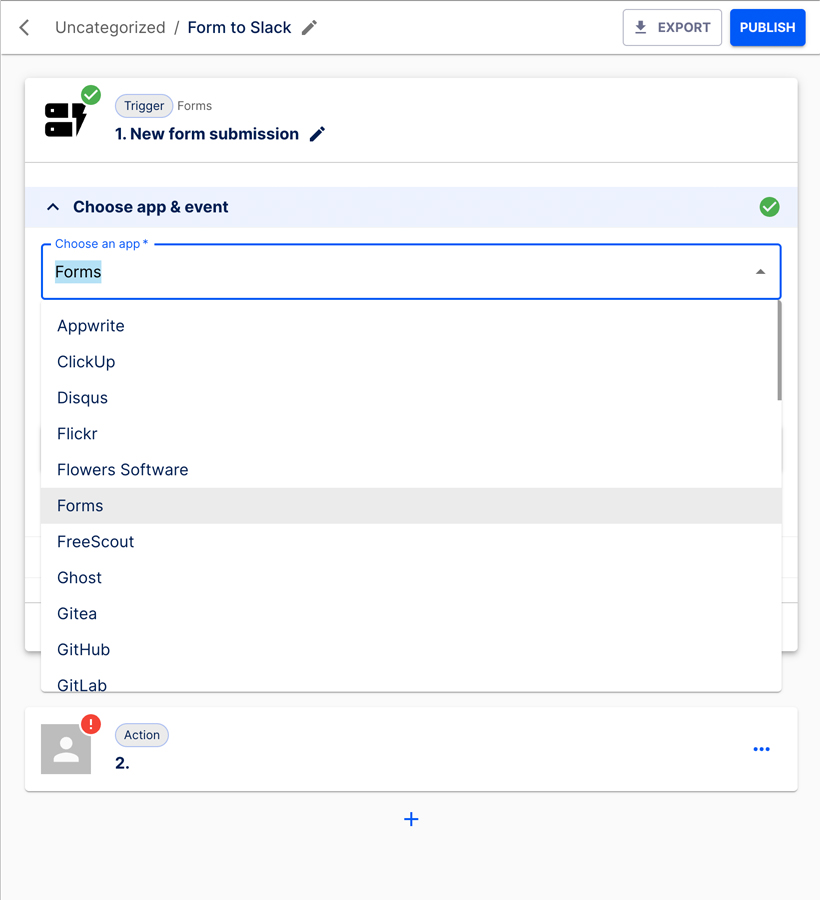
Let's configure the Trigger step. In the Choose app & event section select Forms from the list.
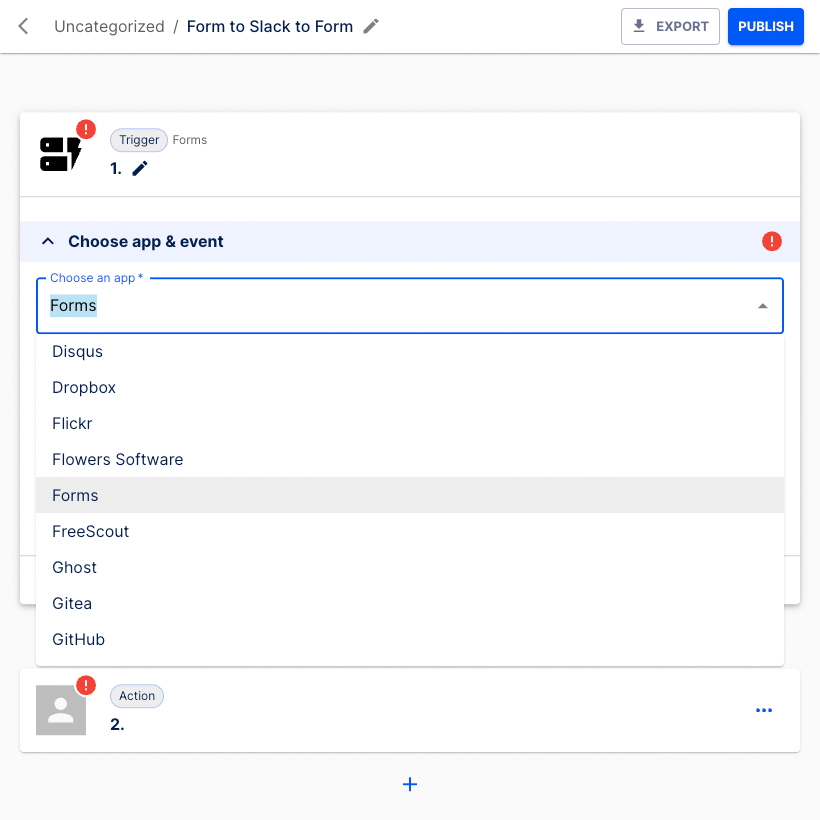
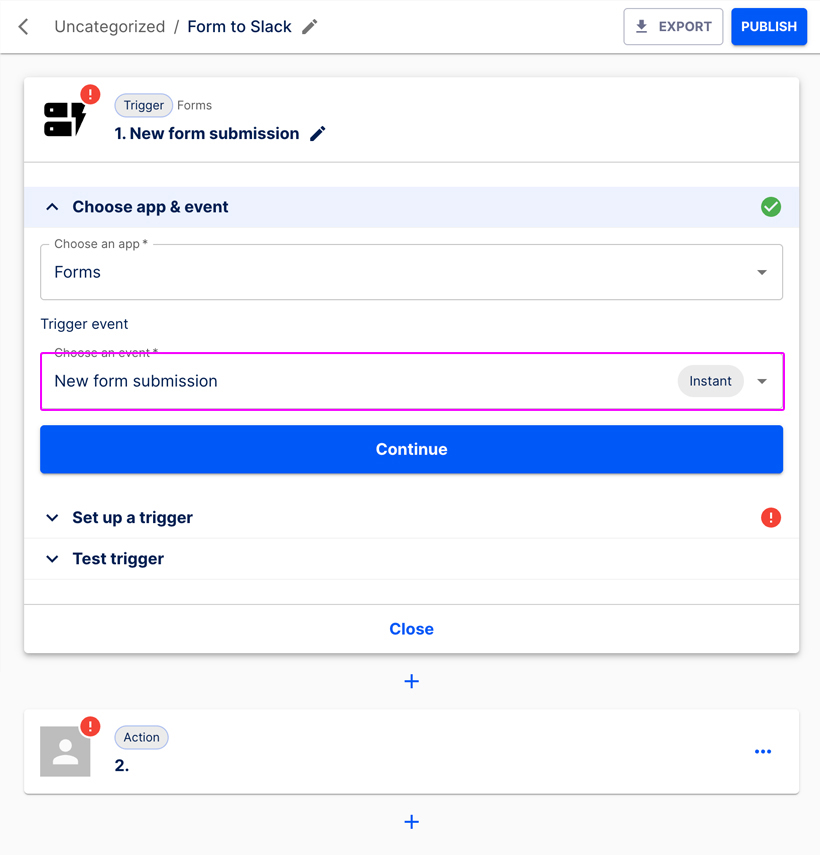
Select New form submission as the Trigger event.

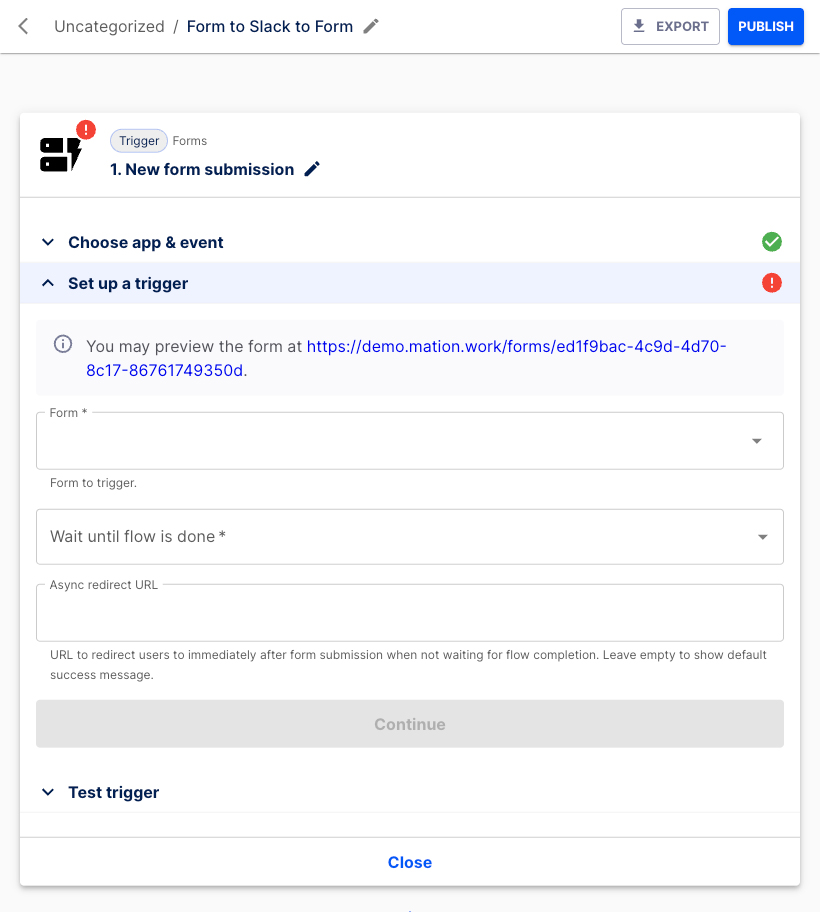
Click the Continue button.
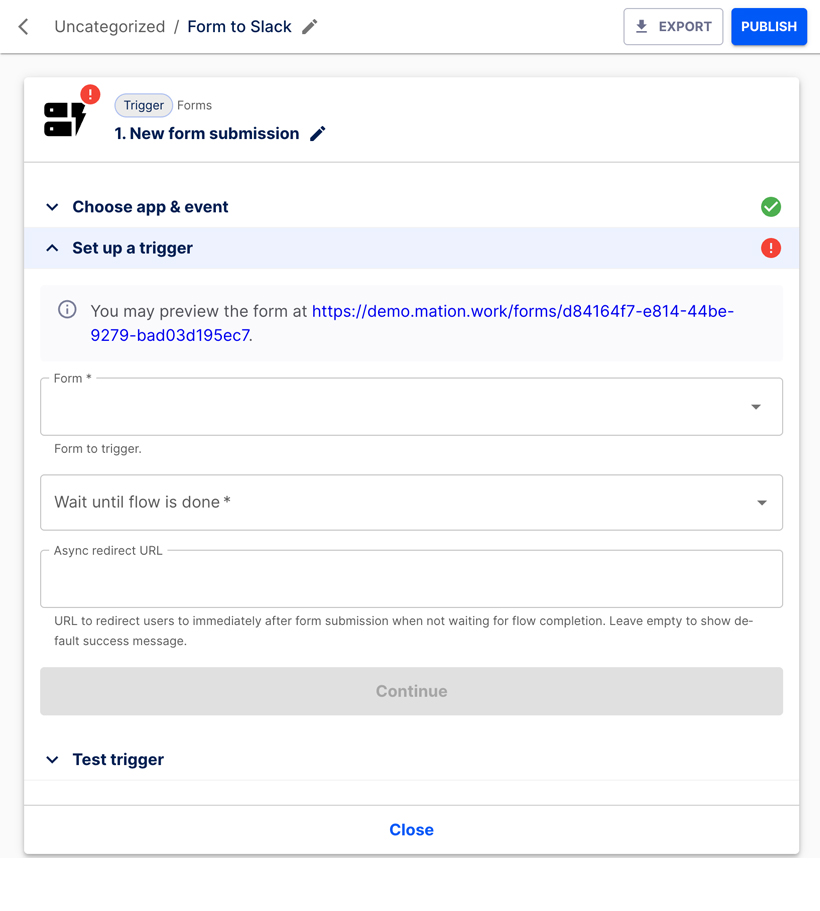
The Set up a trigger section opens.
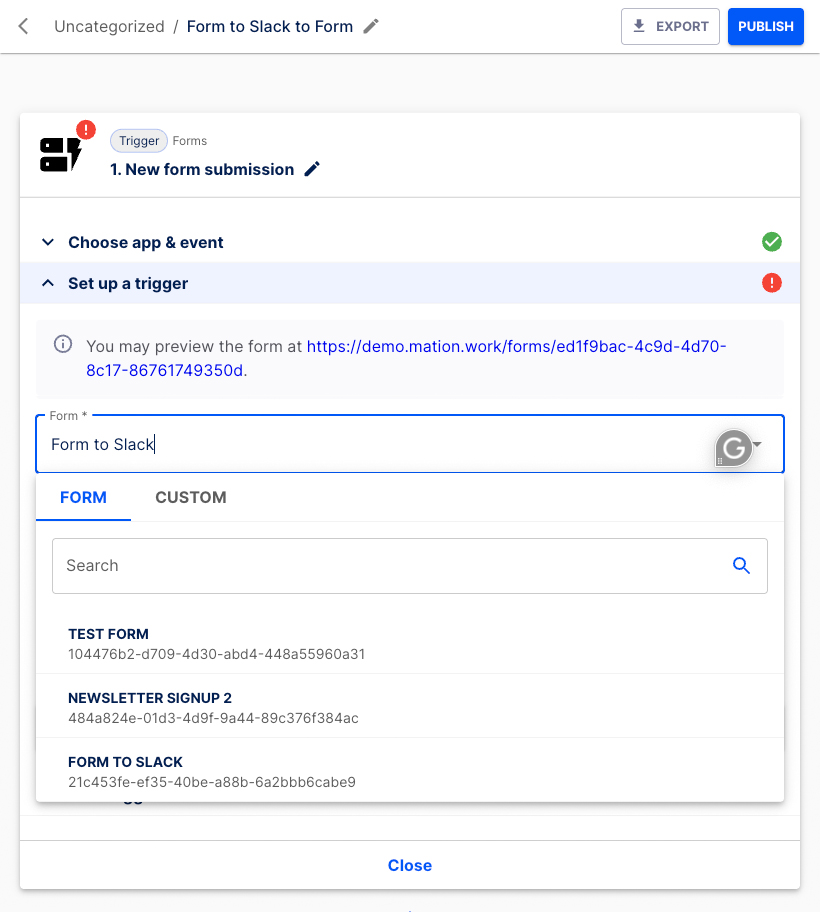
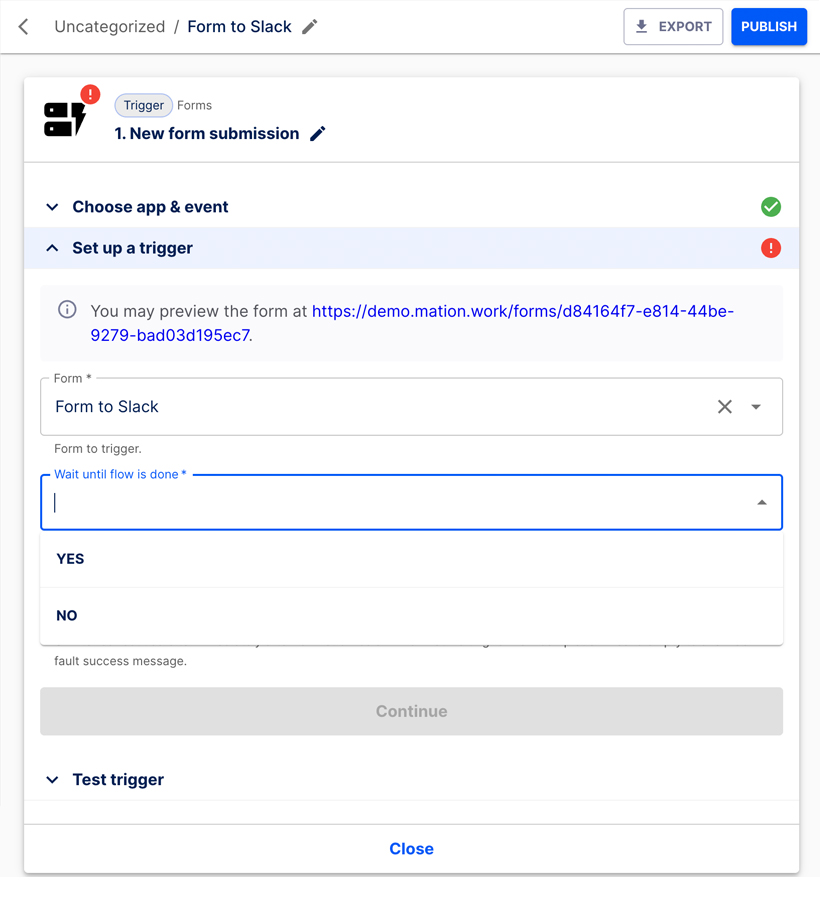
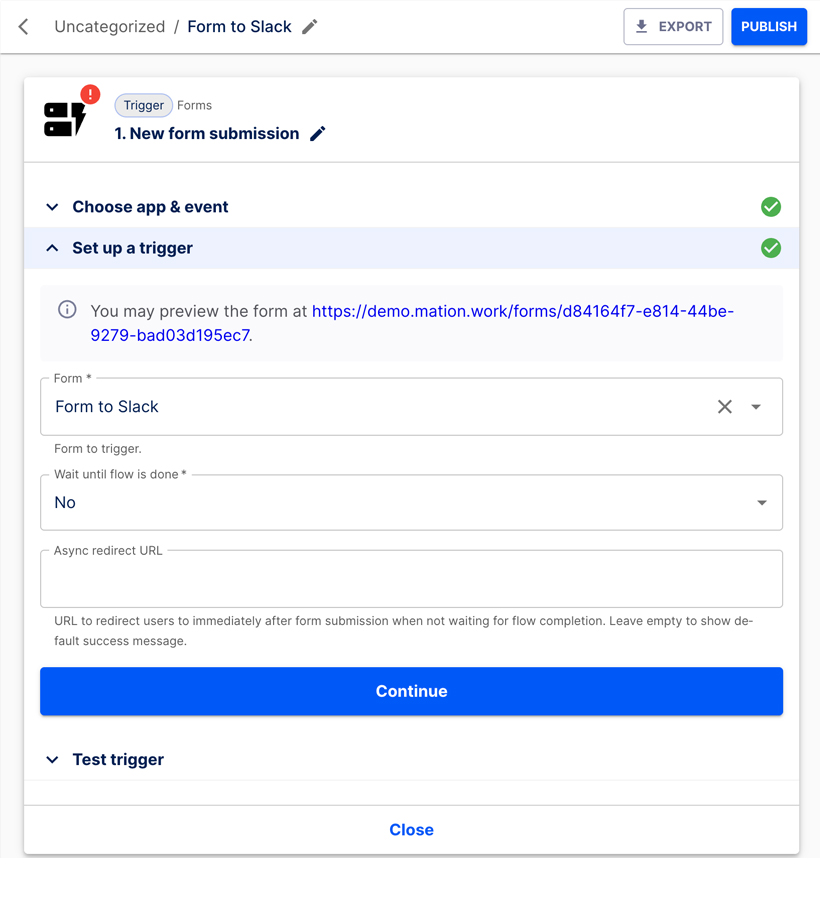
Select the form. Choose Form to Slack from the list.
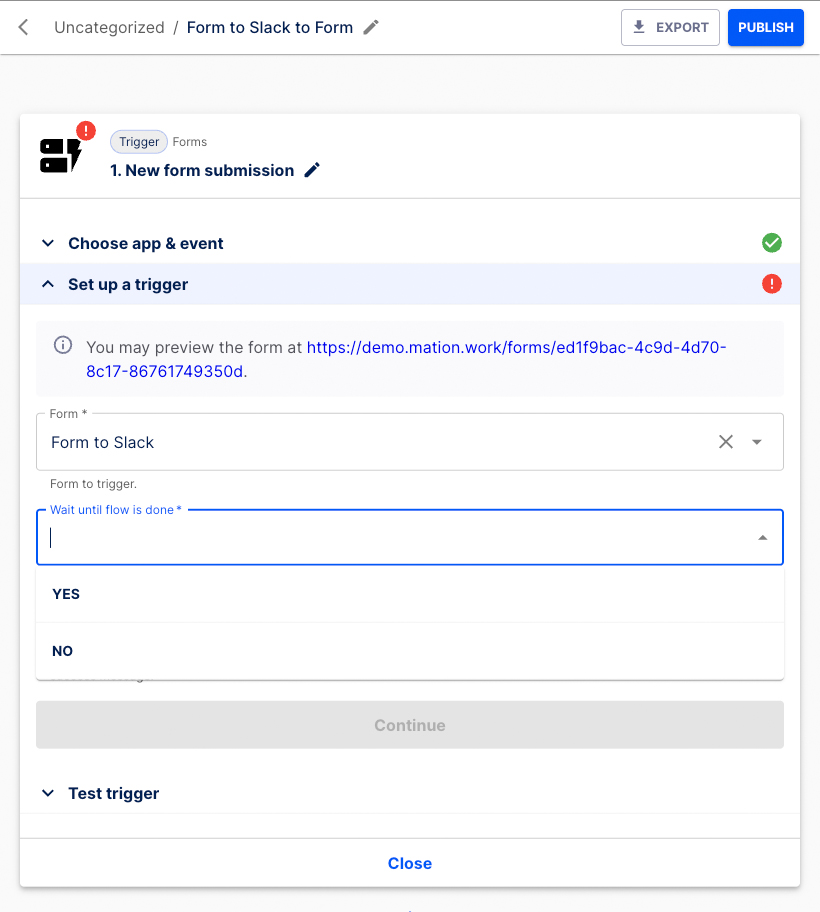
Choose Yes in the Wait until flow is done field.
WARNING
In the Set up a trigger section, you must select Yes in the Wait until flow is done field. Otherwise your step-level response message – configured later in an Action step – will not be displayed!
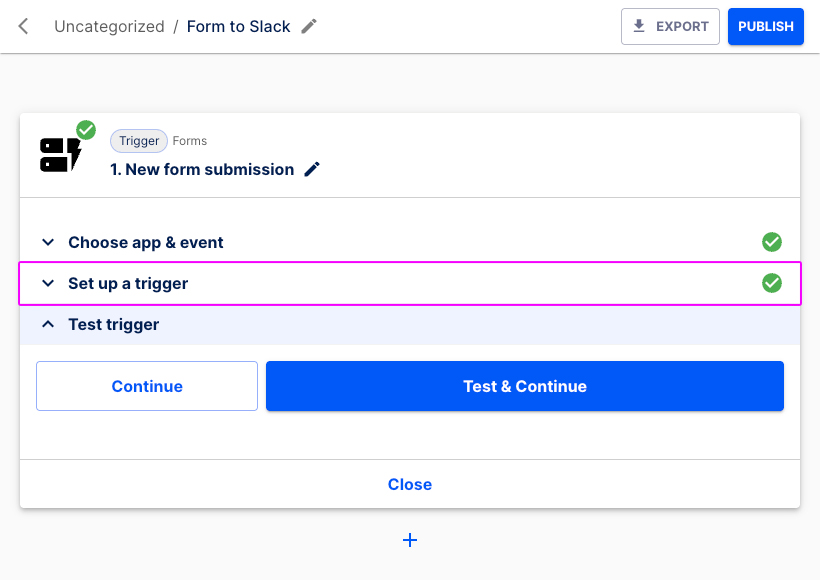
Press the Continue button.
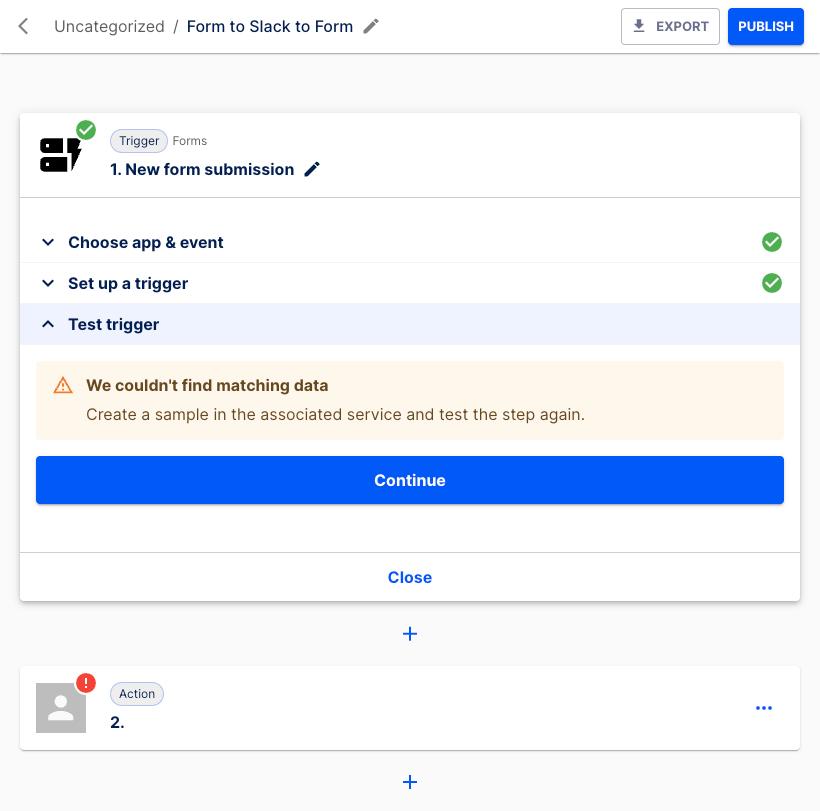
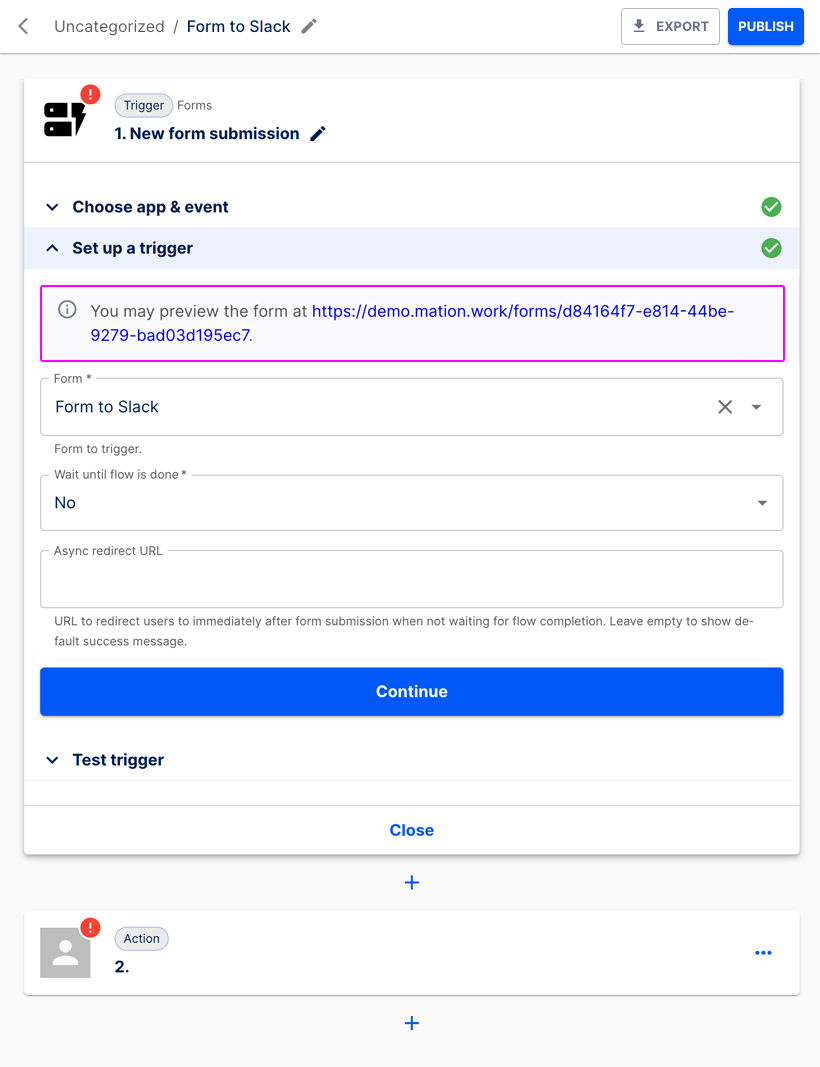
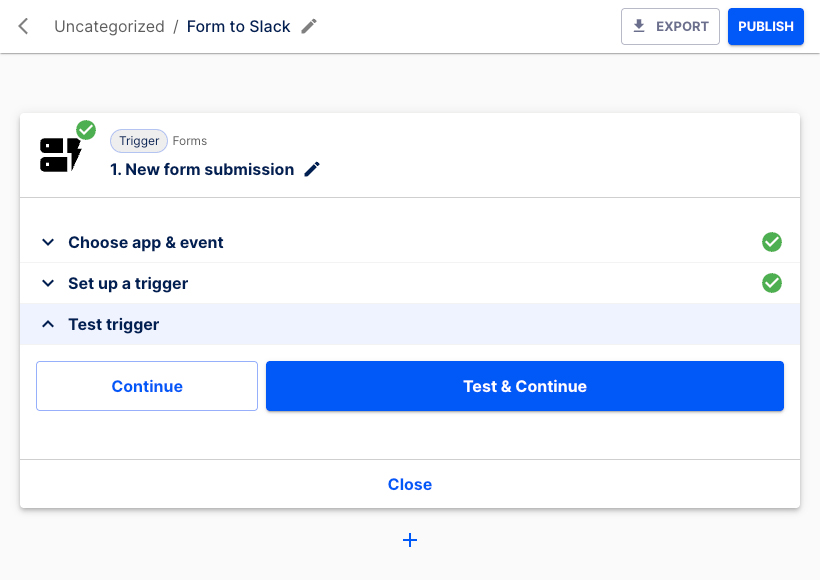
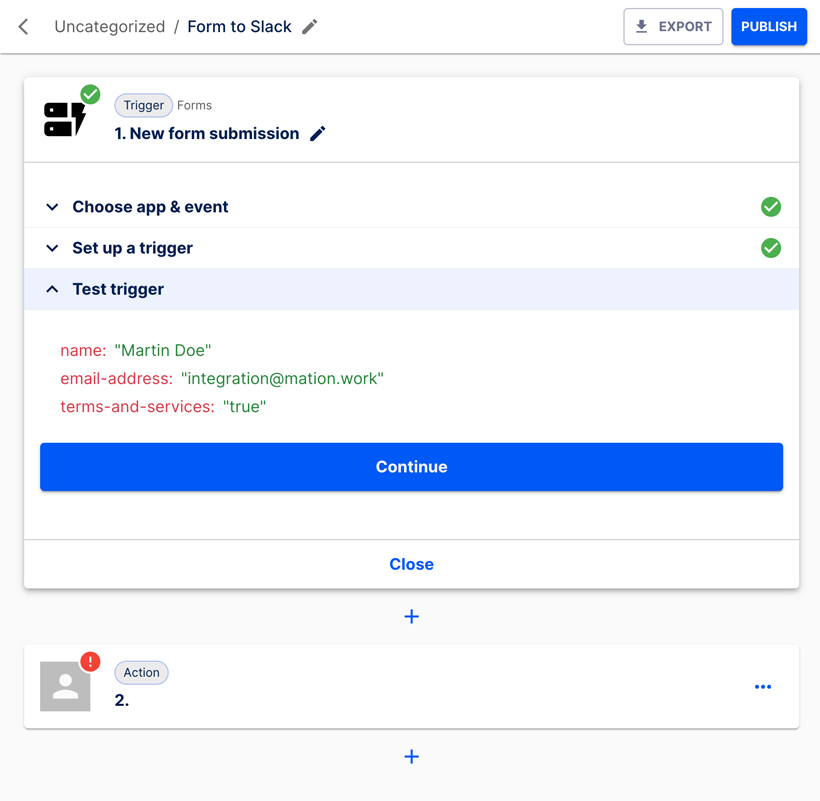
In the Test trigger section hit the Test & Continue button.
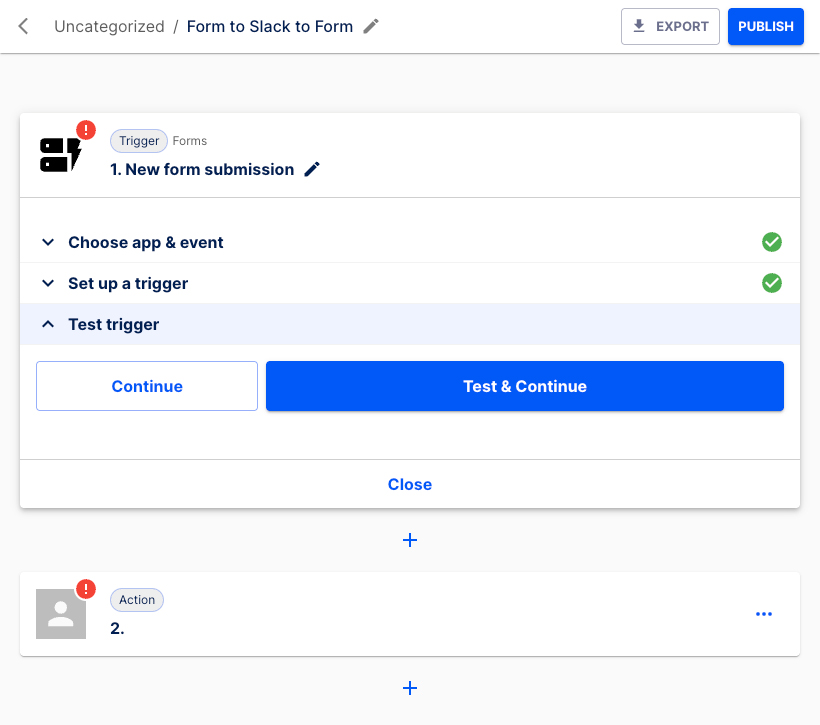
Click the Continue button.
INFO
Do not worry about the error message. The new form hasn't submitted any data yet. We`ll address this shortly.
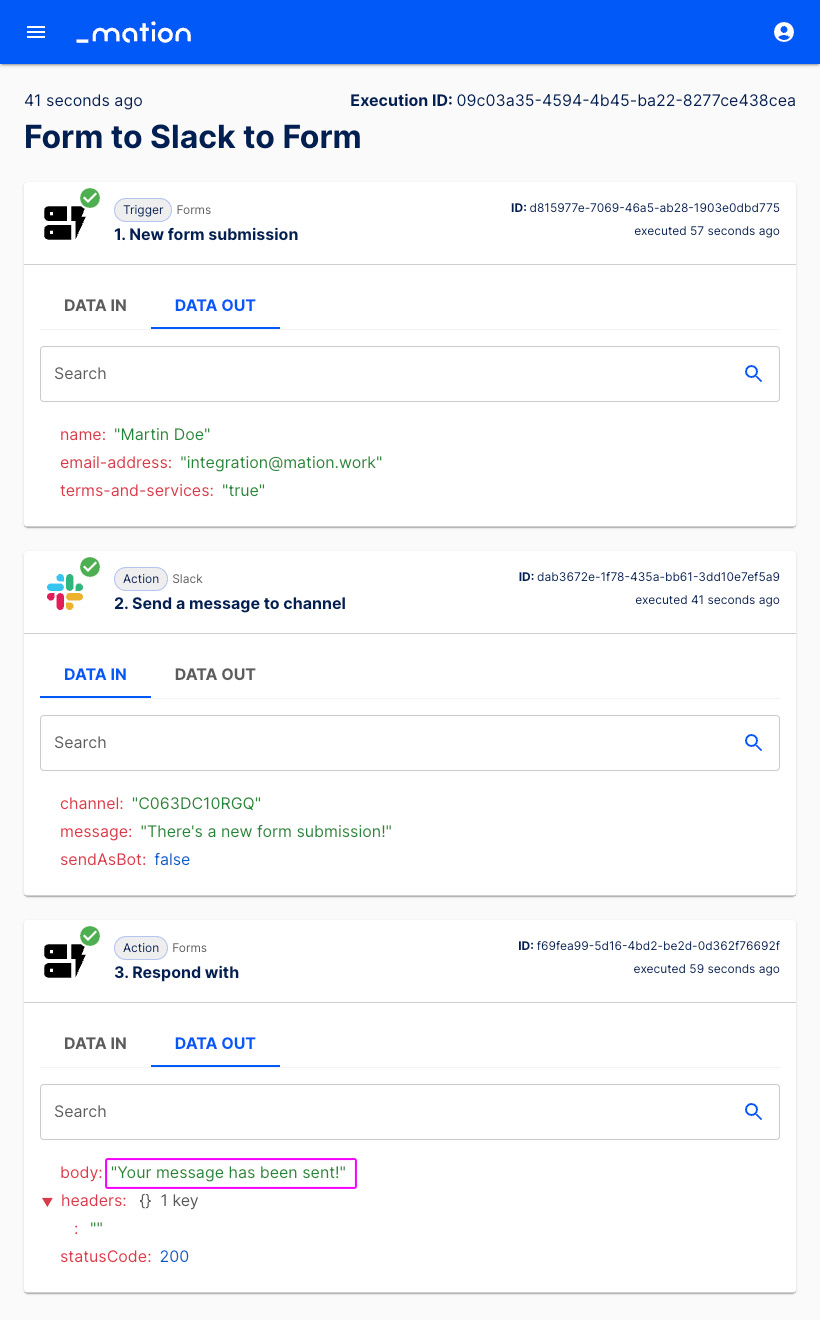
Let's configure the first Action step.

In the Choose app & event section select Slack from the list.
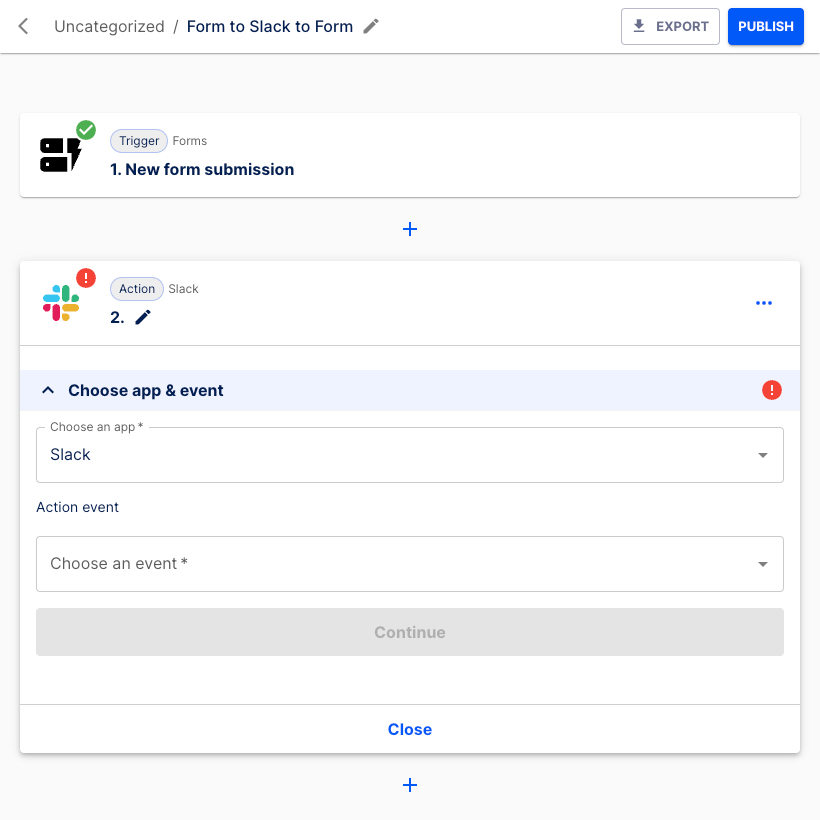
Choose Send a message to a channel as the Action event.

Press the Continue button.
Select the connection, then click the Continue button.

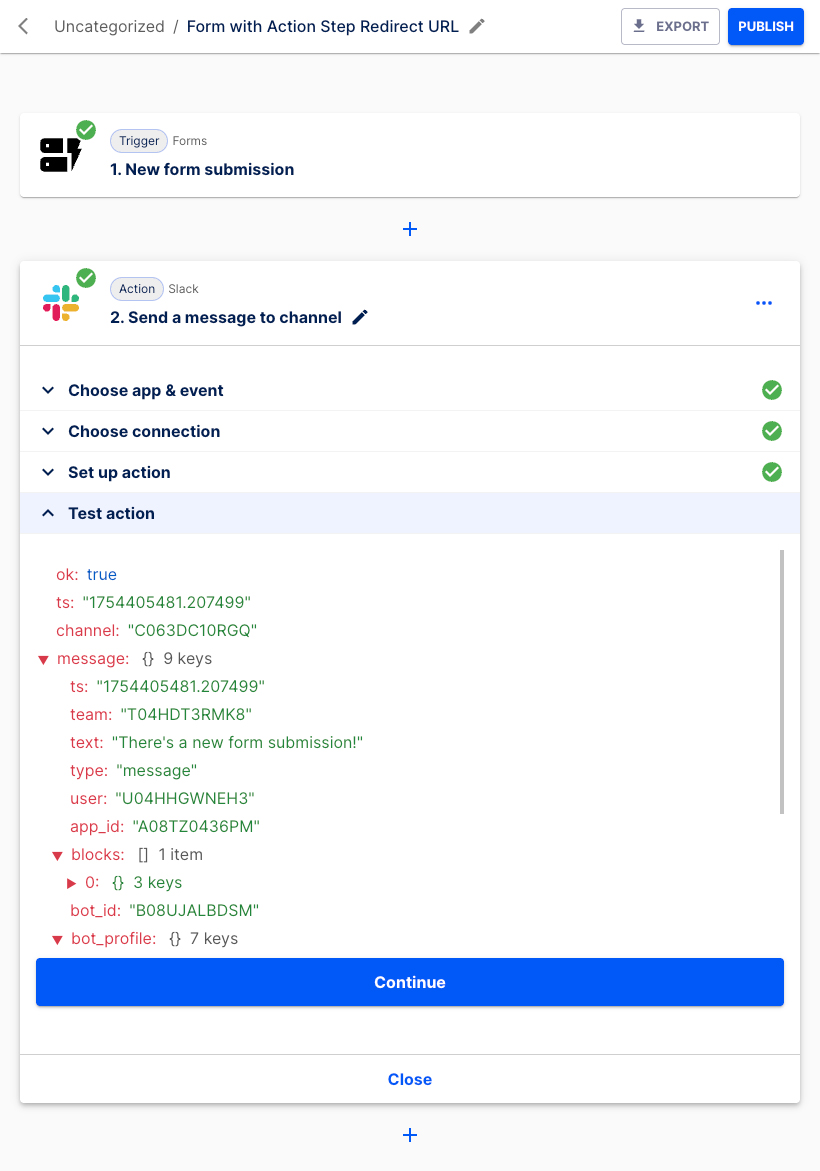
Choose the Slack channel from the list in the Set up action section. Enter a text message to be displayed in Slack, e.g. "There's a new form submission!". Select to either Send as a bot or not.

Click the Continue button.
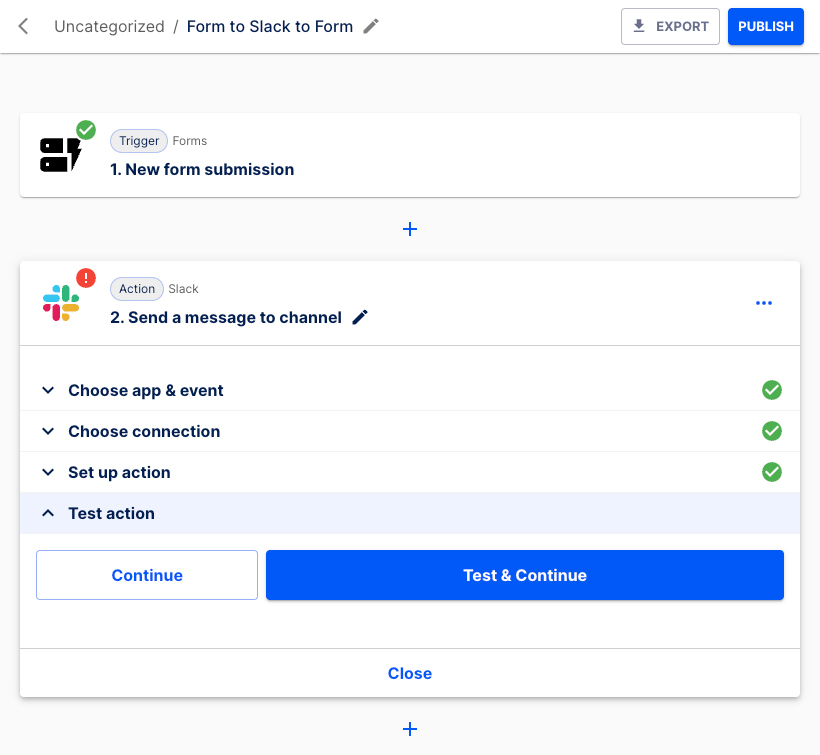
Press the Test & Continue button.
The Action step has been set up successfully.
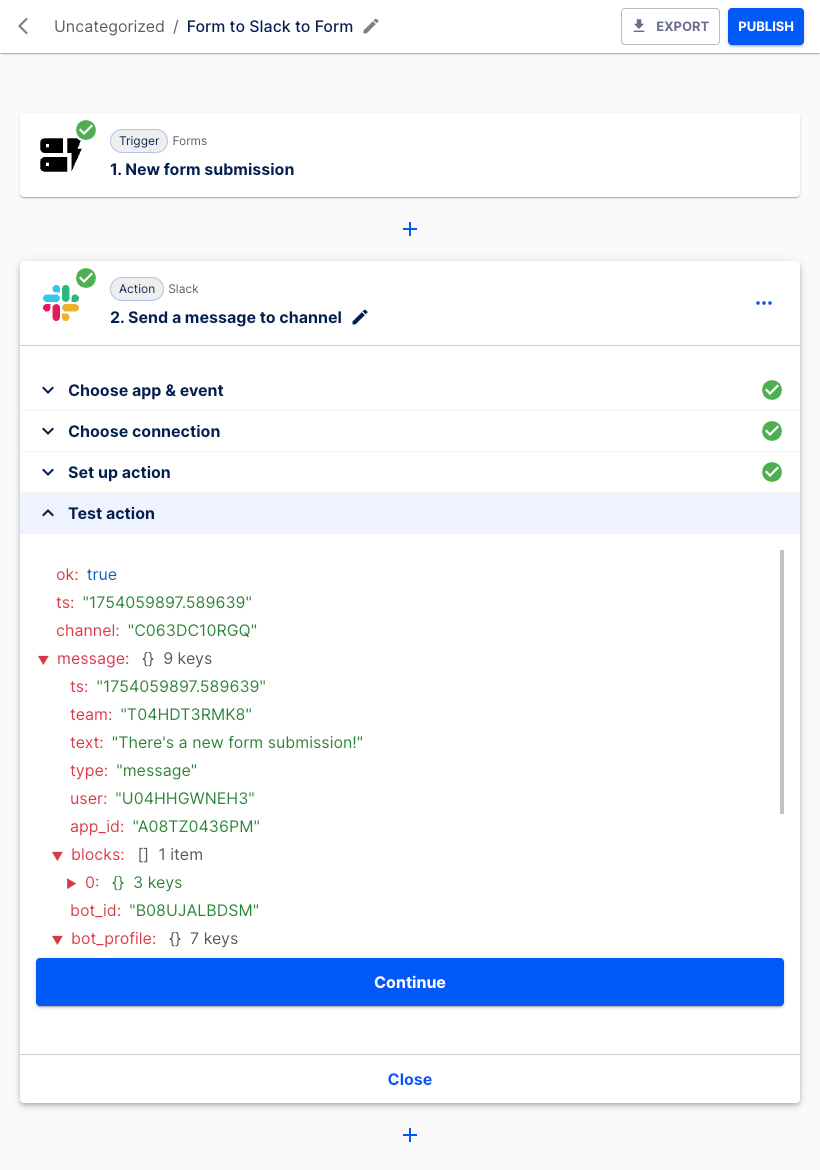
Hit the Continue button.
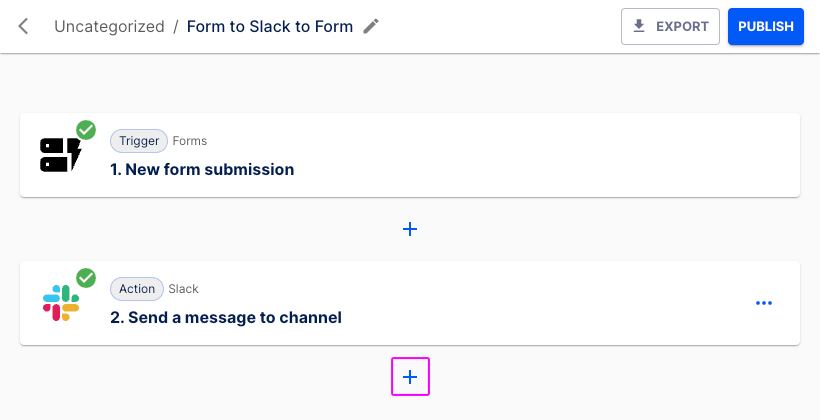
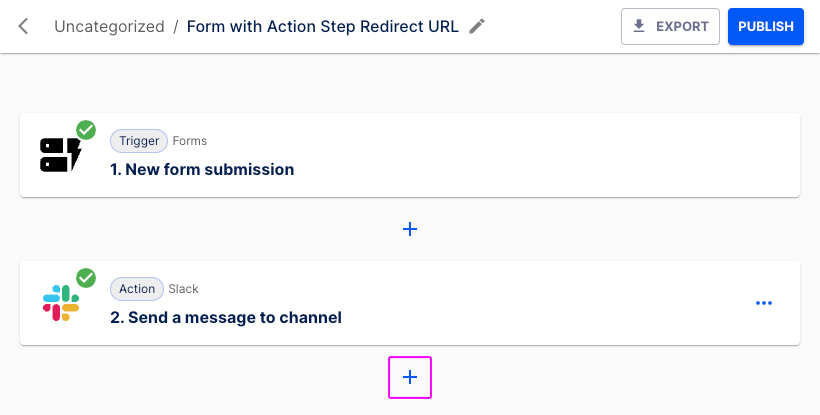
Select the + button underneath to insert the next Action step.
Let's configure the second Action step.
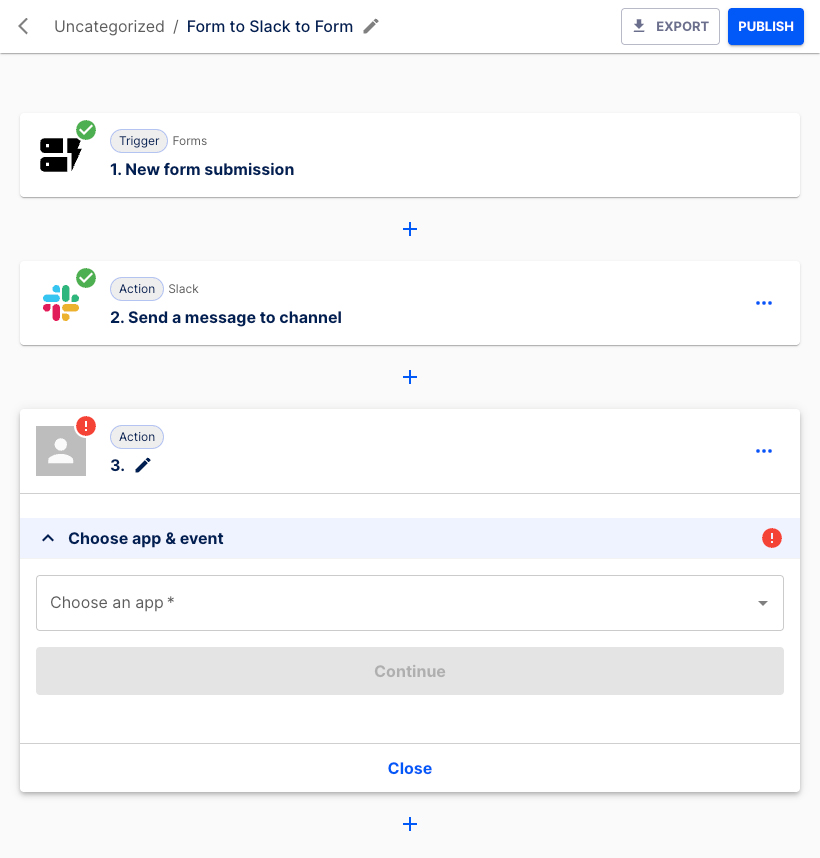
Choose Forms from the list.
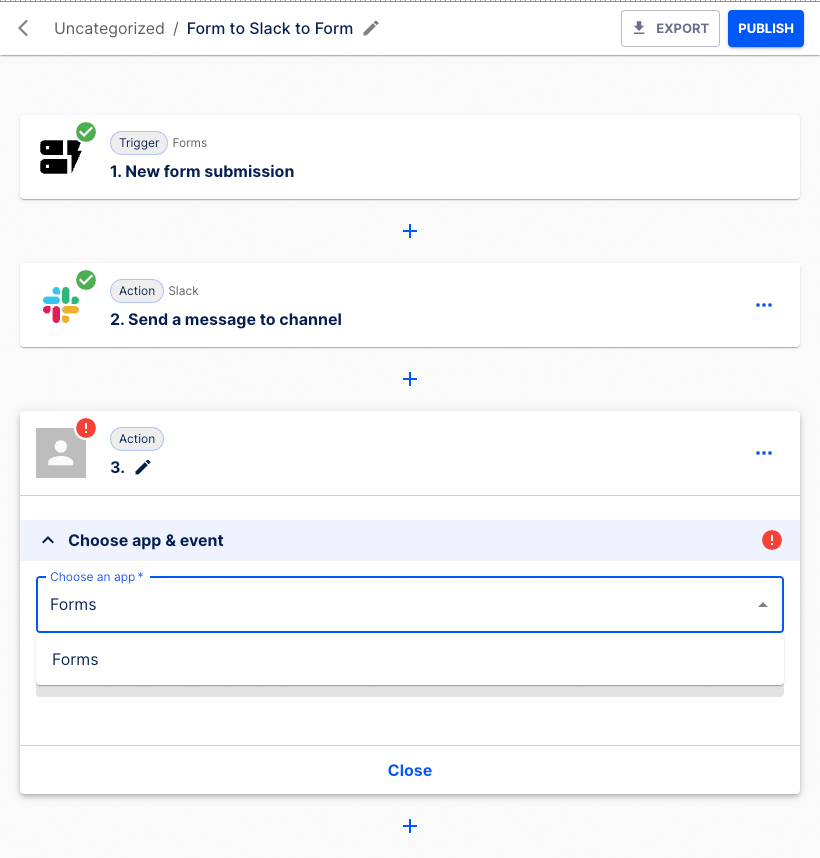
Select Respond with as the Action event.
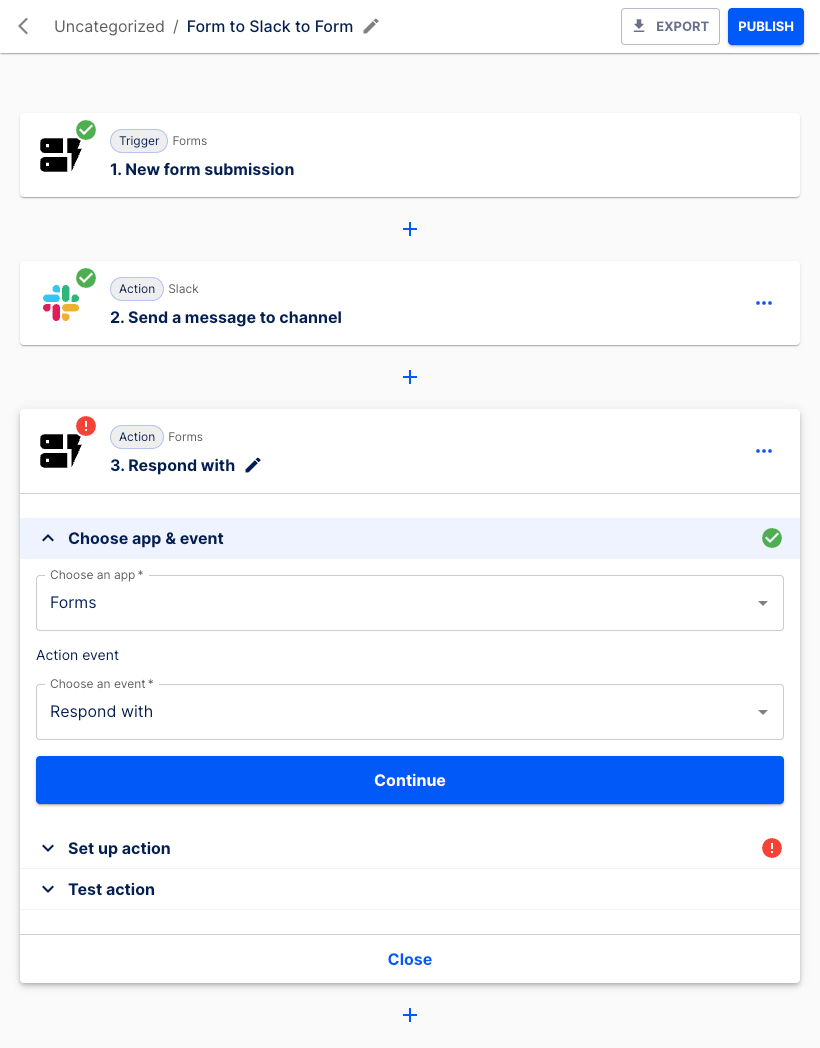
Click the Continue button.
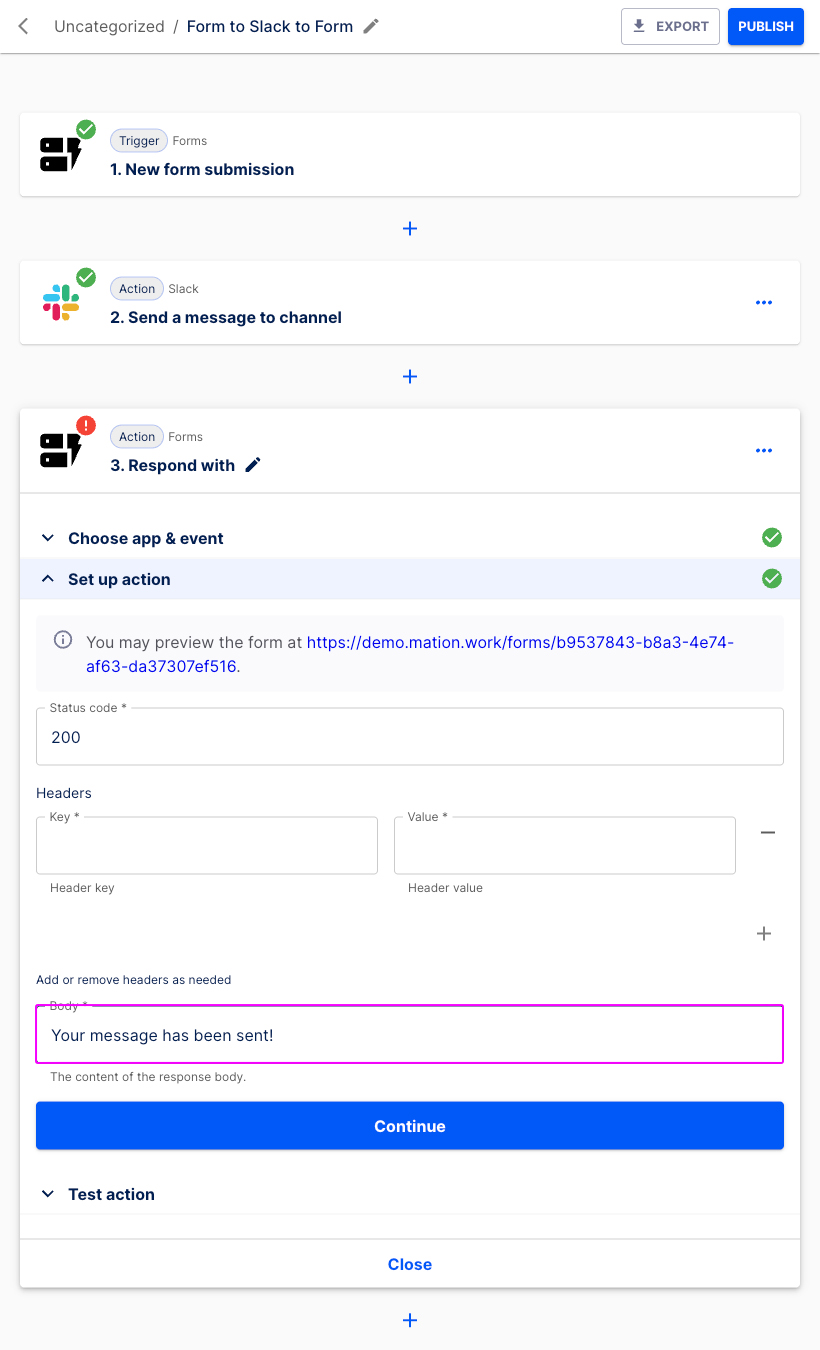
The Status code field is prefilled. Do not fill in the Key and Value fields.
INFO
An HTTP status code 200 means the request was successful, and the server has sent back the requested data. Learn more about Status Codes here.
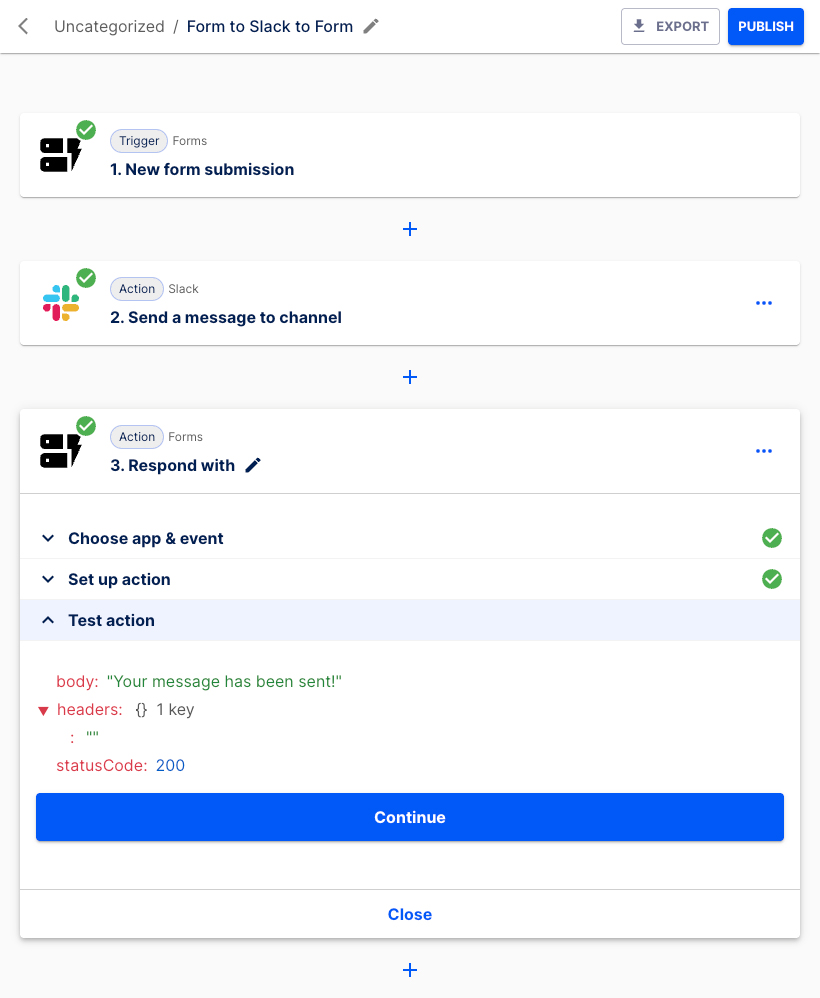
Enter your individual response message, e.g. "Your message has been sent!" in the Body field.
Click the Continue button.
Press the Test & Continue button.
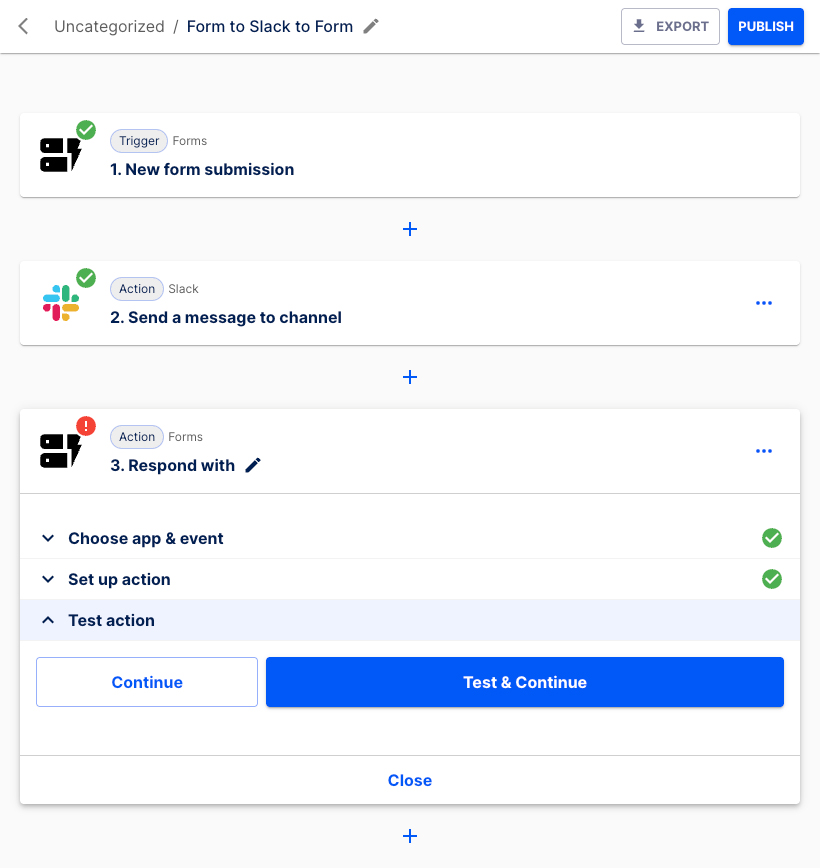
The Action has been tested successfully.
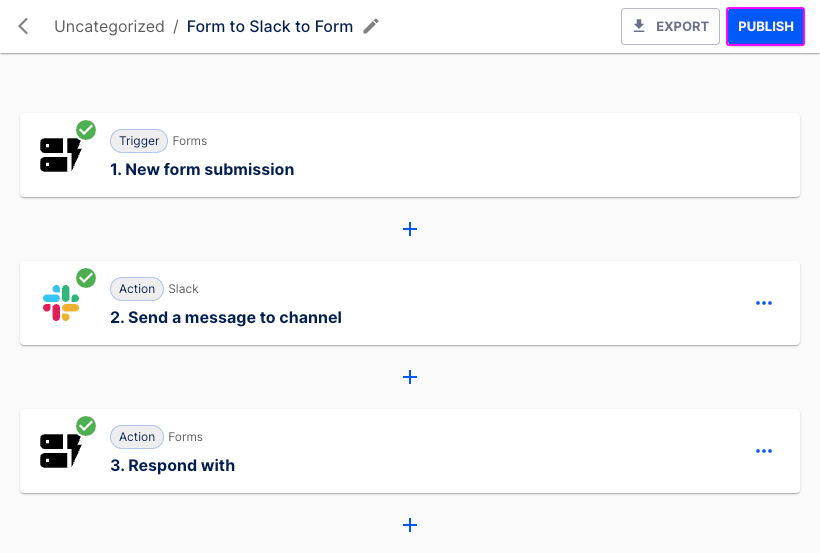
Click the Continue button.
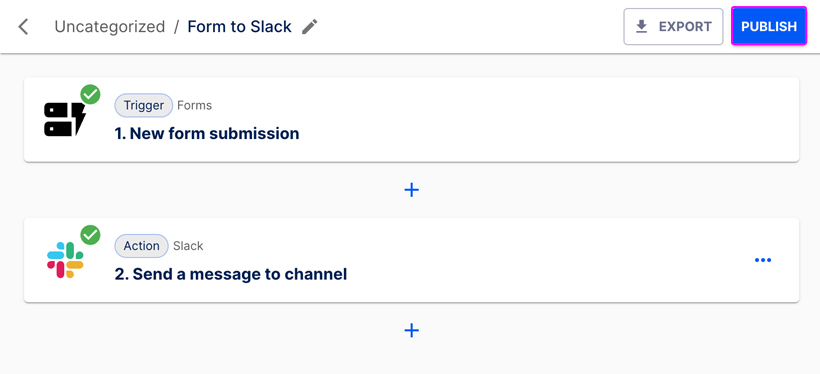
Hit the Publish button.
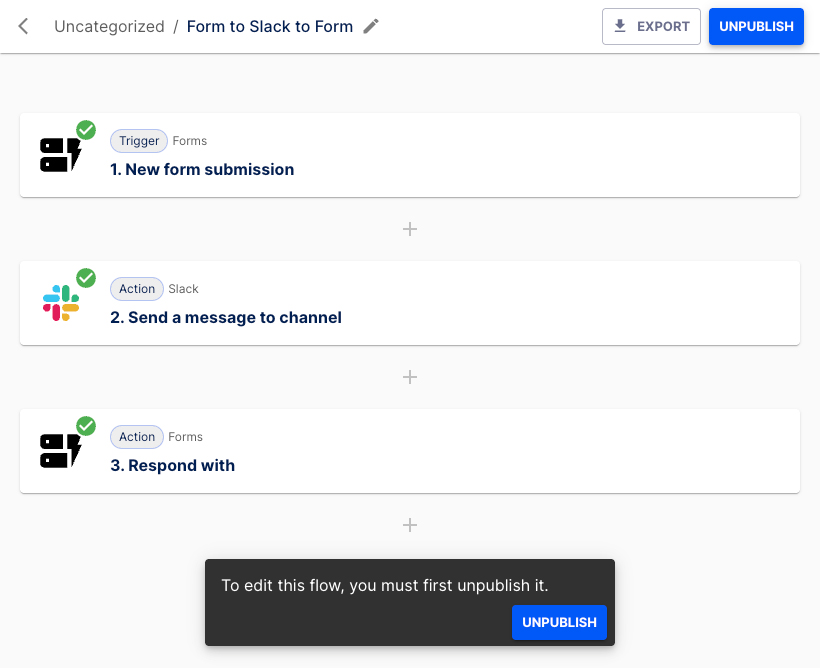
The flow has been published successfully.
Go back to the Trigger step and navigate to the Set up a trigger section. Click the link!
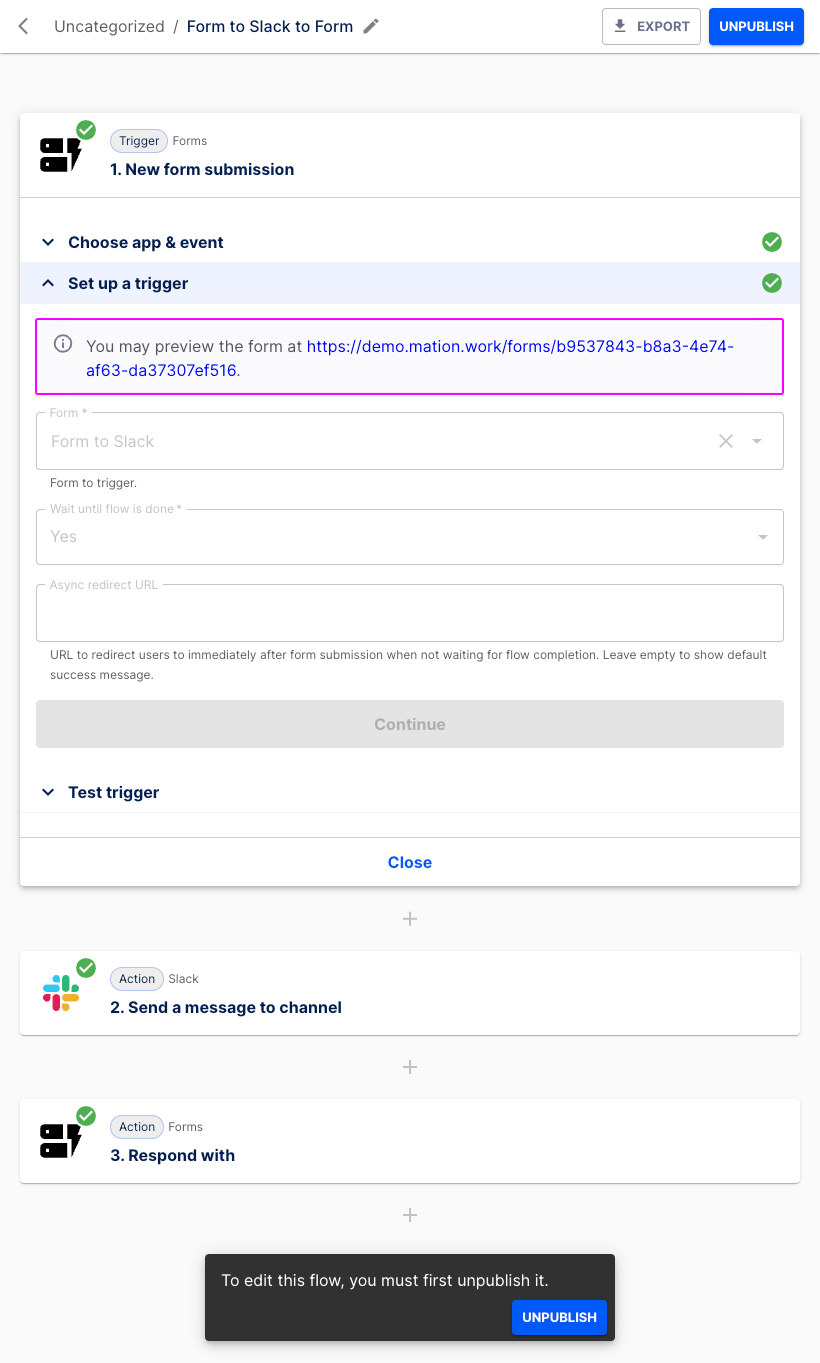
A new tab with the form opens.
Fill in the form fields, tick the checkbox and click the Register now button.

Your custom step-level response message is displayed below the form.
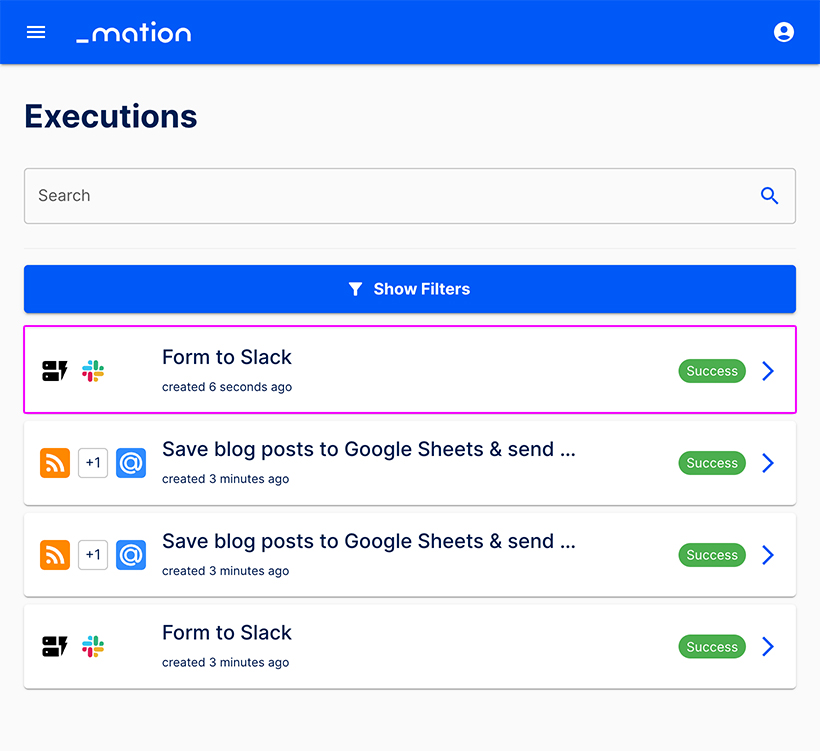
Navigate to Executions to check the flow`s performance.
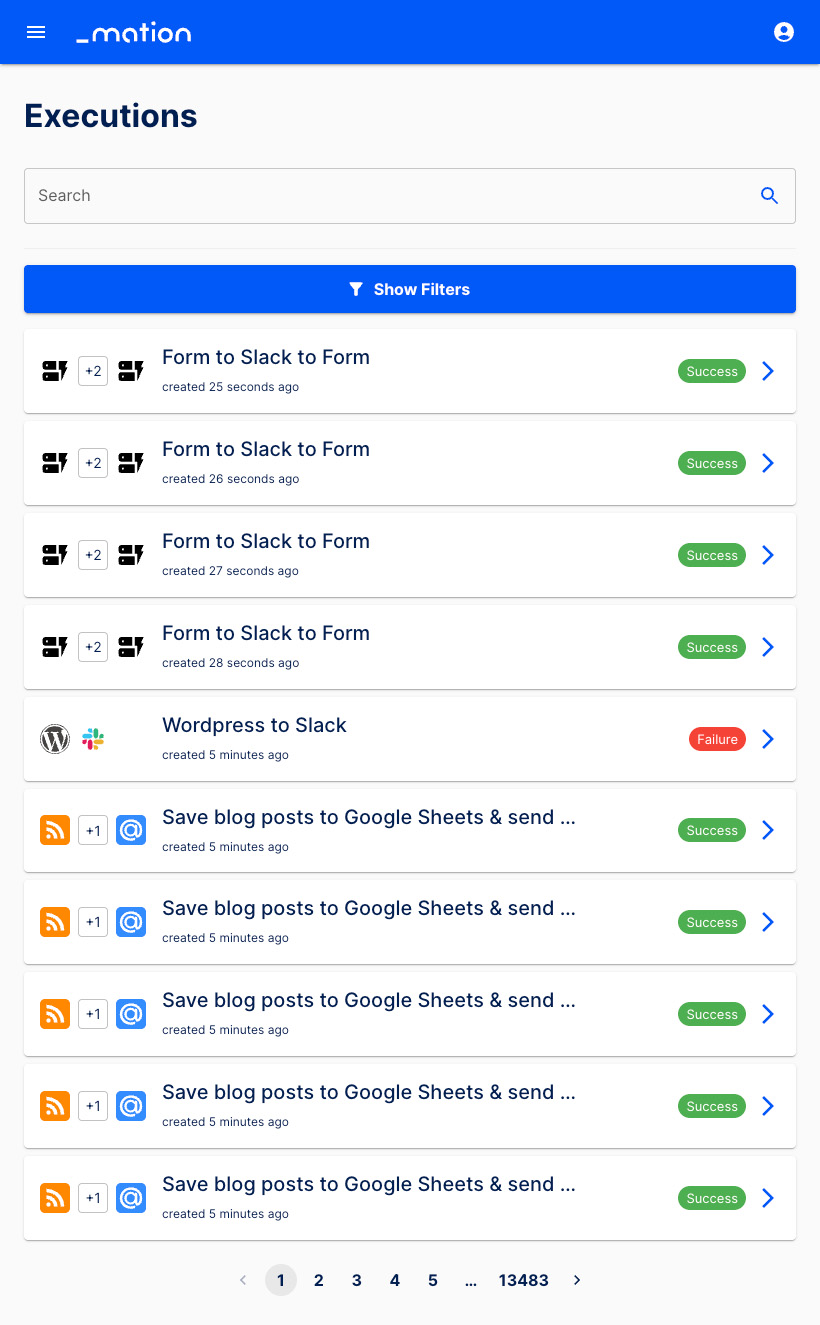
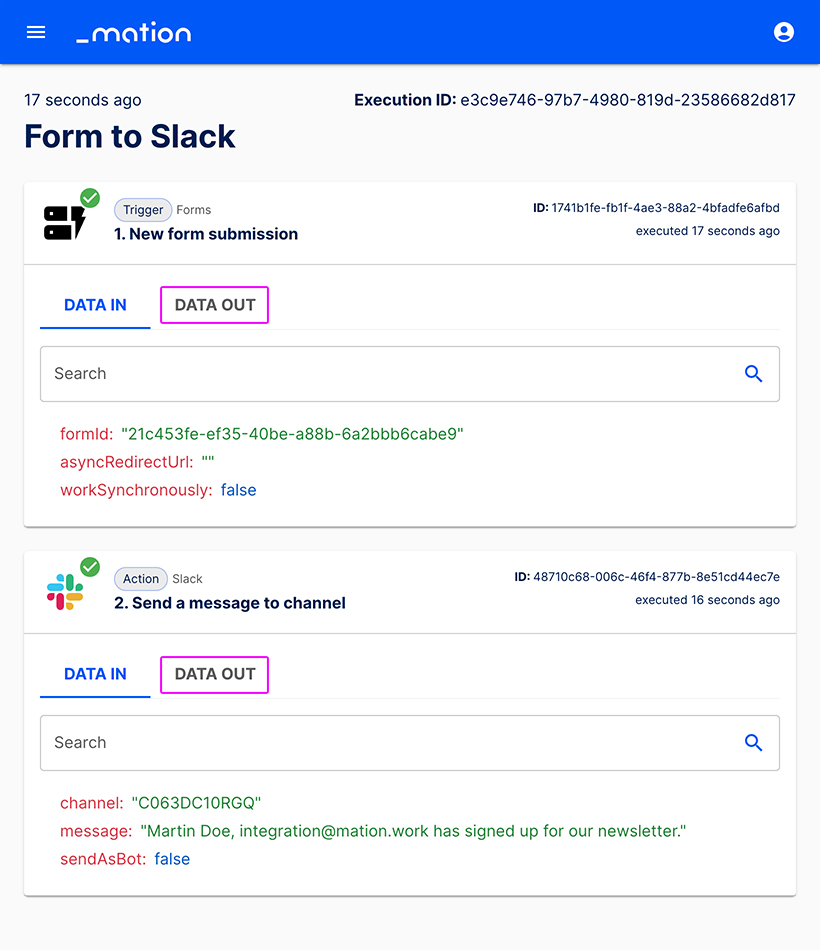
Click the DATA OUT buttons.
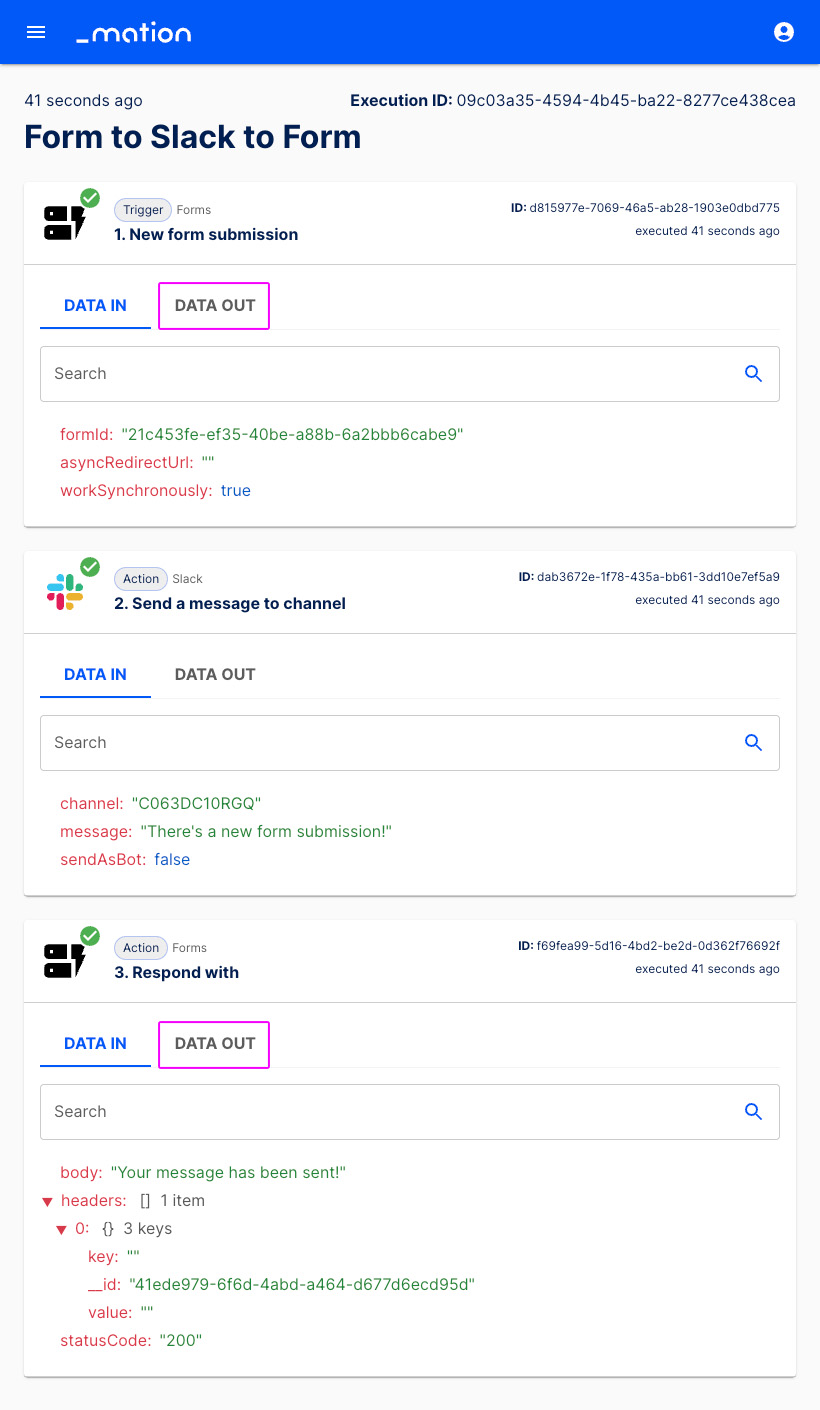
The form has responded with the custom step-level response message.
The new custom response message at step-level has been set up successfully. It will override the response messages at form-level and system default.
Redirect URLs
Redirect URLs let you forward users to a specific destination after form submission. There are two ways to set up Redirect URLs in a flow. Either in the Trigger step, or in a later Action step.
Redirect URL in the Trigger step
Prerequisites
This guide assumes you have a Slack account and a channel configured to receive data. A basic newsletter form named Form to Slack with two required text fields and a checkbox has already been set up.
Navigate to Flows and click the + Create flow button.
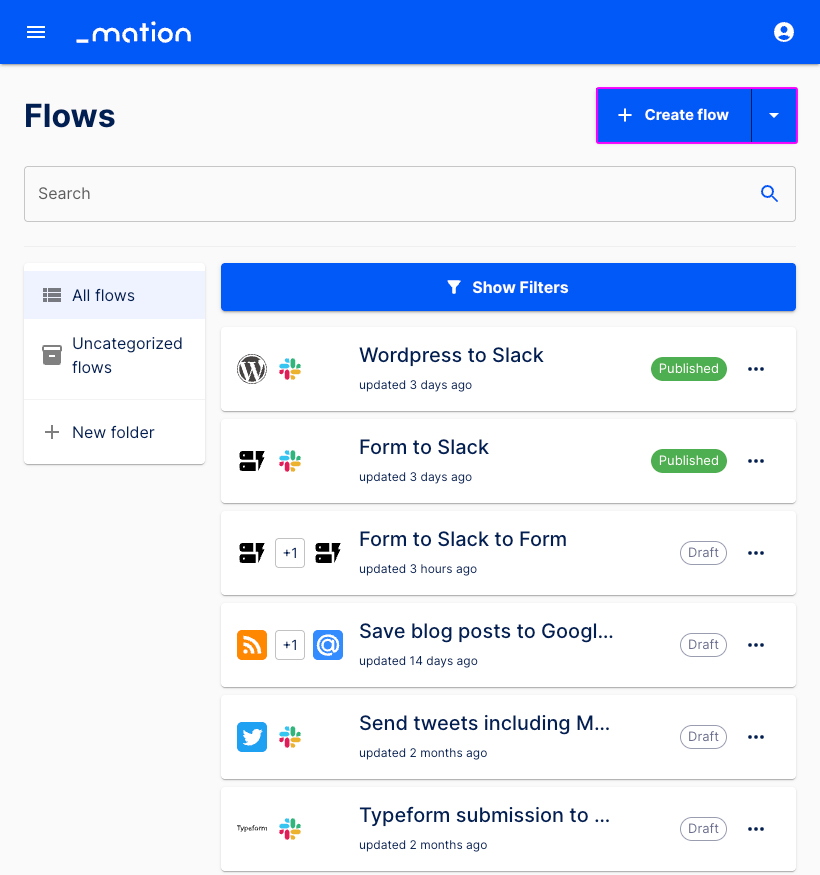
Enter a name, e.g. "Form with Redirect URL".
Let's configure the Trigger step. In the Choose app & event section select Forms from the list.
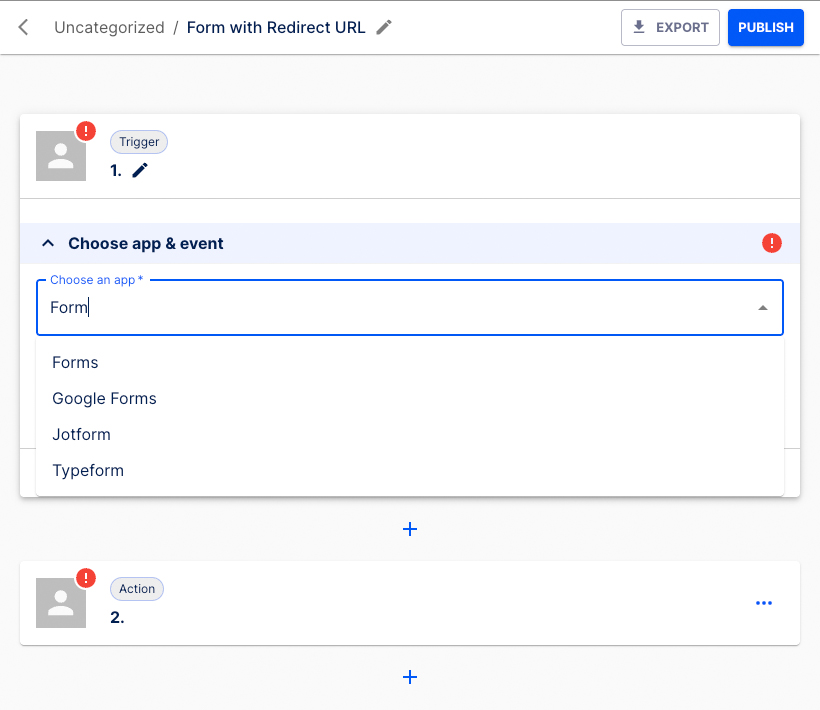
Select New form submission as the Trigger event.

Click the Continue button.
The Set up a trigger section opens.
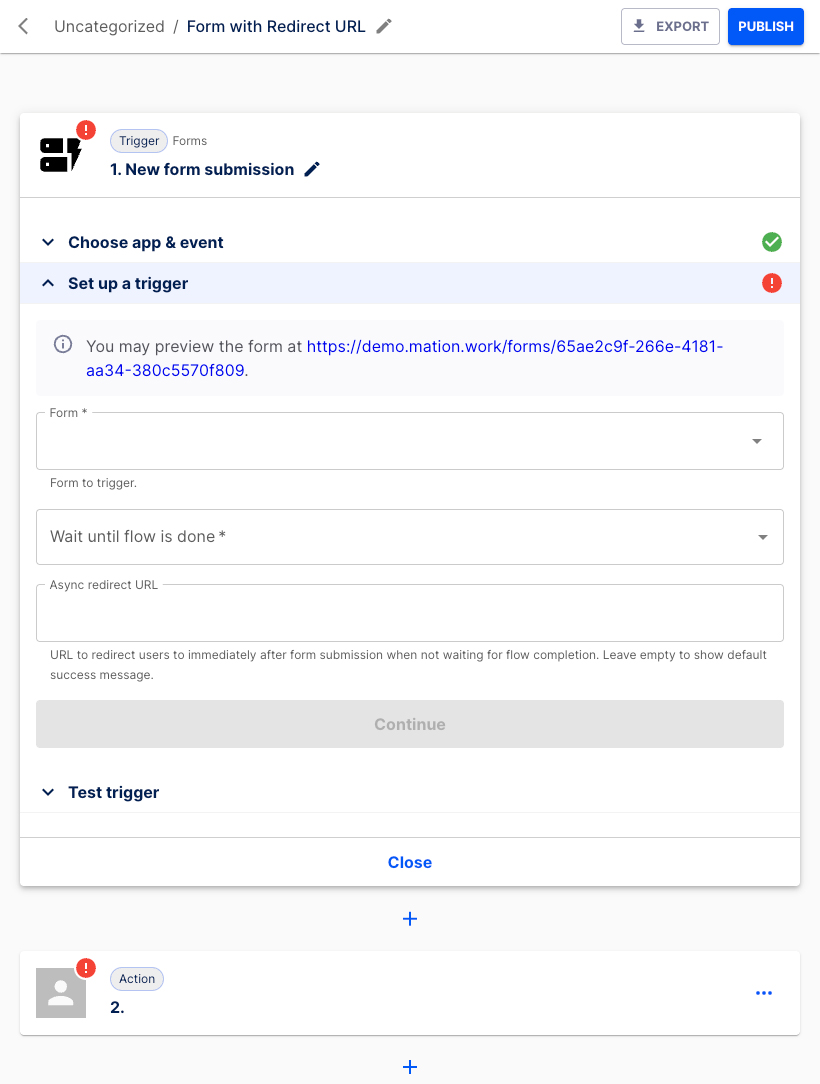
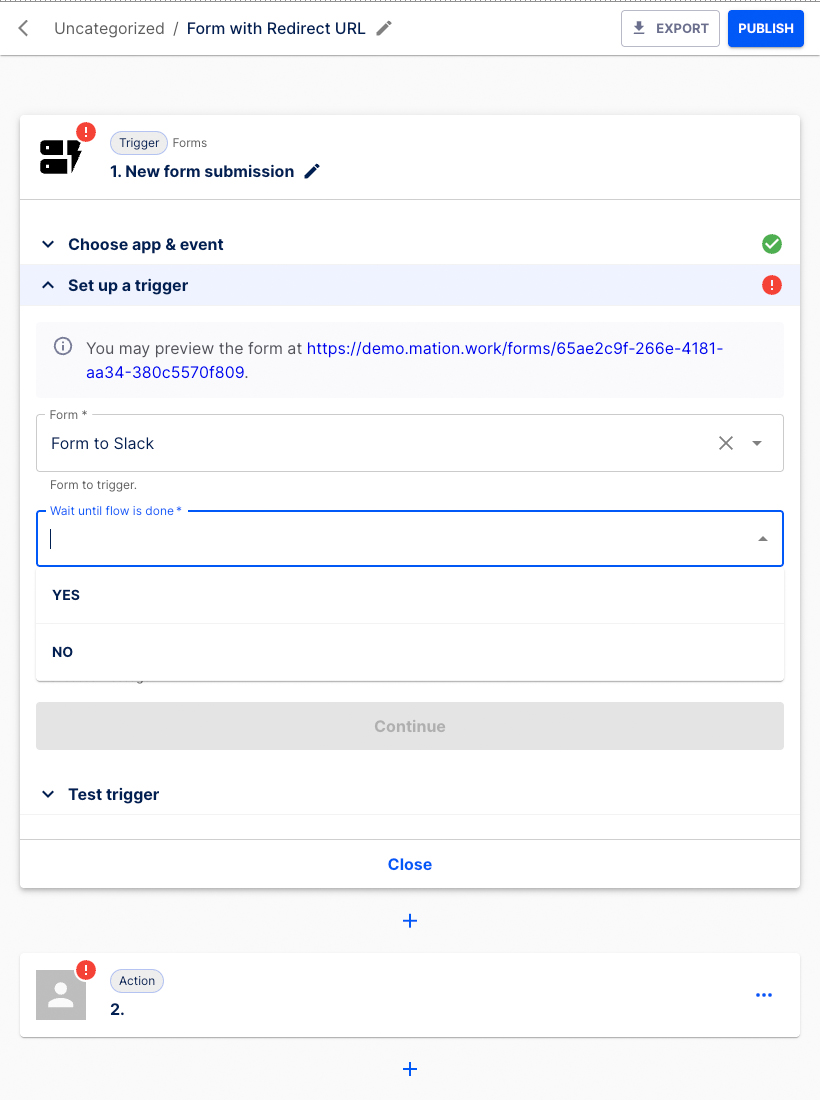
Select the form. Choose Form to Slack from the list.

Choose Yes in the Wait until flow is done field.
WARNING
In the Set up a trigger section, you must select Yes in the Wait until flow is done field. Otherwise your Redirect URL will not work!
Enter the Redirect URL.
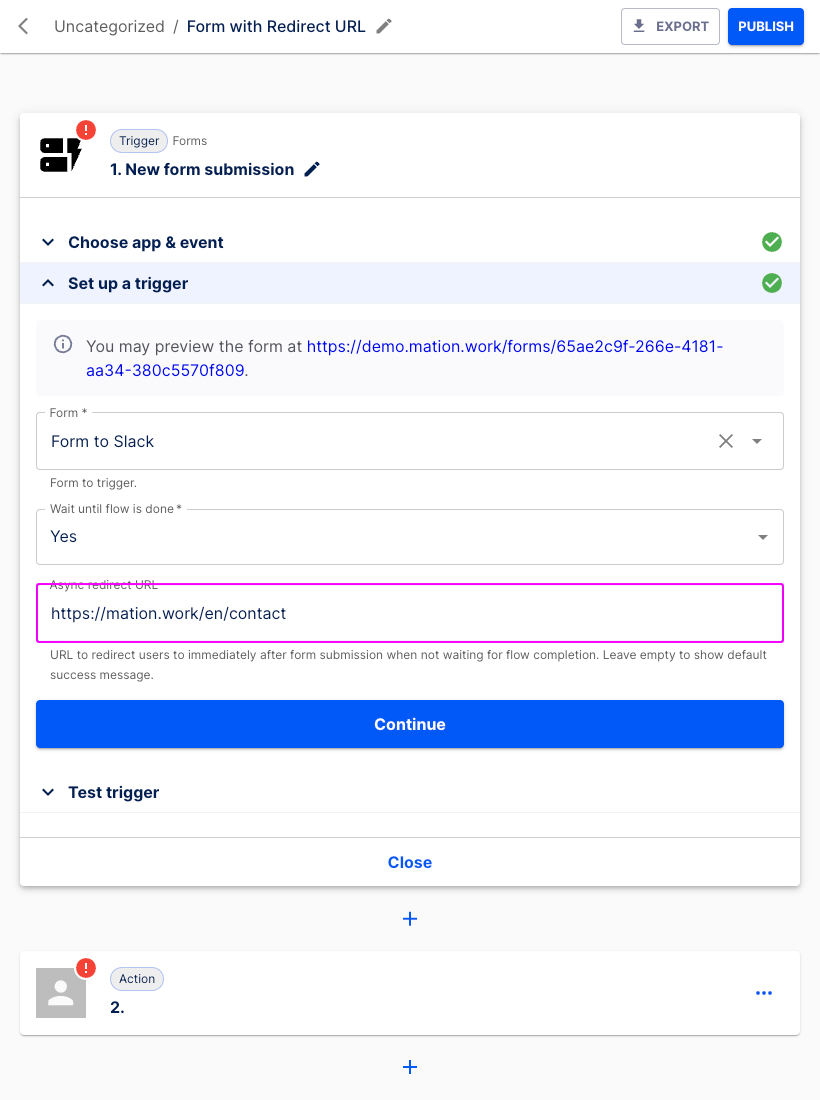
Press the Continue button.
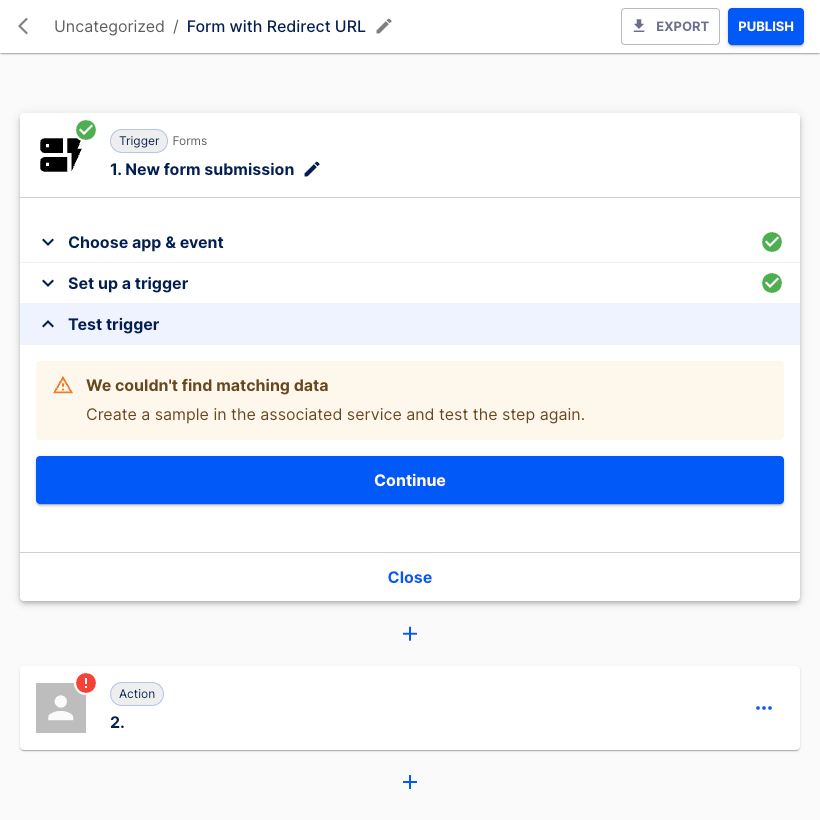
In the Test trigger section hit the Test & Continue button.

Click the Continue button.
INFO
Do not worry about the error message. The new form hasn't submitted any data yet. We`ll address this shortly.
Let's configure the Action step.
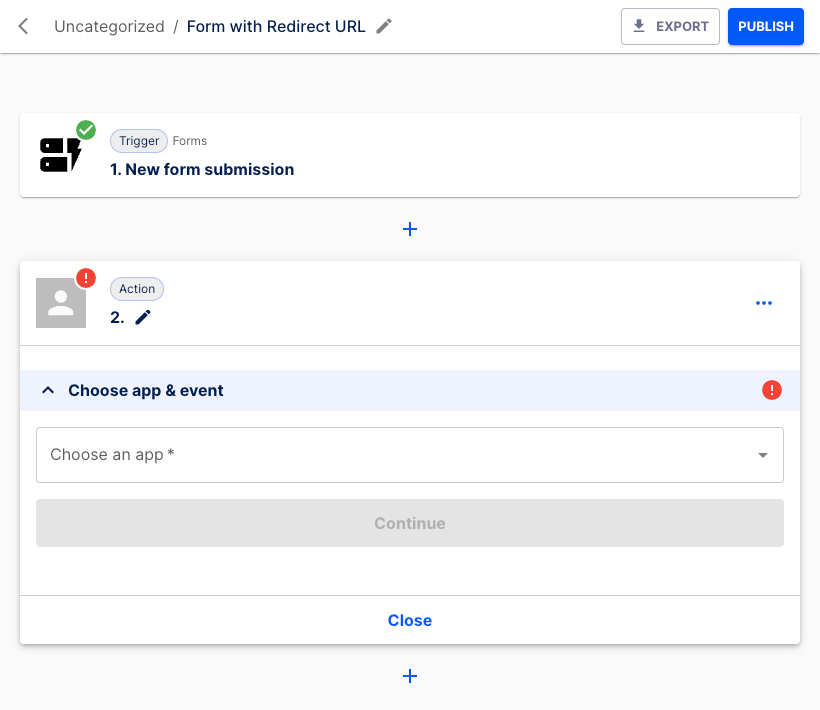
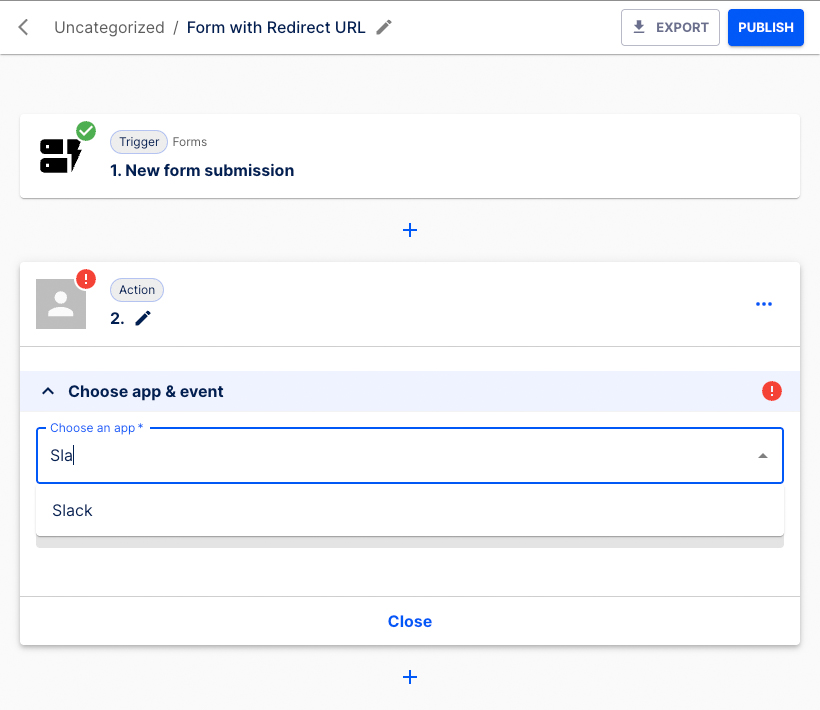
In the Choose app & event section select Slack from the list.
Choose Send a message to a channel as the Action event.

Press the Continue button.
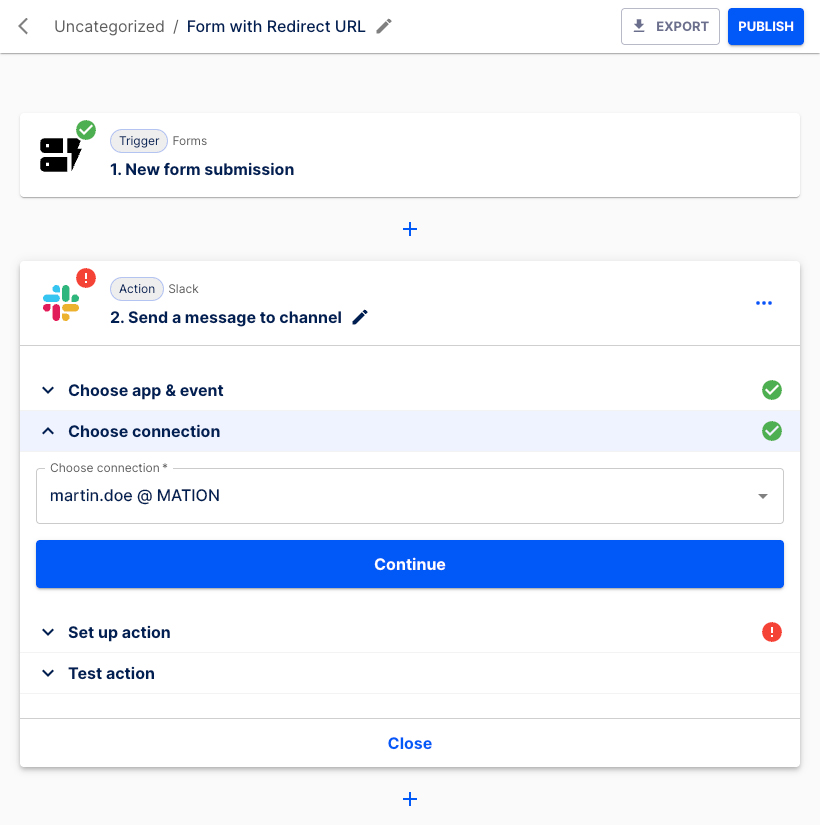
Select the connection, then click the Continue button.
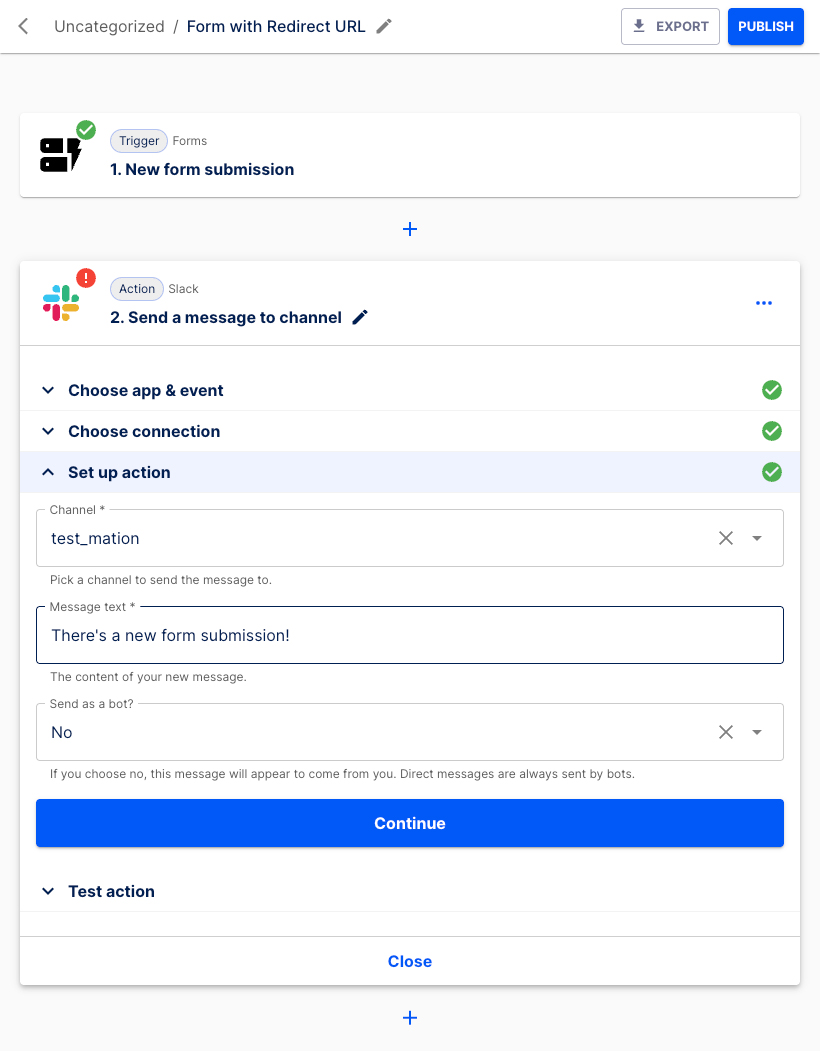
Choose the Slack channel from the list in the Set up action section. Enter a text message to be displayed in Slack, e.g. "There's a new form submission!". Select to either Send as a bot or not.
Click the Continue button.
Press the Test & Continue button.

The Action step has been set up successfully.
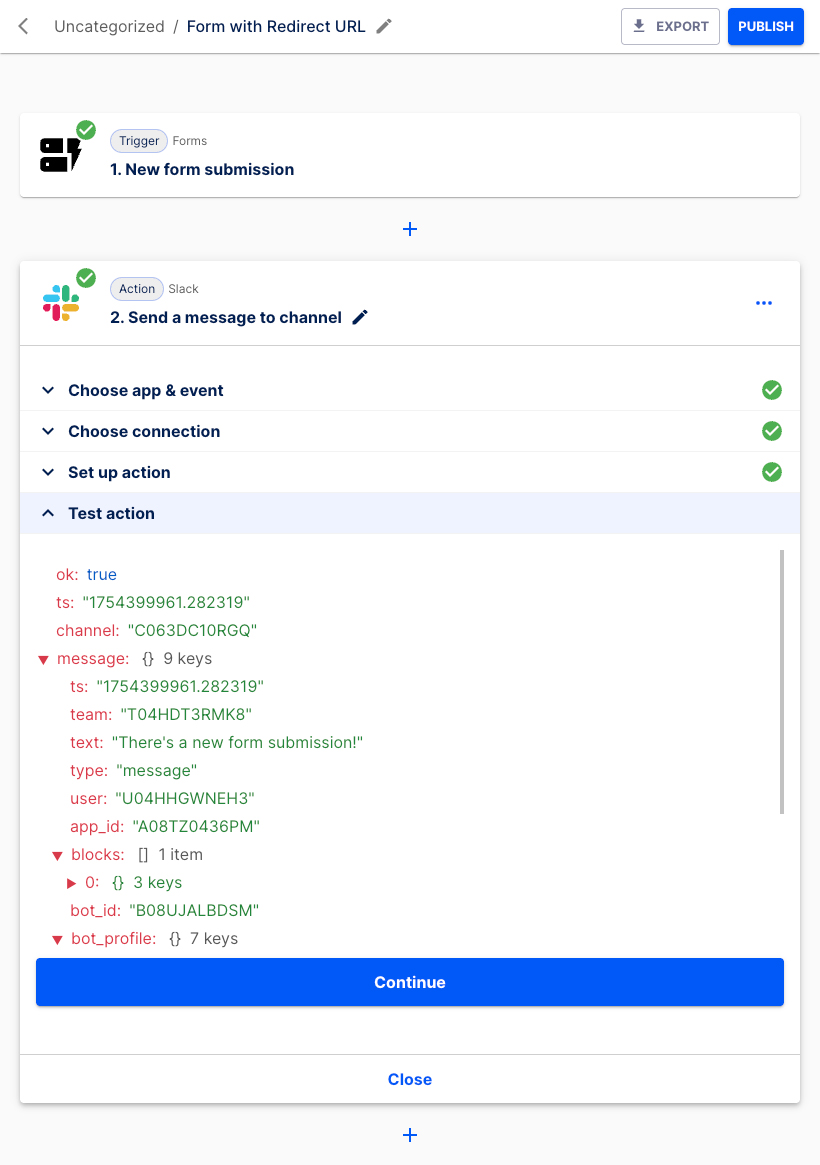
Click the Continue button.
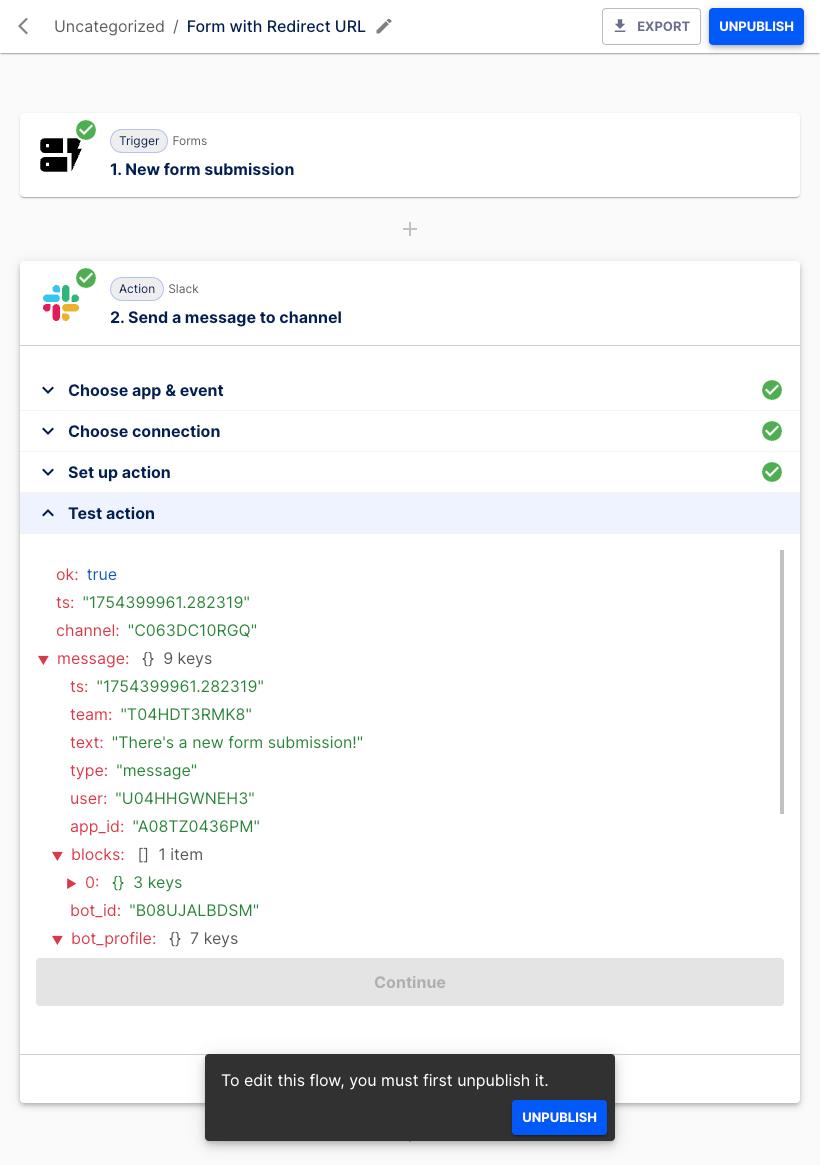
Hit the Publish button.
The flow has been published successfully.
Go back to the Trigger step and navigate to the Set up a trigger section. Click the link!
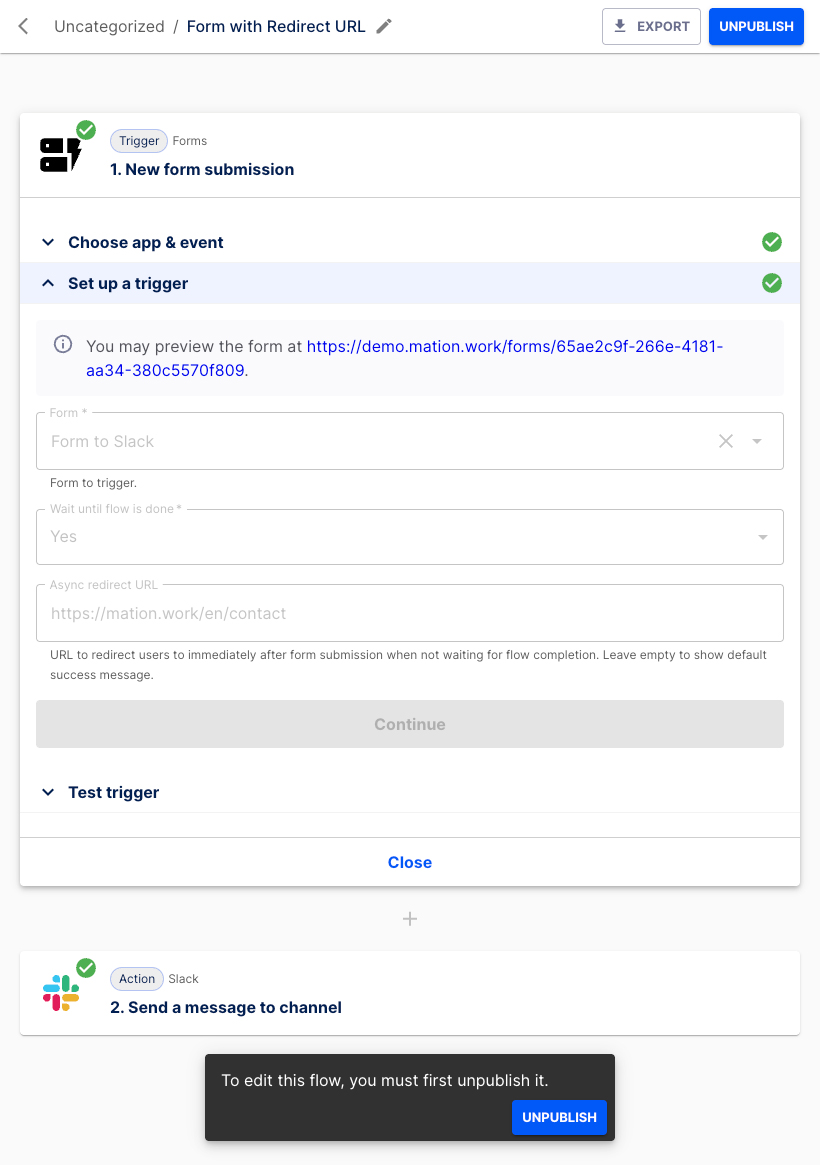
A new tab with the form opens.
Fill in the form fields, tick the checkbox and click the Register now button.
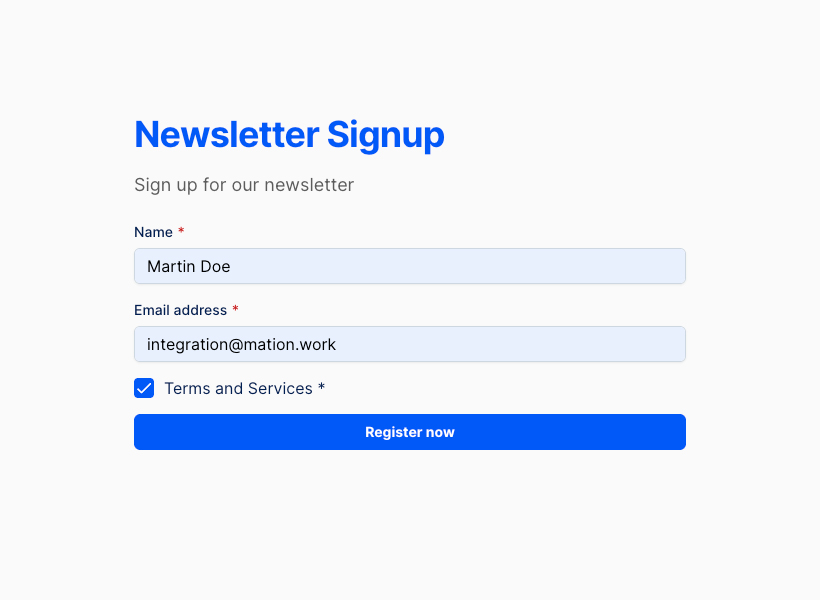
You've been redirected to the configured Redirect URL.

Redirect URL in the Action step
Prerequisites
This guide assumes you have a Slack account and a channel configured to receive data. A basic newsletter form named Form to Slack with two required text fields and a checkbox has already been set up.
Navigate to Flows and click the + Create flow button.
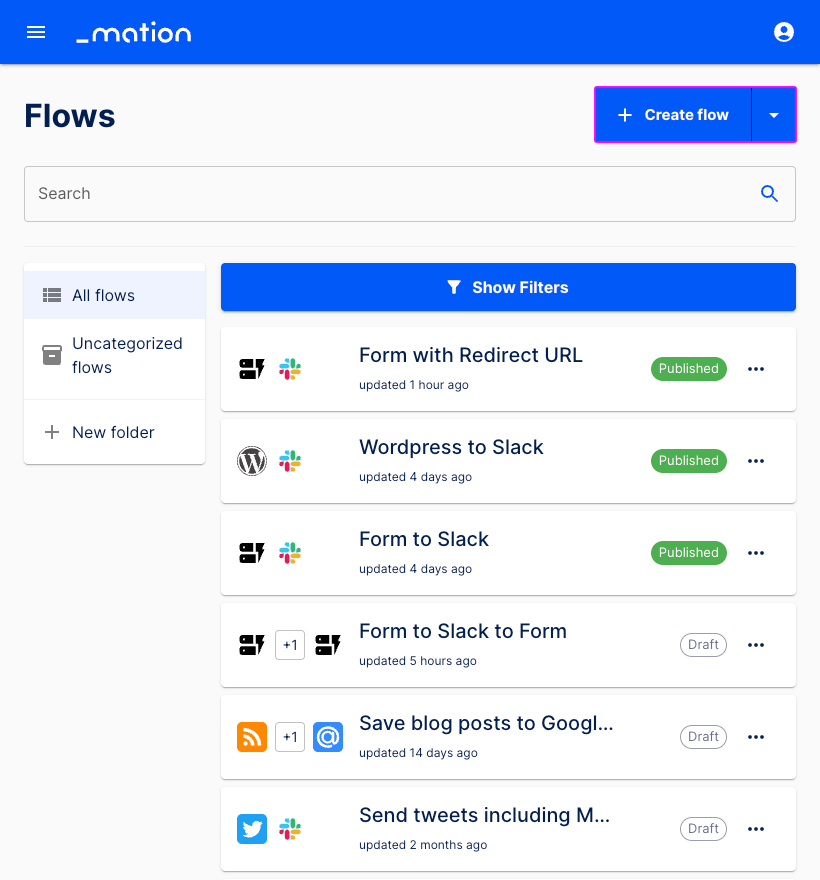
Enter a name, e.g. "Form with Action Step Redirect URL".
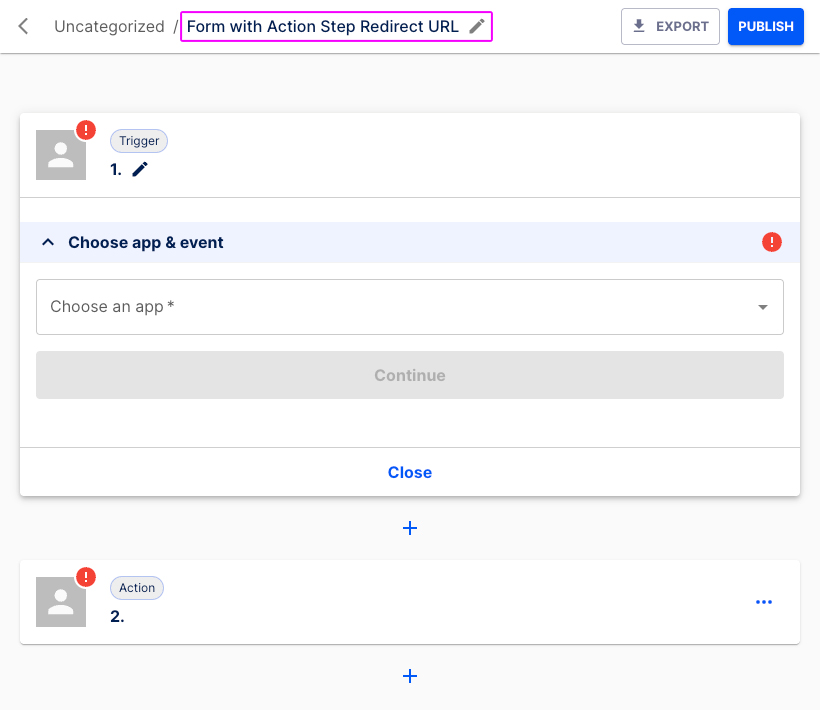
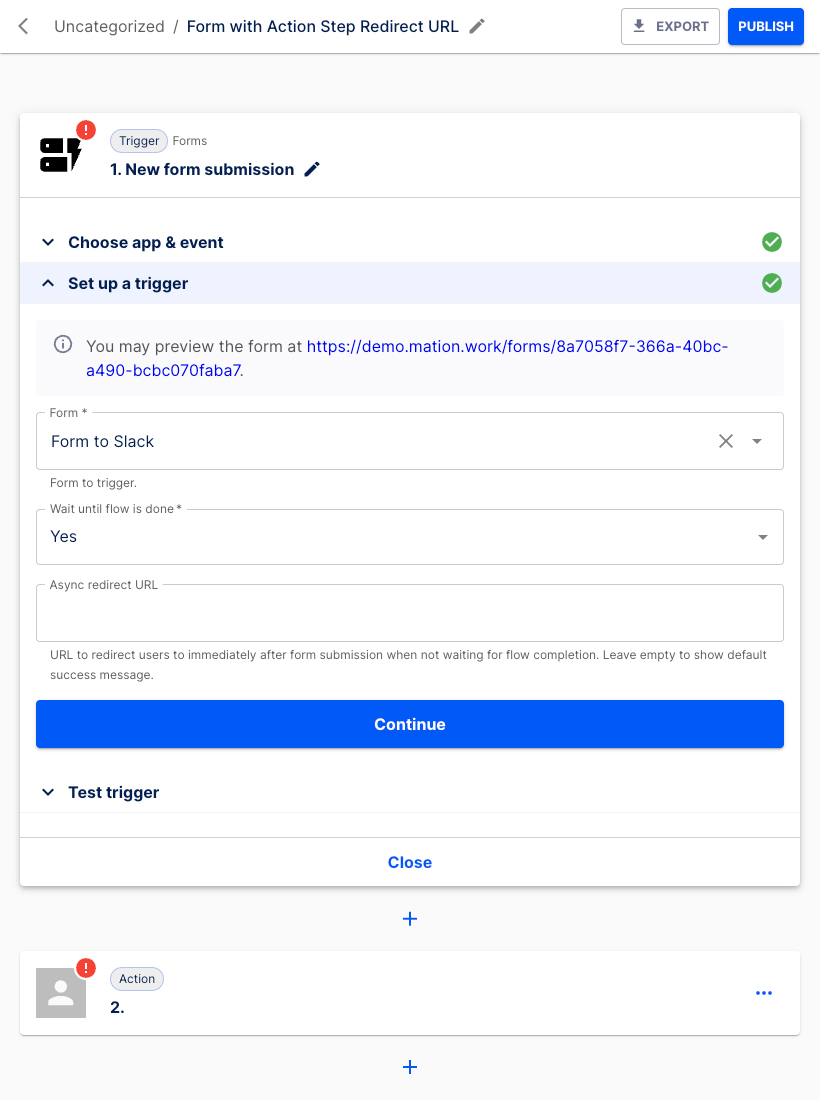
Let's configure the Trigger step. In the Choose app & event section select Forms from the list.
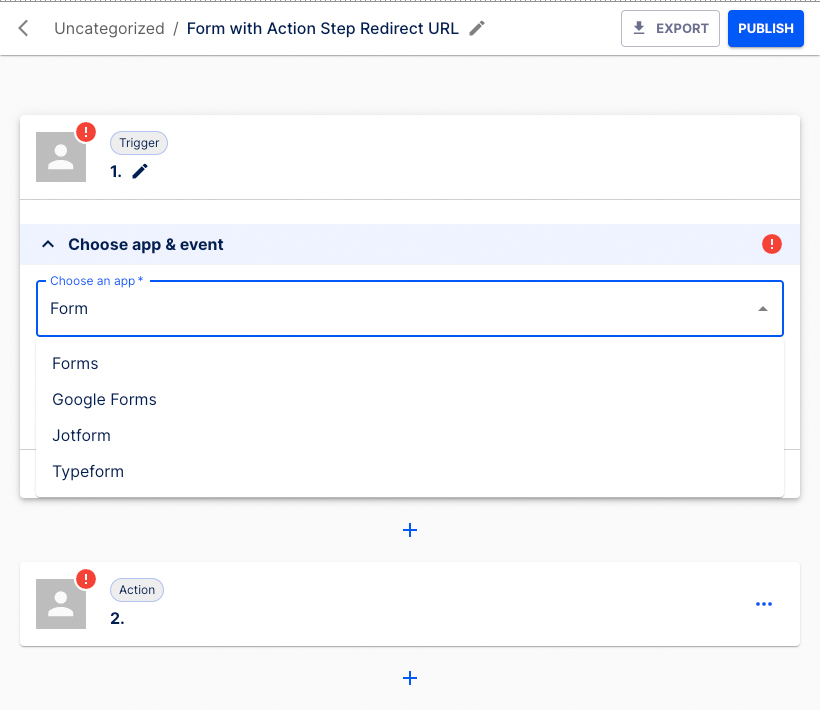
Select New form submission as the Trigger event.
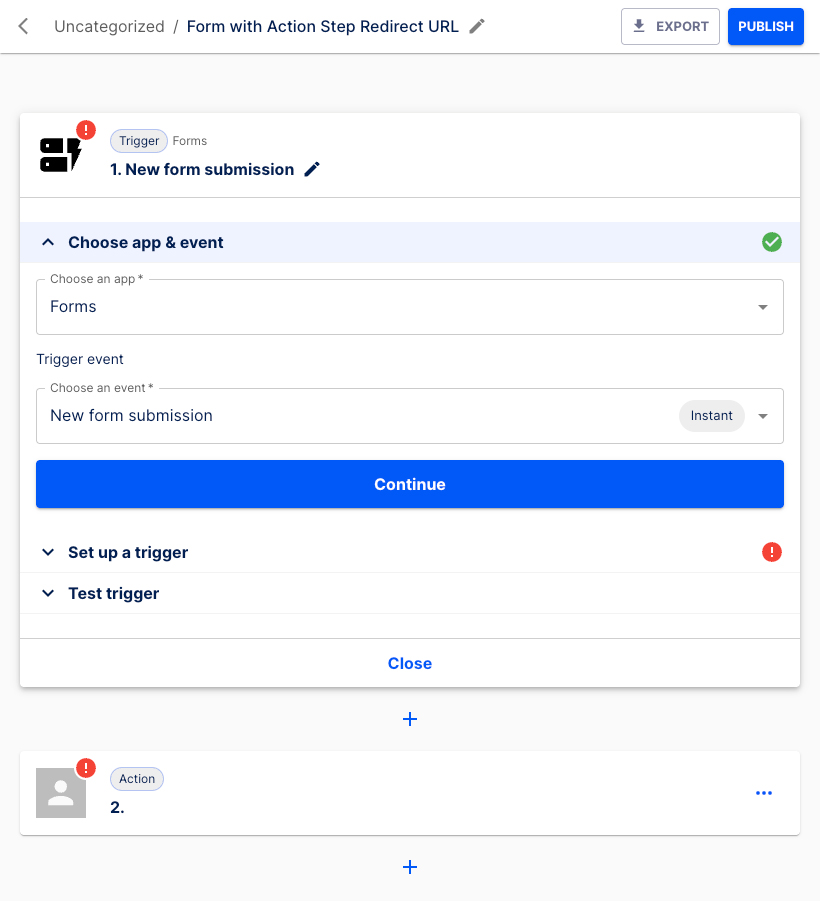
Click the Continue button.
The Set up a trigger section opens.
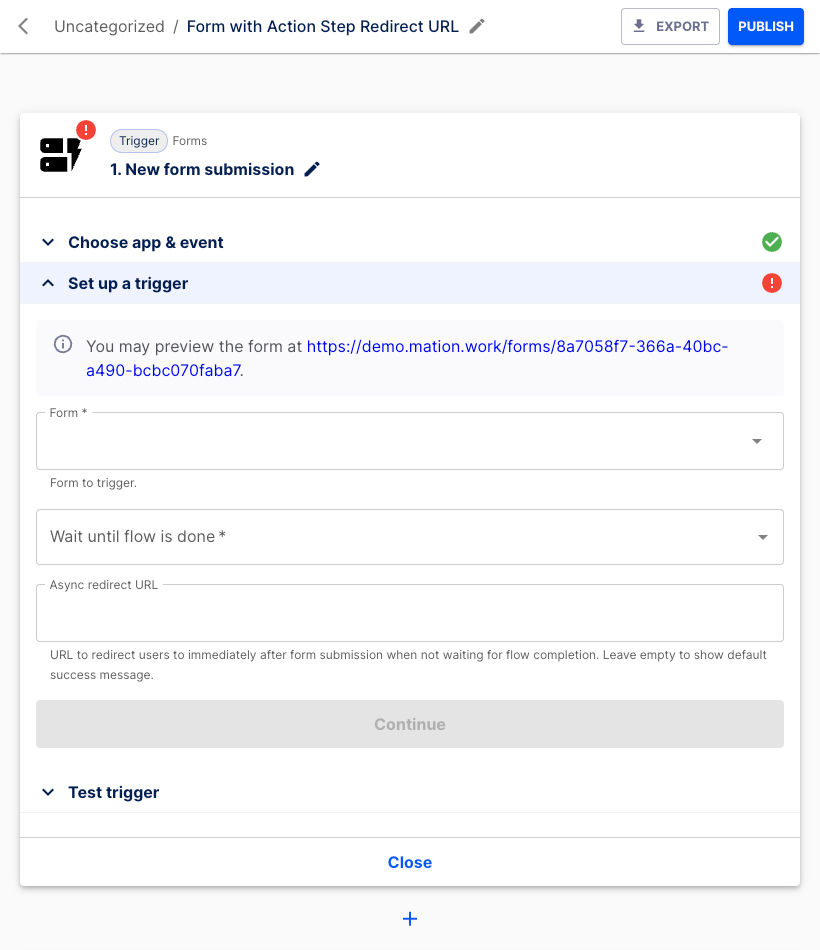
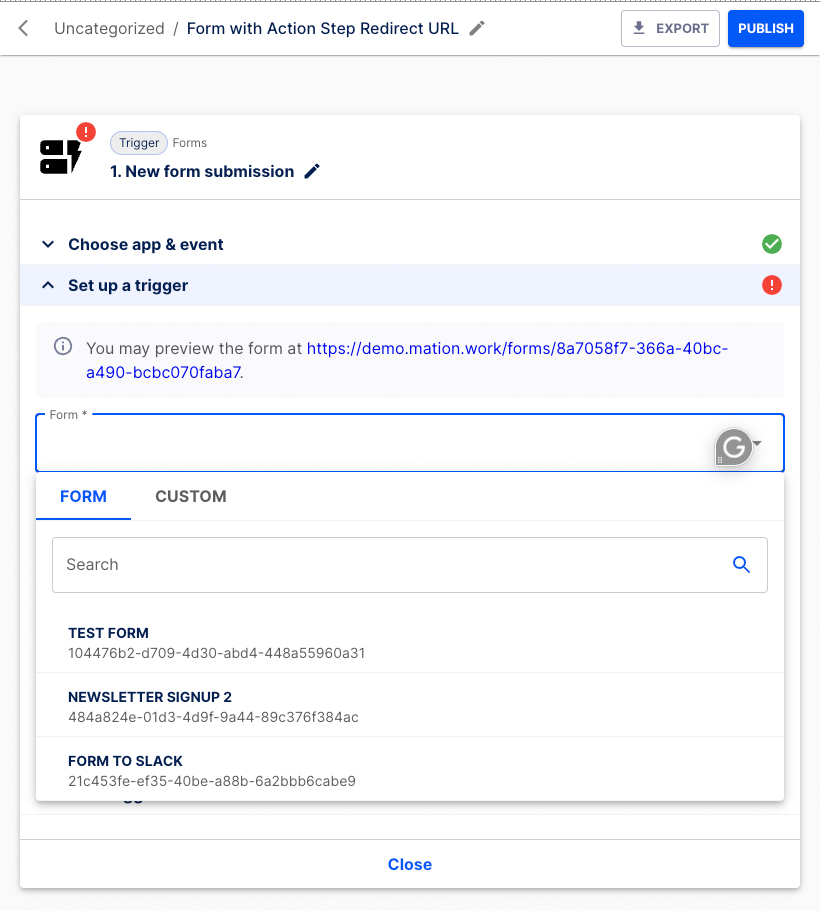
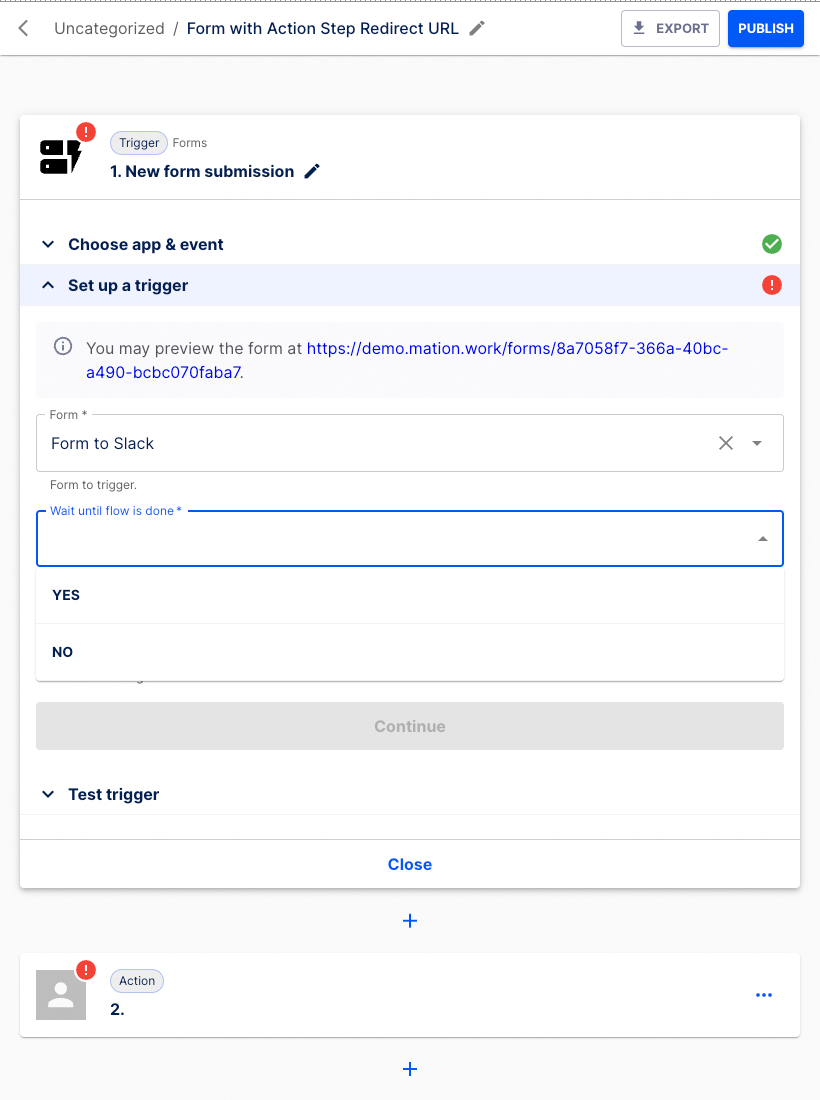
Select the form. Choose Form to Slack from the list.
Choose Yes in the Wait until flow is done field.
WARNING
In the Set up a trigger section, you must select Yes in the Wait until flow is done field. Otherwise your Action step Redirect URL will not work!
Press the Continue button.
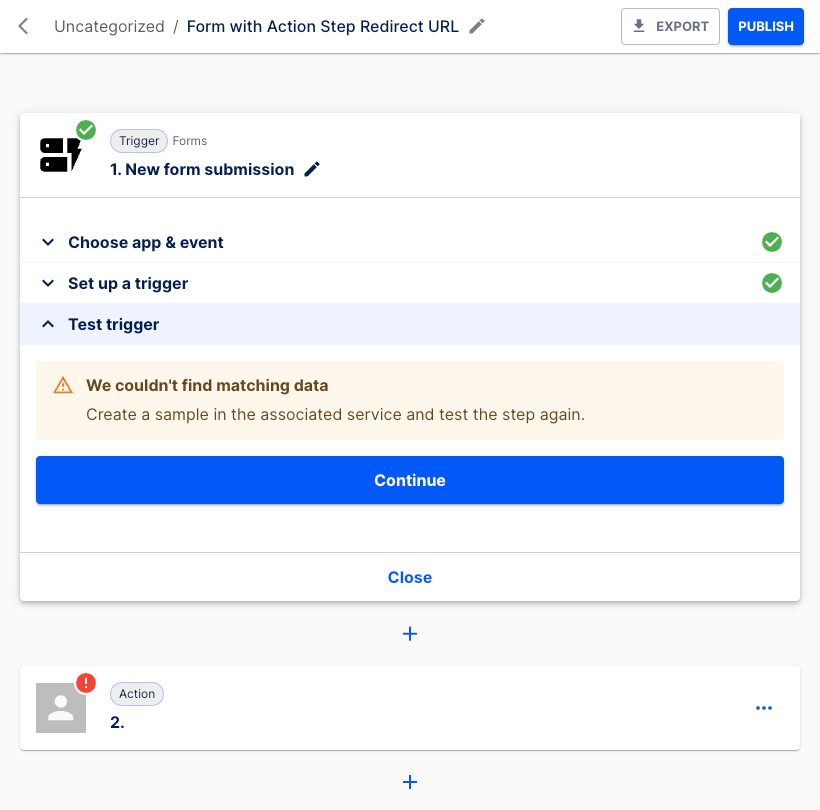
In the Test trigger section hit the Test & Continue button.
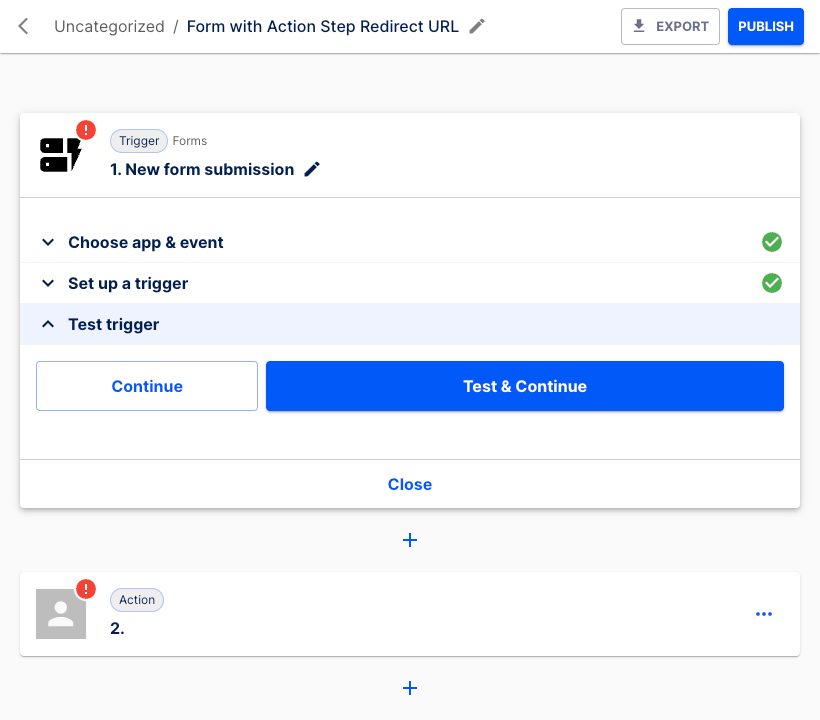
Click the Continue button.
INFO
Do not worry about the error message. The new form hasn't submitted any data yet. We`ll address this shortly.
Let's configure the first Action step.

In the Choose app & event section select Slack from the list.
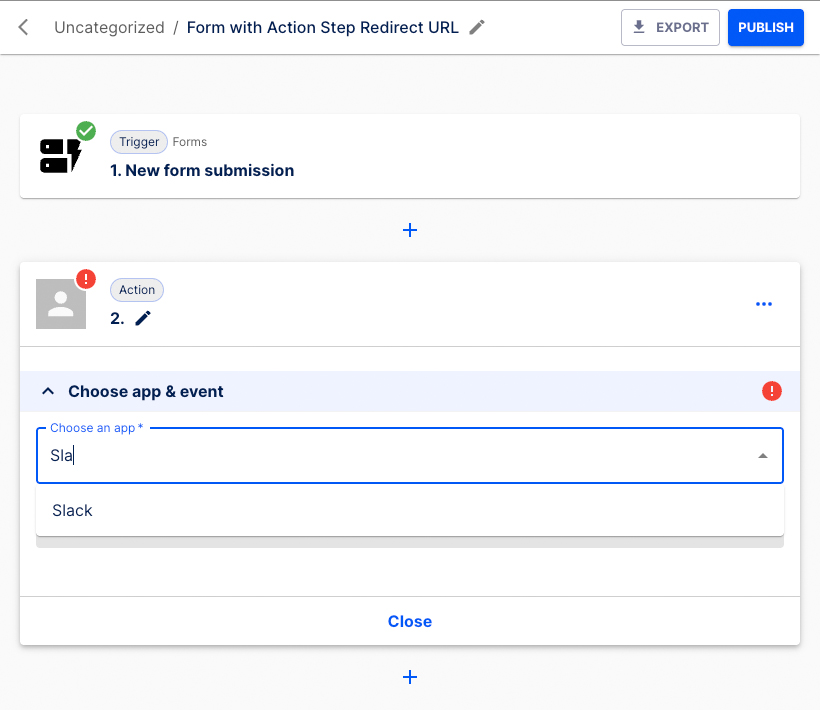
Choose Send a message to a channel as the Action event.
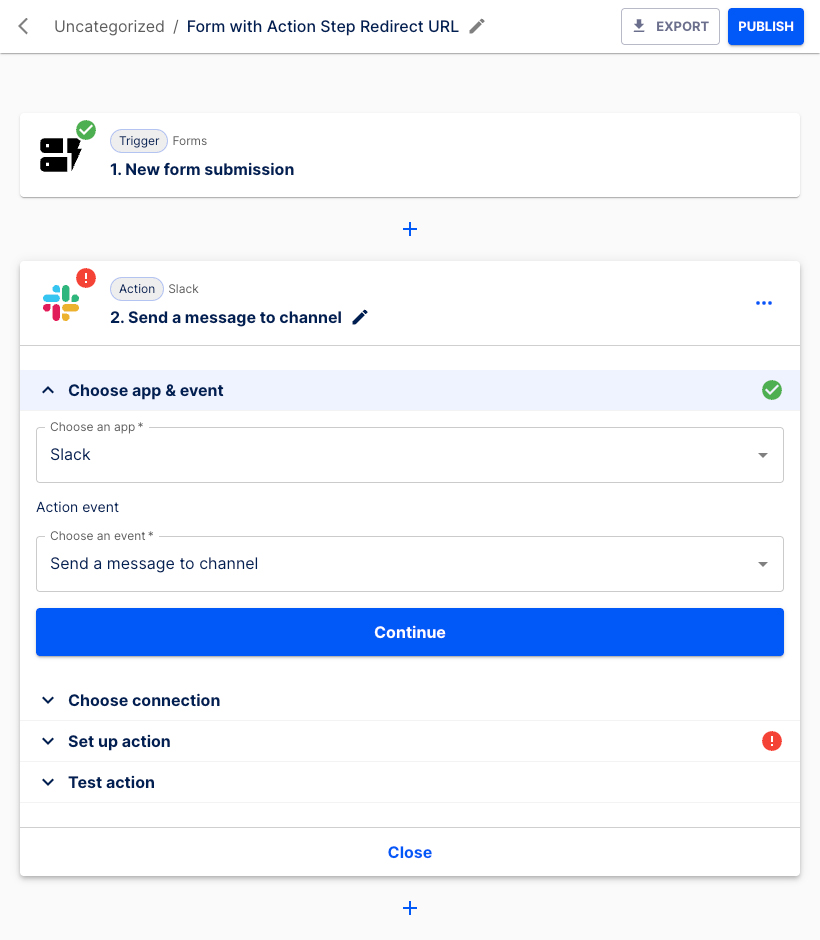
Press the Continue button.
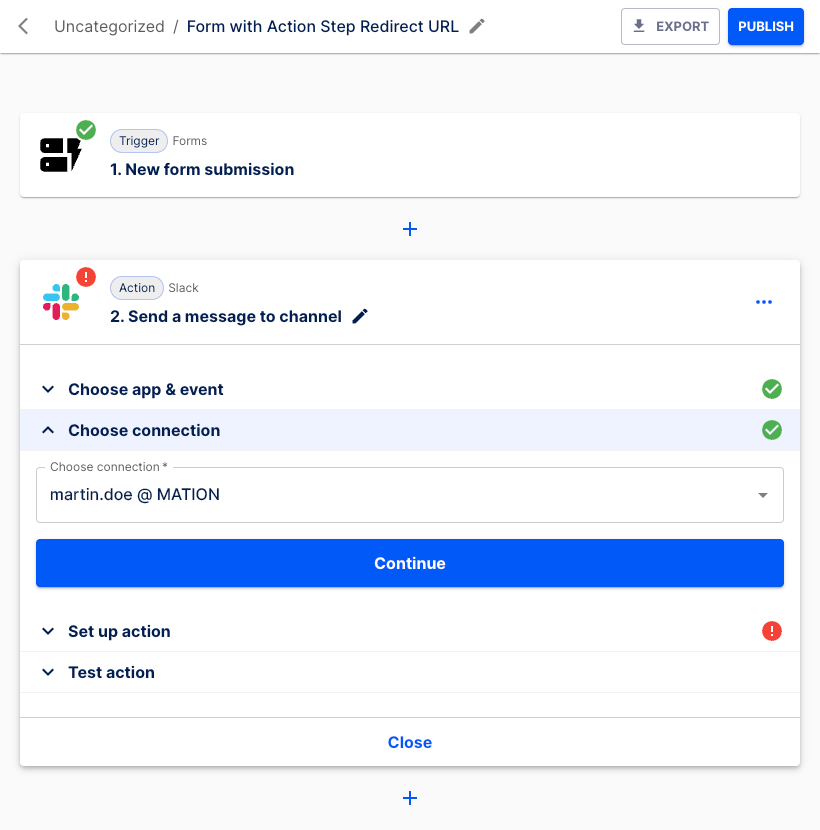
Select the connection, then click the Continue button.
Choose the Slack channel from the list in the Set up action section. Enter a text message to be displayed in Slack, e.g. "There's a new form submission!". Select to either Send as a bot or not.
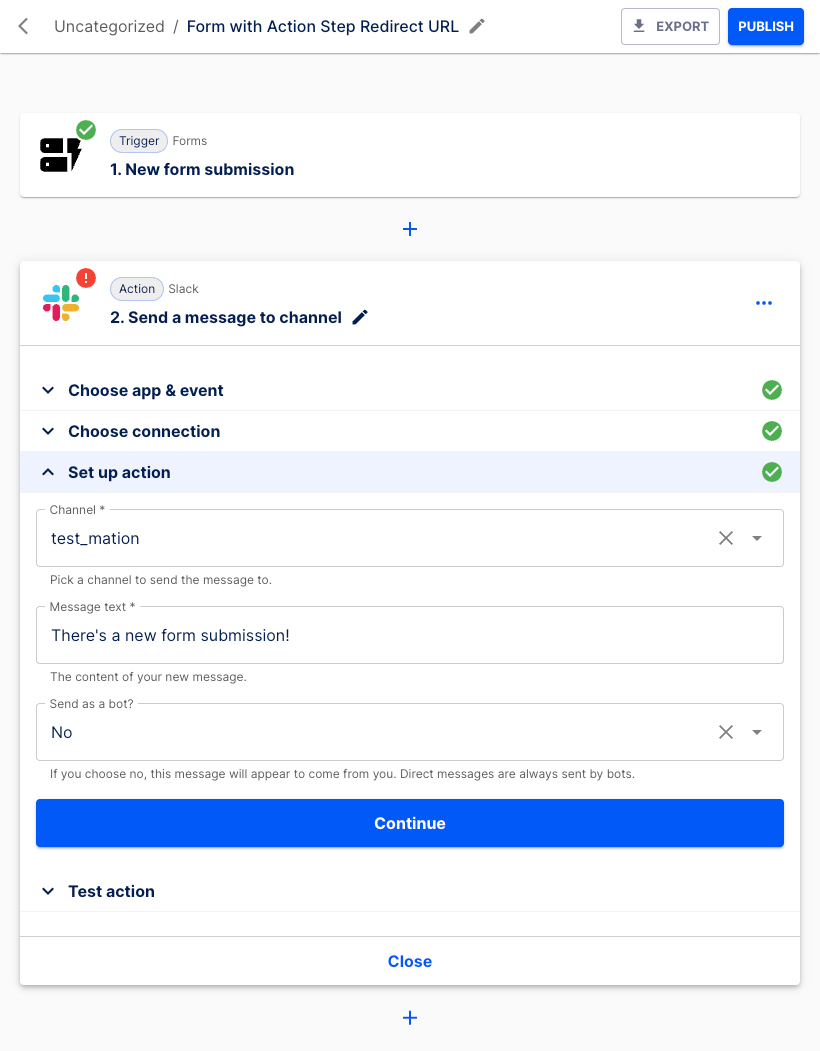
Click the Continue button.
Press the Test & Continue button.
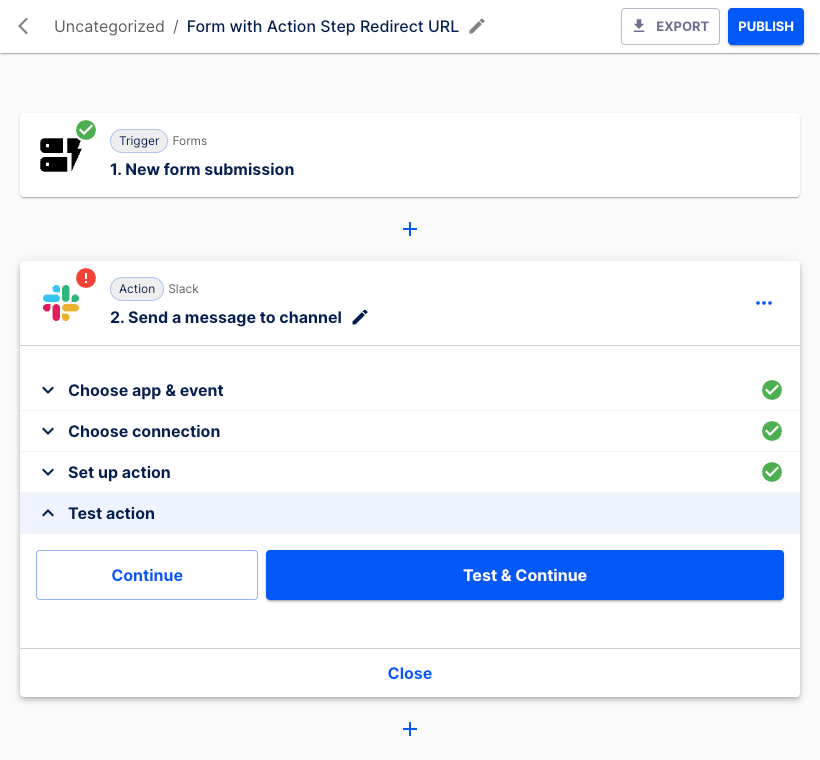
The Action step has been set up successfully.
Click the Continue button.
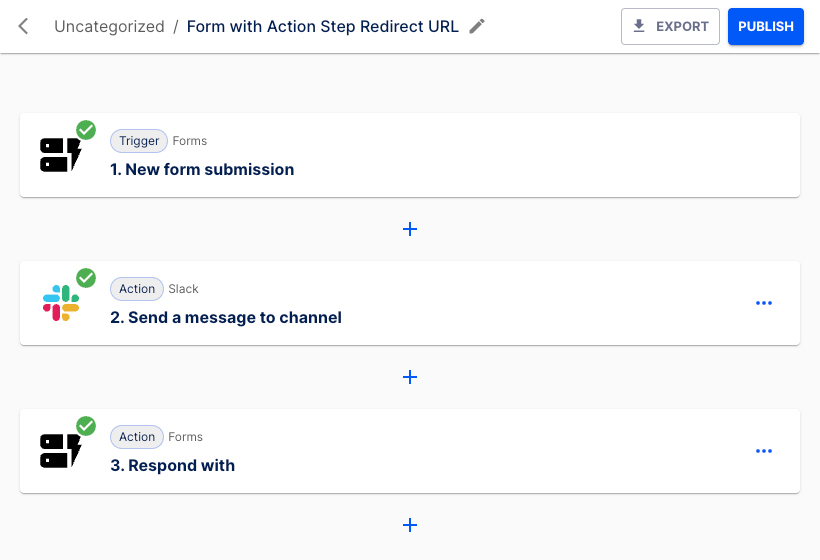
Select the + button underneath to insert the next Action step.
Let's configure the second Action step.
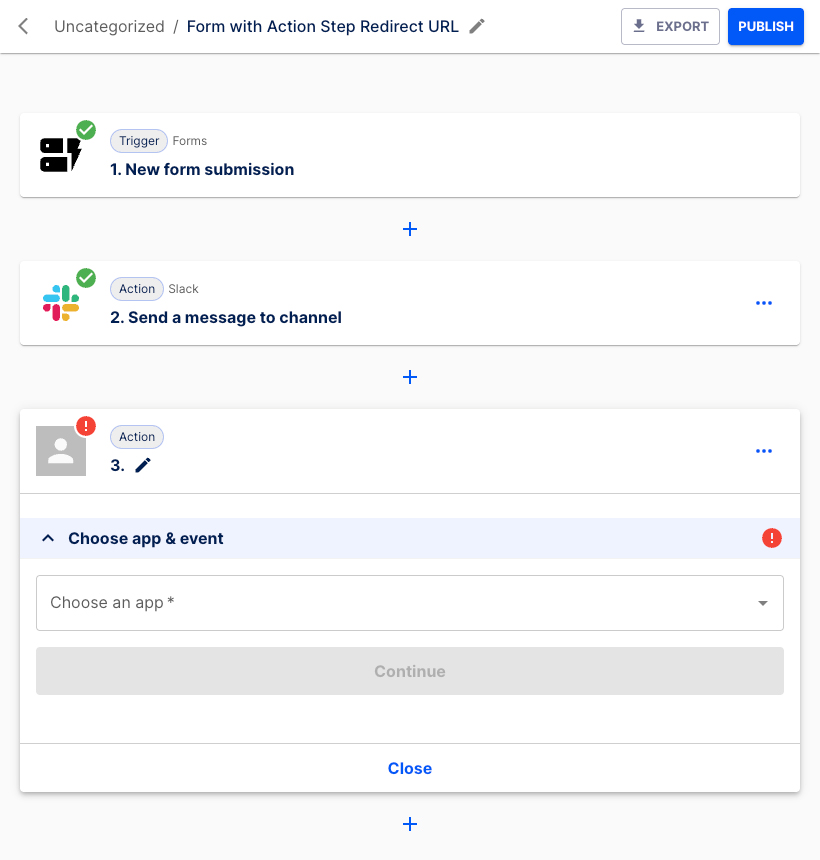
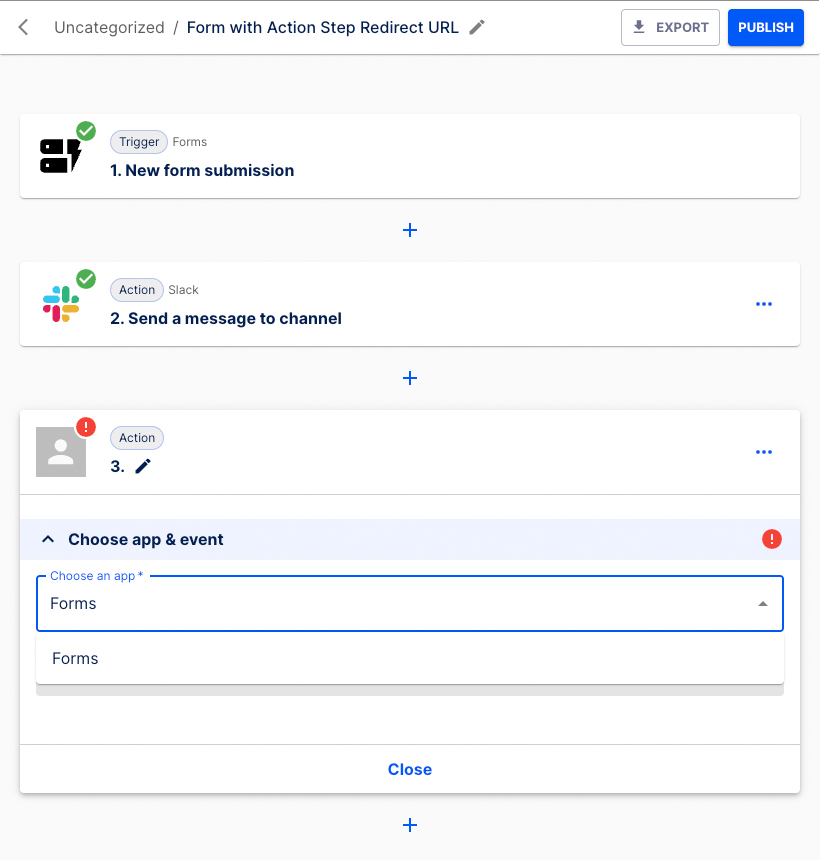
Choose Forms from the list.
Select Respond with as the Action event.
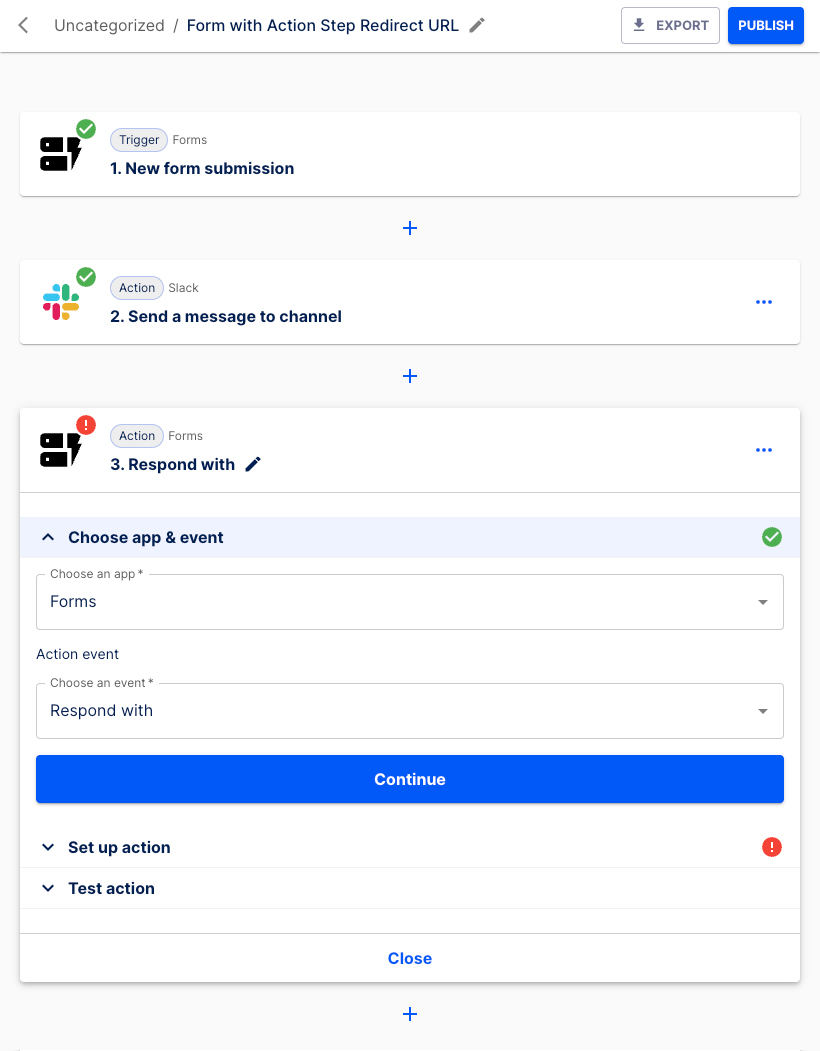
Click the Continue button.
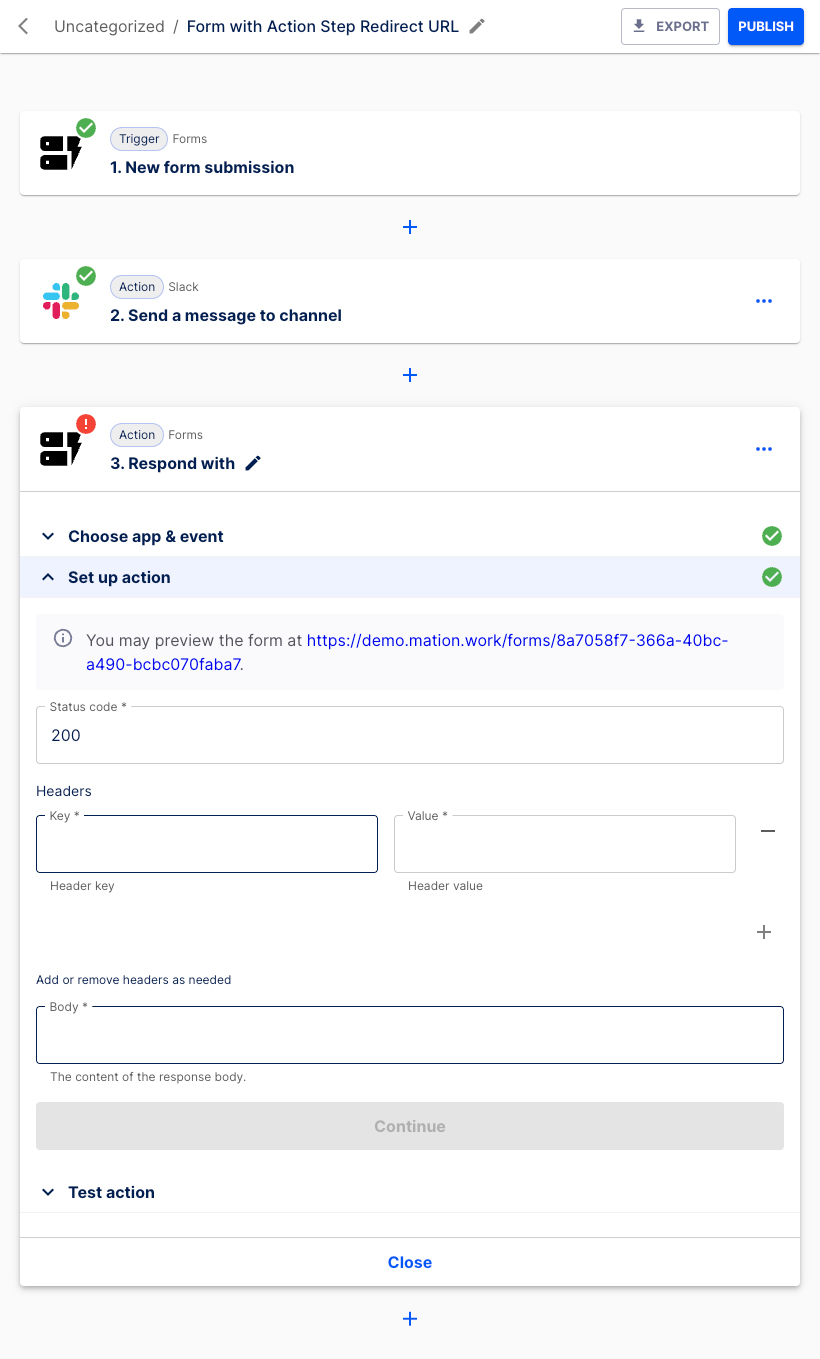
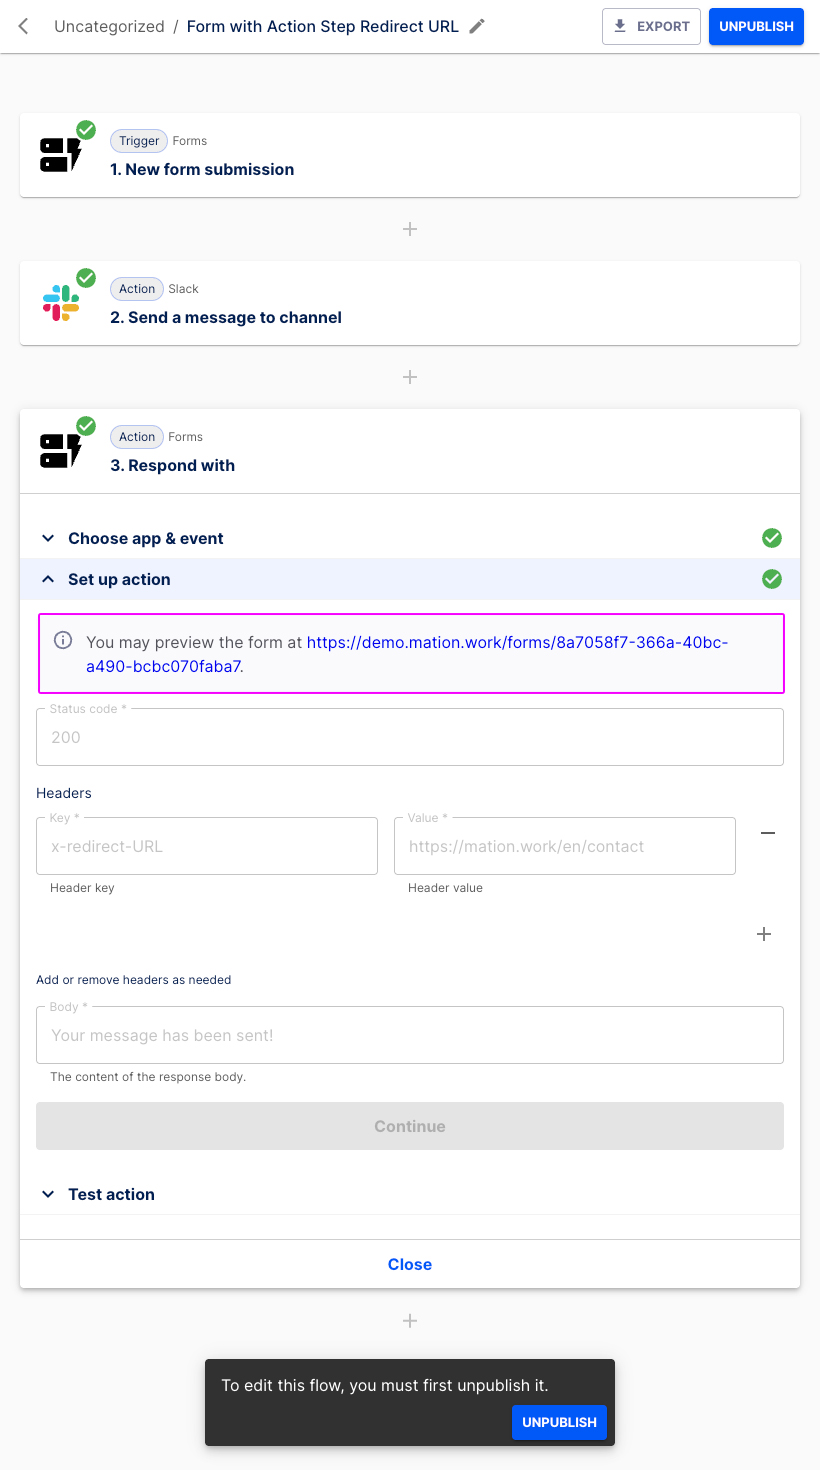
The Status code field is prefilled.
INFO
An HTTP status code 200 means the request was successful, and the server has sent back the requested data. Learn more about Status Codes here.
Enter
x-redirect-URLin the Key field, and insert theredirect URLin the Value field.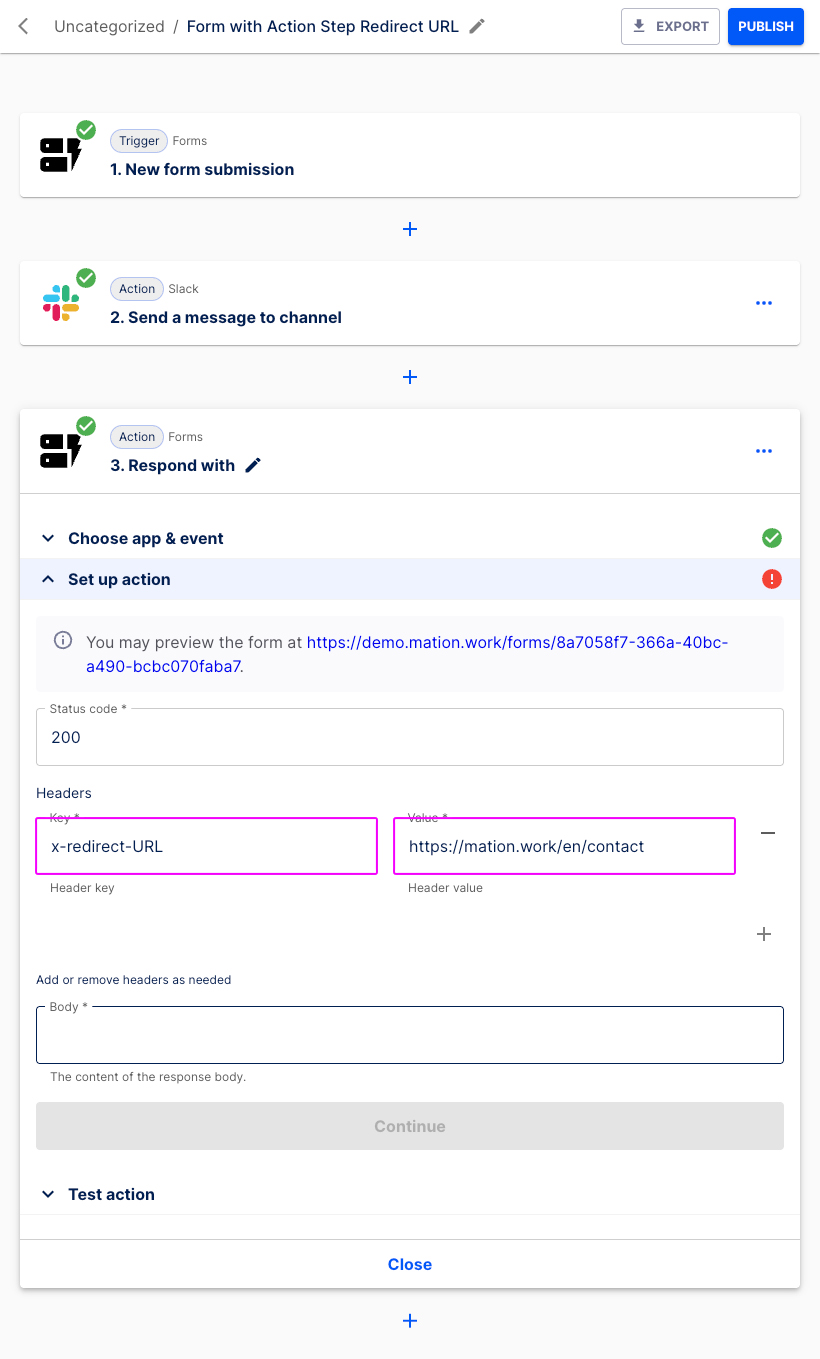
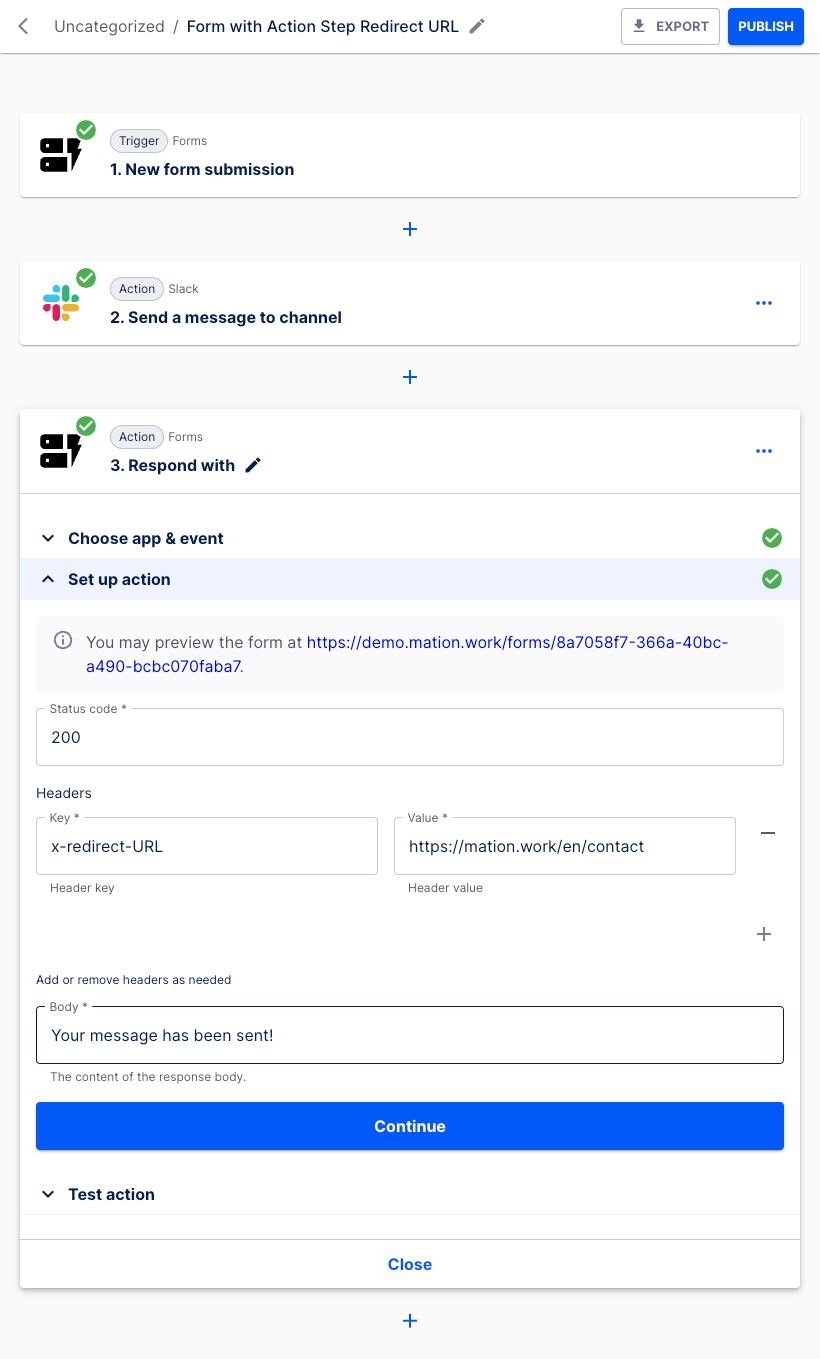
Enter your individual response message, e.g. "Your message has been sent!" in the Body field.
NOTE
You must fill in a response message in the Body field, otherwise you can't continue.
Click the Continue button.
Press the Test & Continue button.

The Action has been tested successfully.

Click the Continue button.
Hit the Publish button.
The flow has been published successfully.

Go back to the second Action step and navigate to the Set up action section. Click the link!
A new tab with the form opens.
Fill in the form fields, tick the checkbox and click the Register now button.
You've been redirected to the configured Redirect URL.
Array example use case
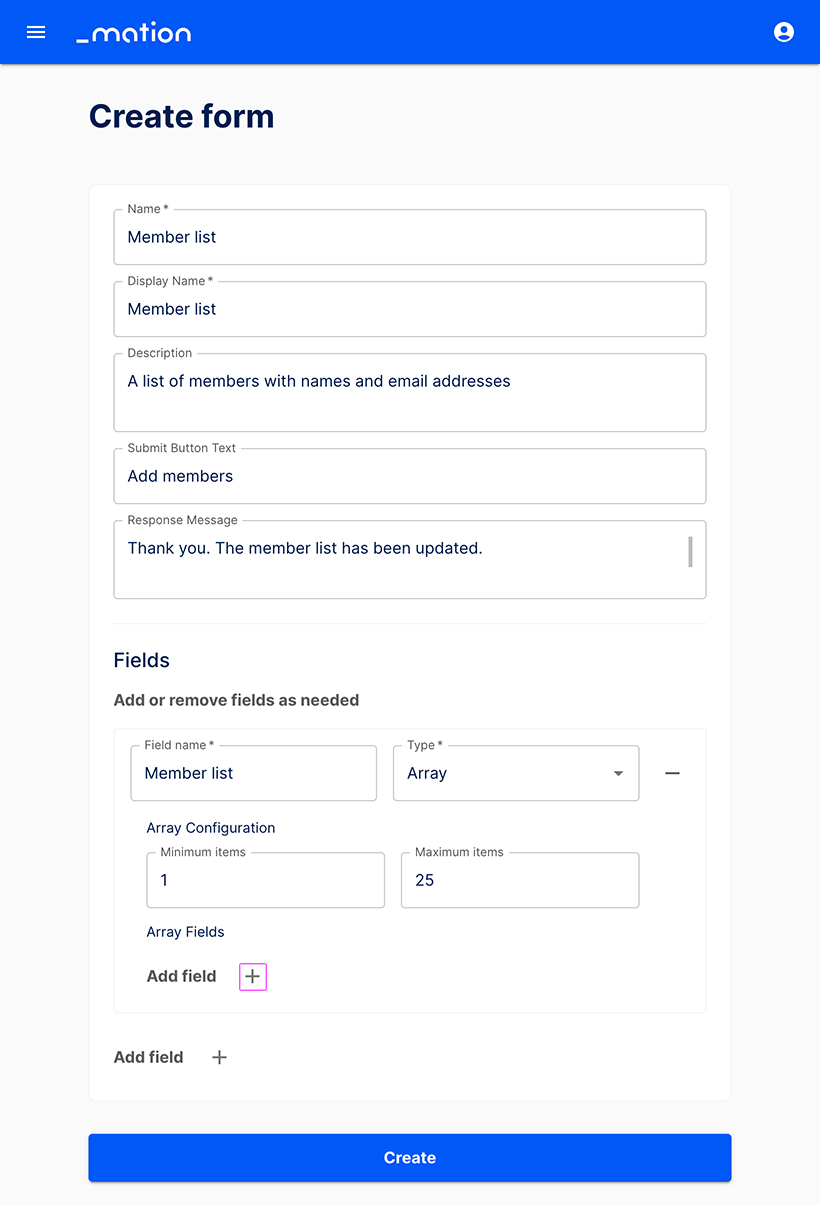
Example: Configure an array for a member list, where each member has a Name and Email address. Set the maximum number of members to 25.
- Go to the Forms page. Click the + Create form button to create a new form.
- Fill in the basic information.
- Configure the array by entering a Field name (e.g. "Member list"). Choose Array as the Type. Set minimum items to 1 and maximum items to 25. Then, click the Add field + button.
- Enter the Field name (e.g. "Name") and select String as the Type. Choose Custom pattern for the Validation format and insert the Regex
^[a-zA-Z ]*$to allow only letters and spaces. Provide the Validation message (e.g. "Only letters and spaces are allowed!"). Make the field Required, then click the Add field + button.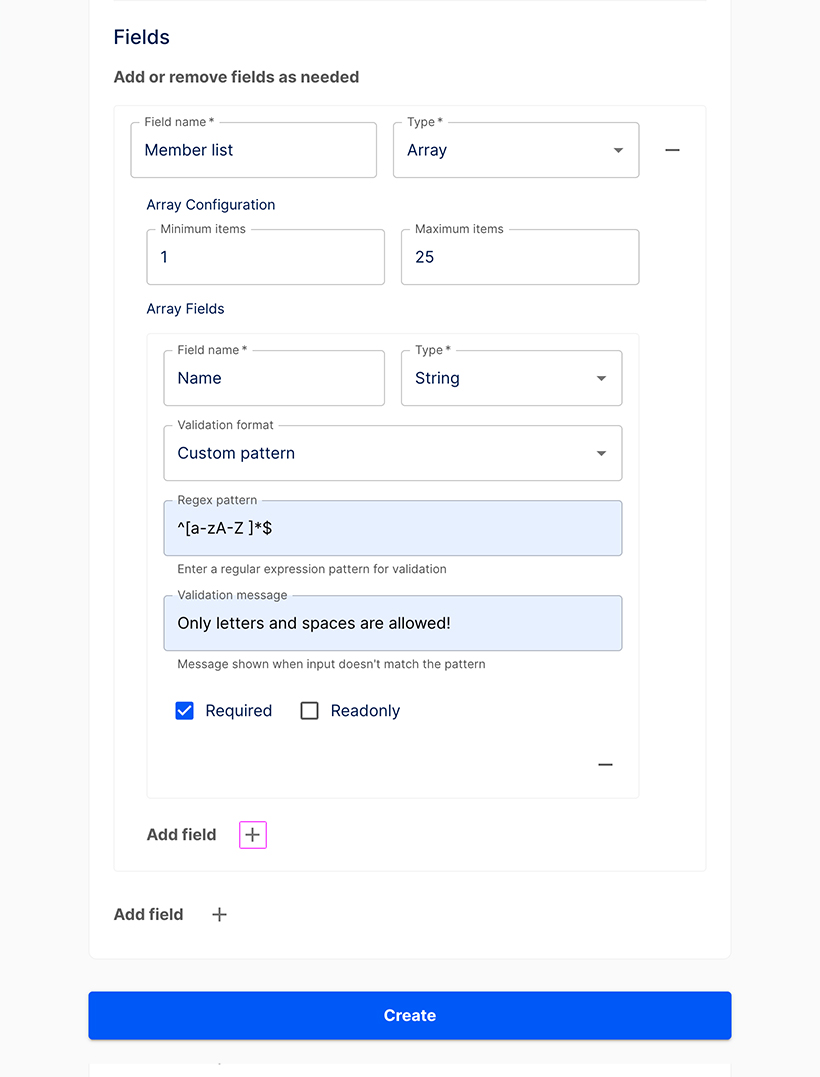
- Insert a Field name (e.g. "Email address"), select String as Type and choose Email as the Validation format. Mark the field as Required.

- Click the Create button.
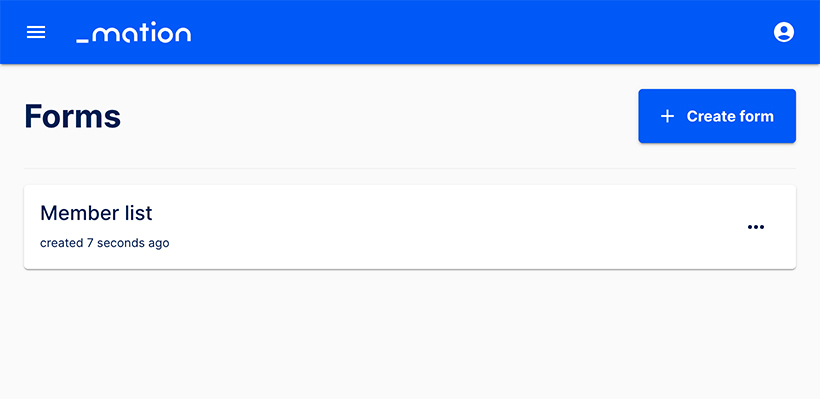
- The new form has been successfully created. You’ve been redirected to the Forms page, where it is now listed.
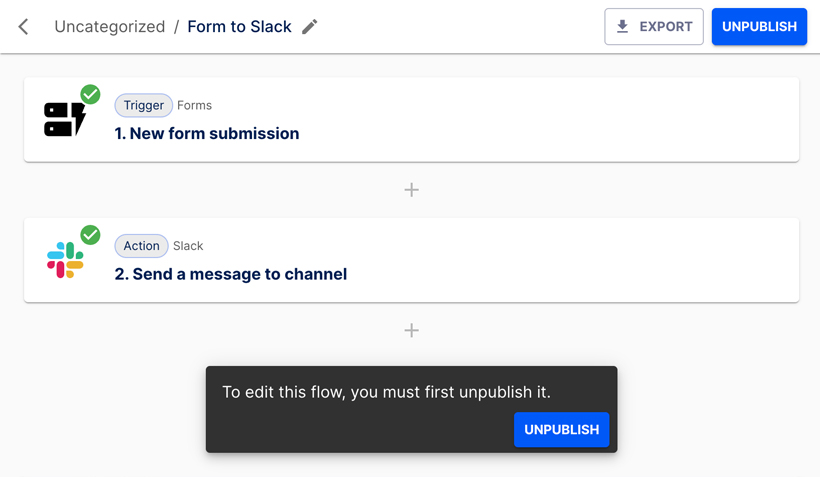
Edit a form
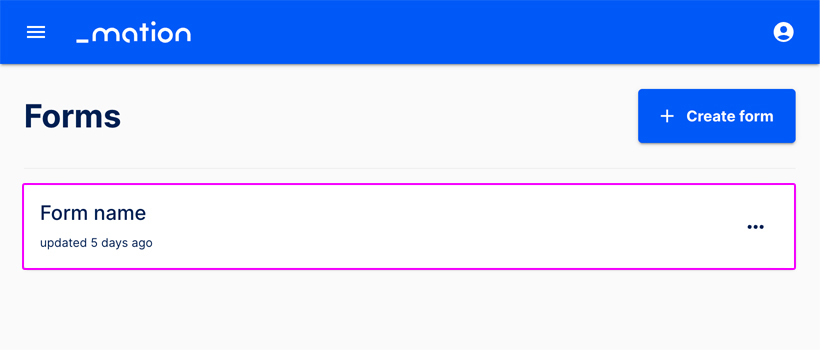
To make changes to a form, navigate to the Forms page and select it from the list.
The form can now be edited.
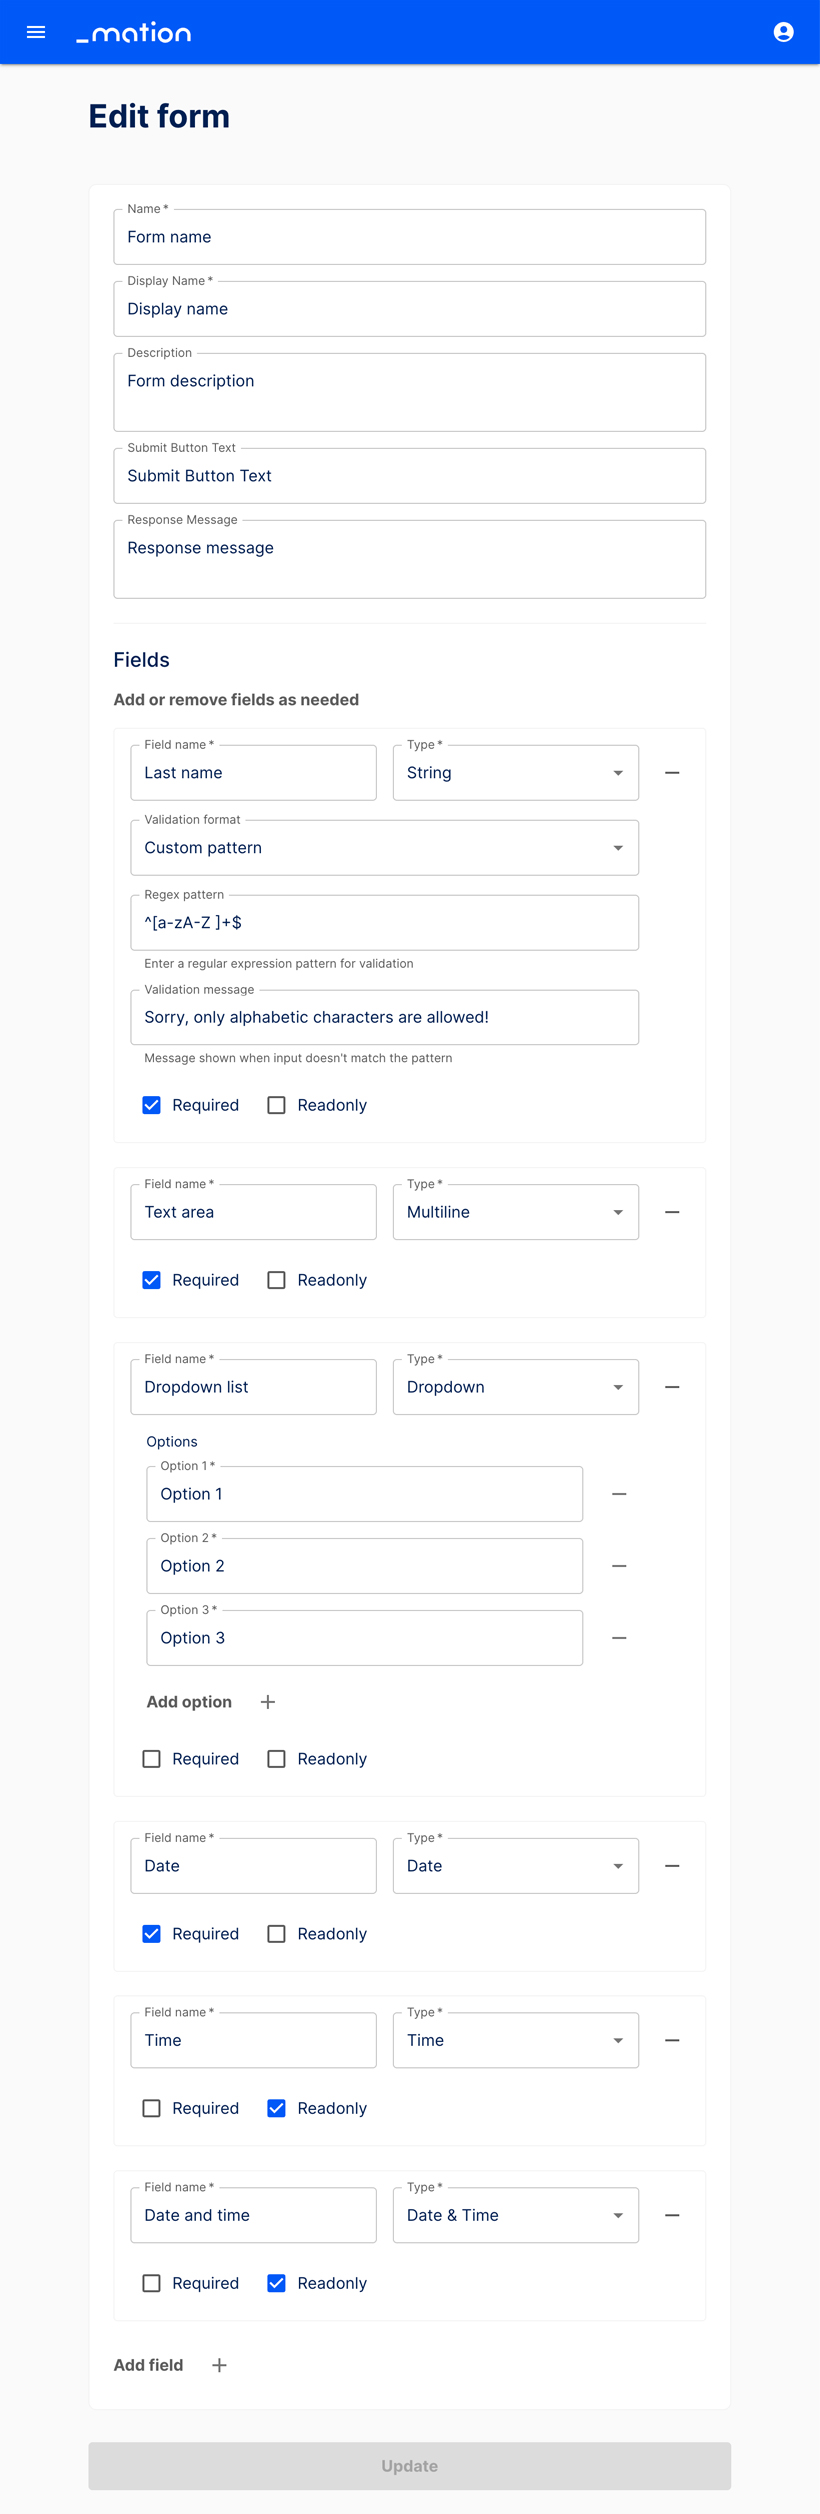
Let's assume we would like to permanently delete Option 3 from the Dropdown, as well as remove the Time and Date & Time fields. To remove a form element, click the – (minus) button to the right of the field.
DANGER
Once a form element is deleted it is permanently removed and cannot be retrieved!
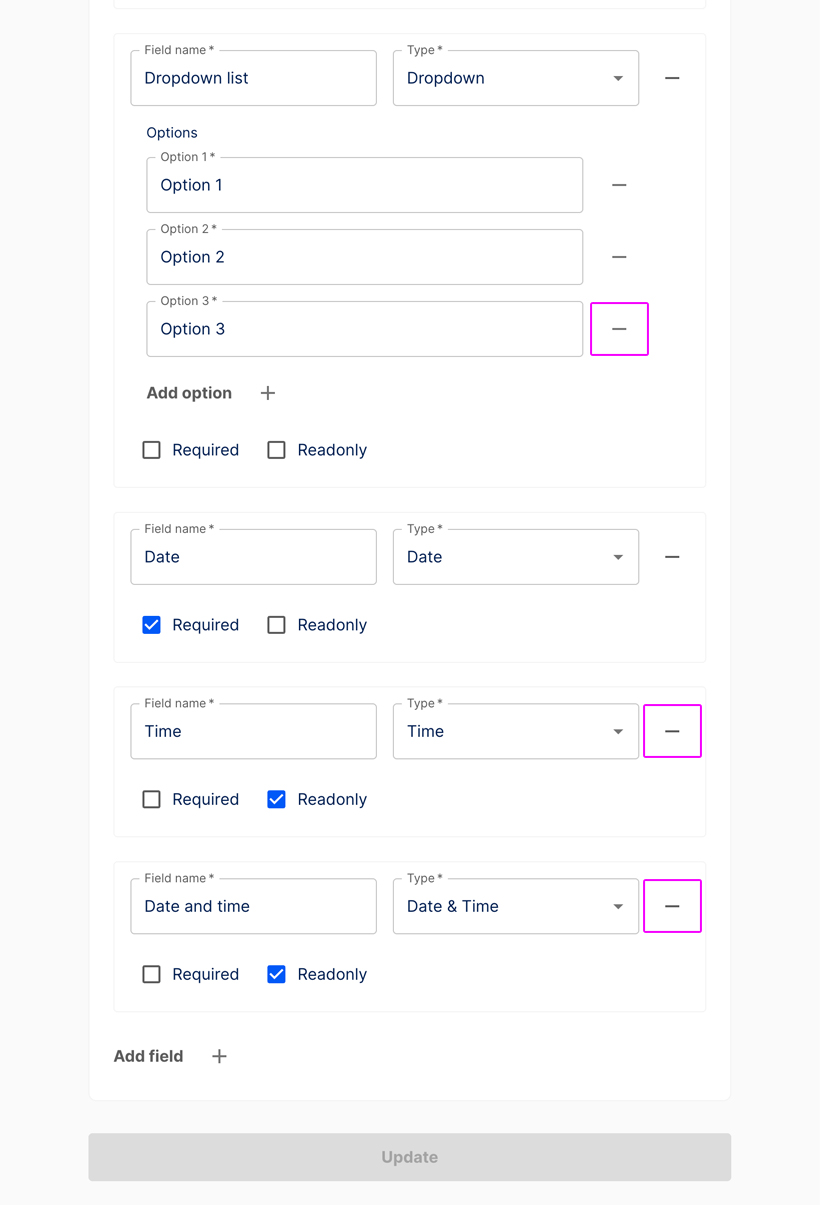
The selected form elements have been successfully removed. Click the + Add field button if you would like to add a new field to your form.
Press the Update button to save your changes.
You’ve been redirected to the Forms page, where your updated form is listed.

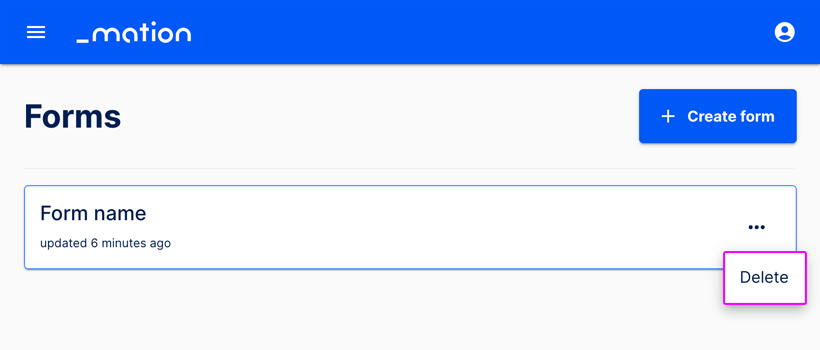
Delete a form
- Go to the Forms page.
- Click the meatballs menu (...) on the right to delete a form.

- Press Delete to permanently remove the form.
Example use case
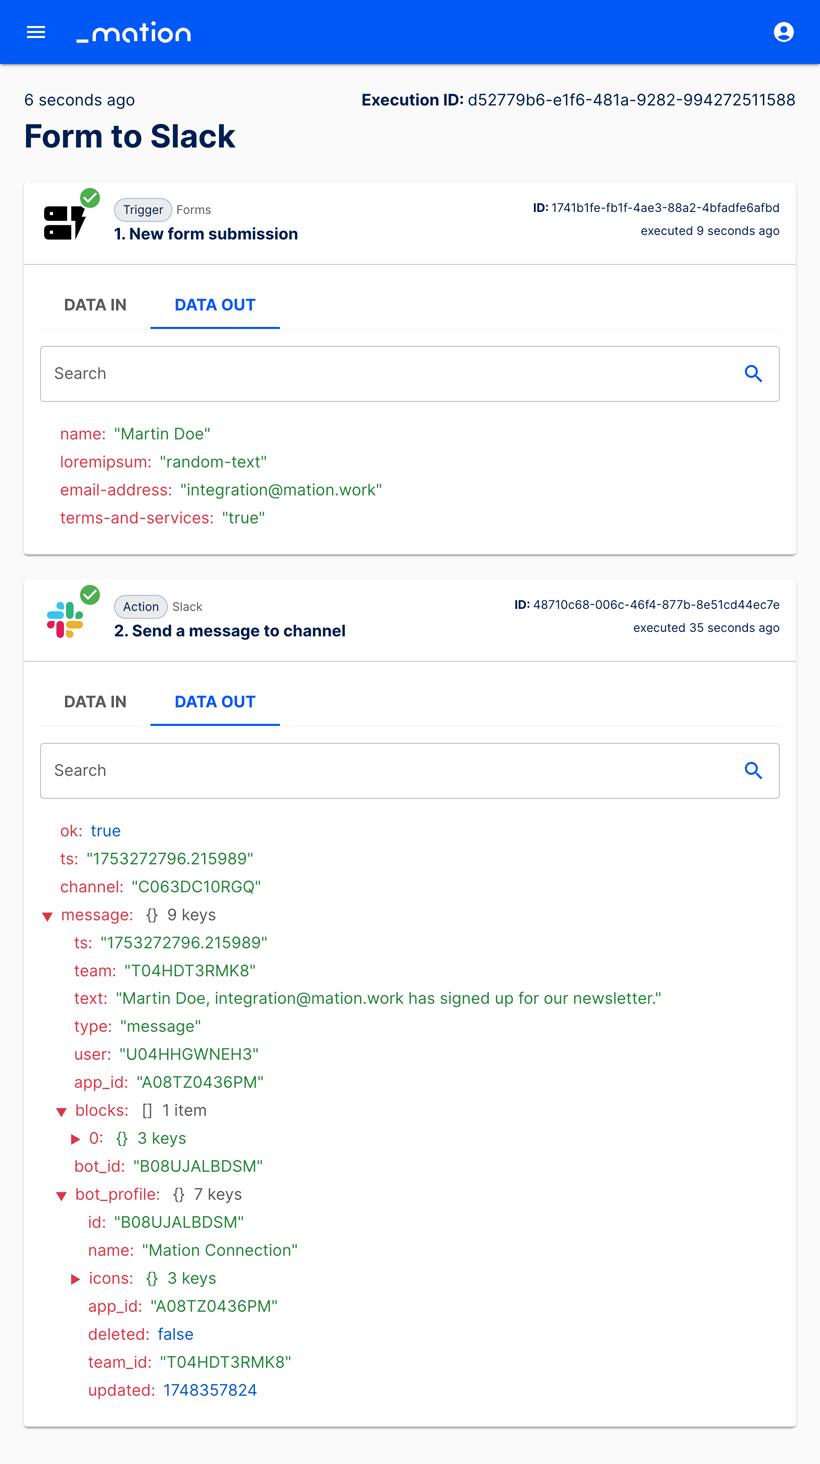
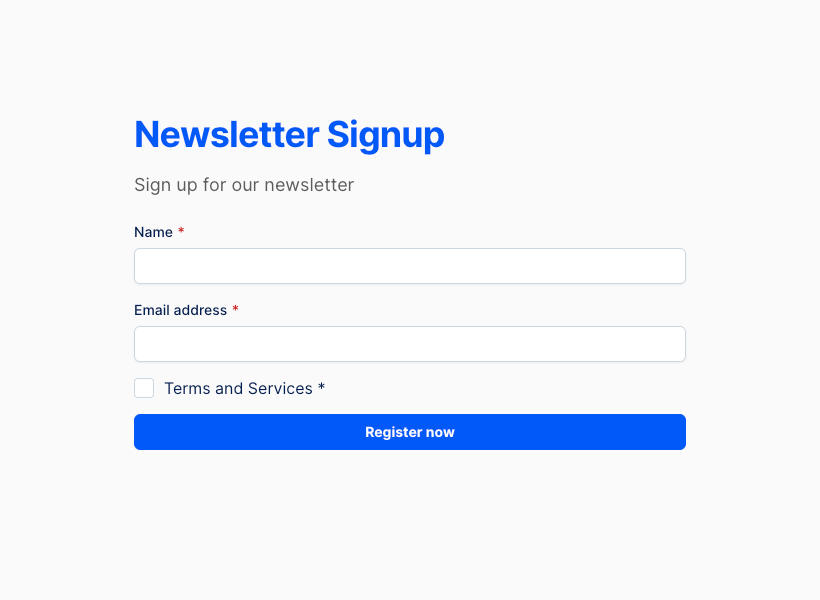
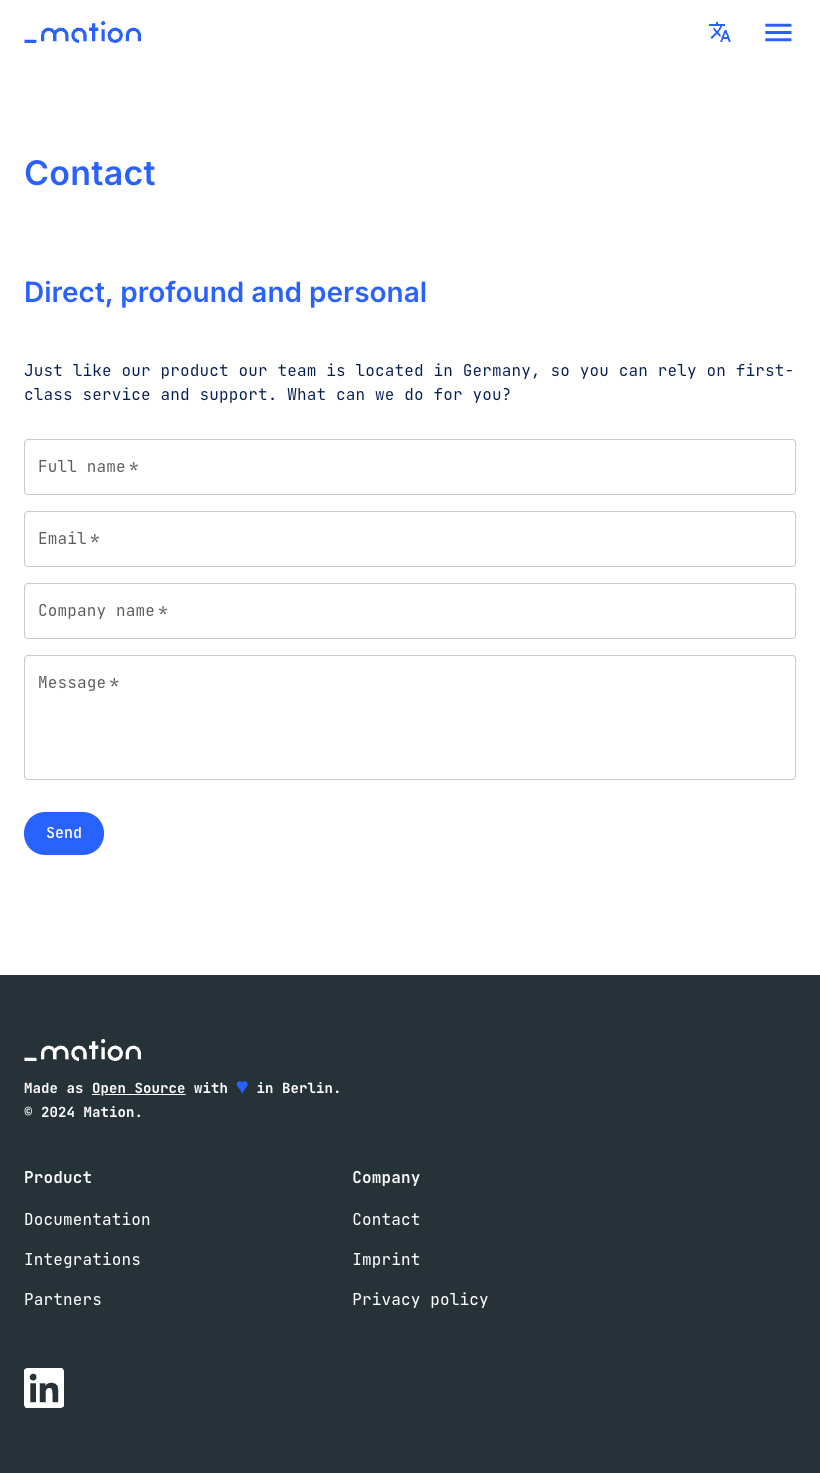
Let's assume we would like to create a simple form that triggers a flow that fetches new form submissions and then sends them to a Slack channel.
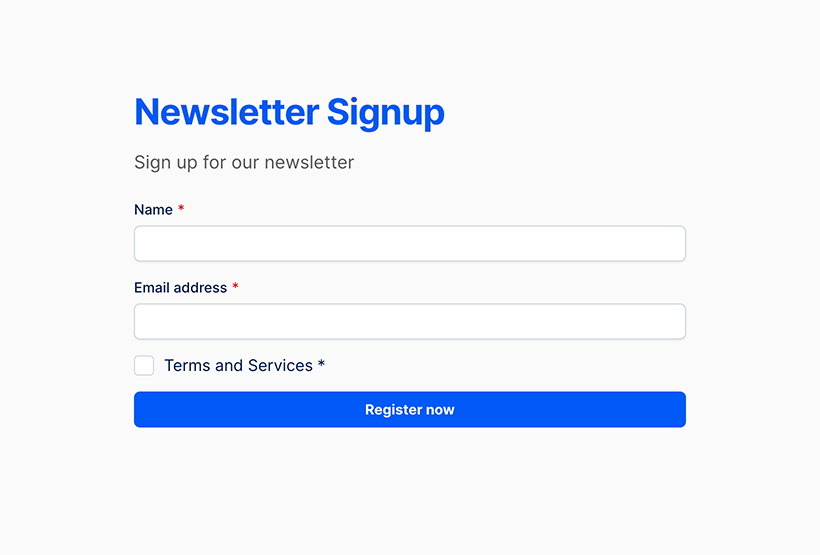
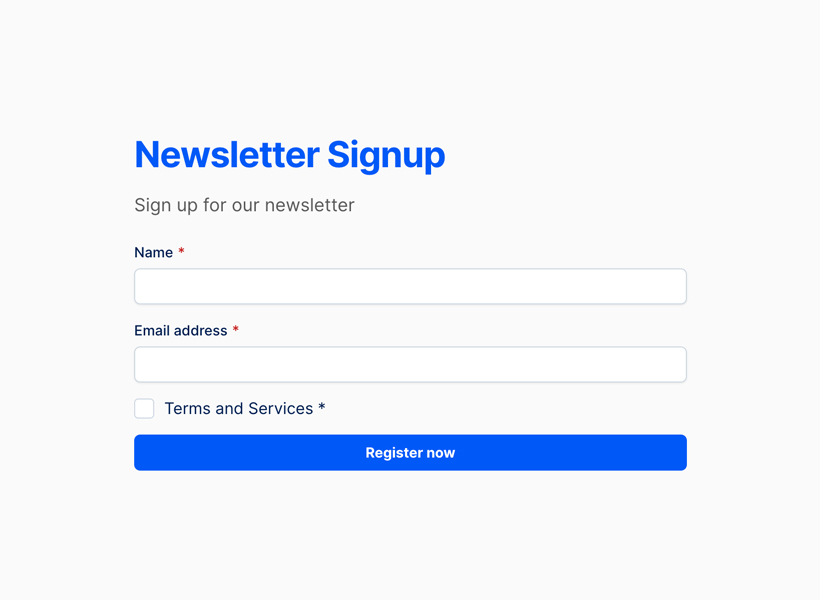
This example shows how to build a form where users enter their Name and Email address, agree to the Terms & Services via a checkbox, and click the Submit button. Both text fields and the checkbox are required. Input validation will also be applied to the text fields.
- Go to the Forms page. Click the + Create form button to create a new form.
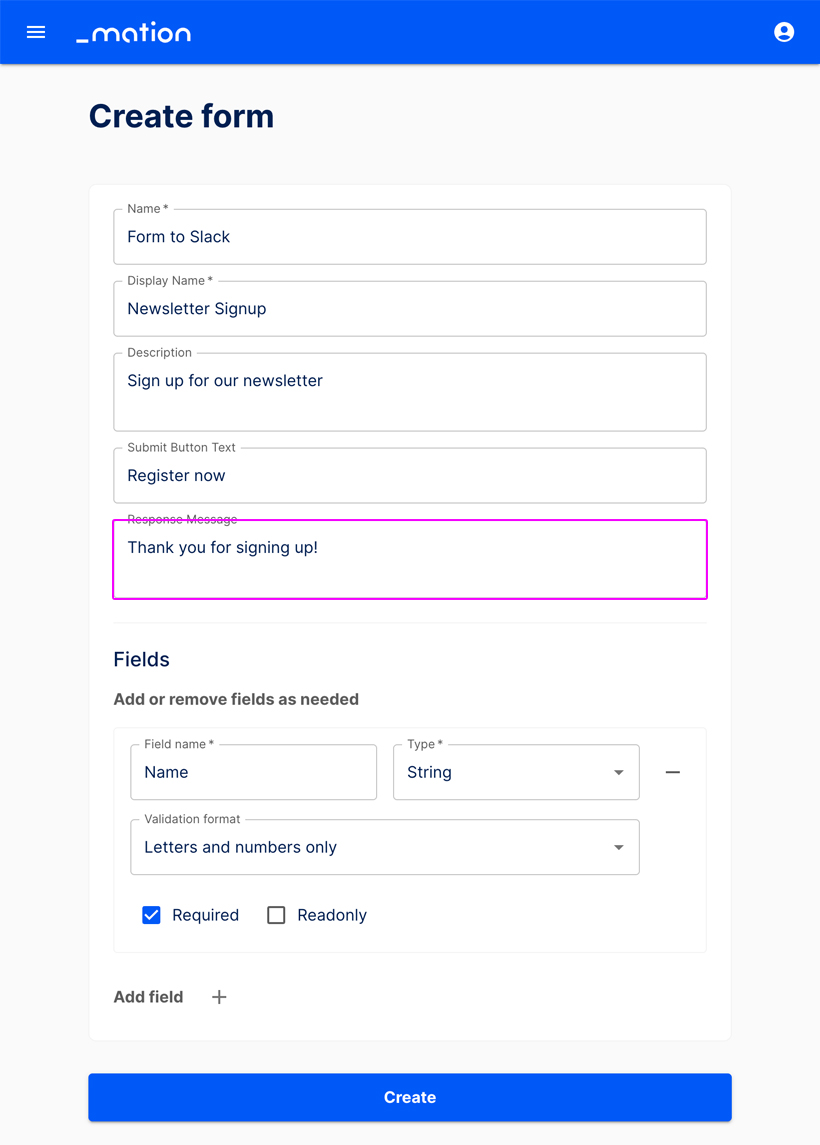
- Assign a Name, for instance "Form to Slack".
- Specify a Display Name, e.g. "Newsletter Signup".
- Add a brief Description, for example "Sign up for our newsletter".
- Enter the Submit Button Text, e.g. "Register now".
- Provide the Response Message, like "Thank you for signing up!".
- Set up the first text field. Enter Name as the Field name. The default type, String, is already selected.
- Let's validate the text input. Choose Custom pattern, then add a Regex pattern, e.g.
^[a-zA-Z ]+$to allow only letters. Add a validation message, like "Sorry, only alphabetic characters are allowed!". Select the Required checkbox.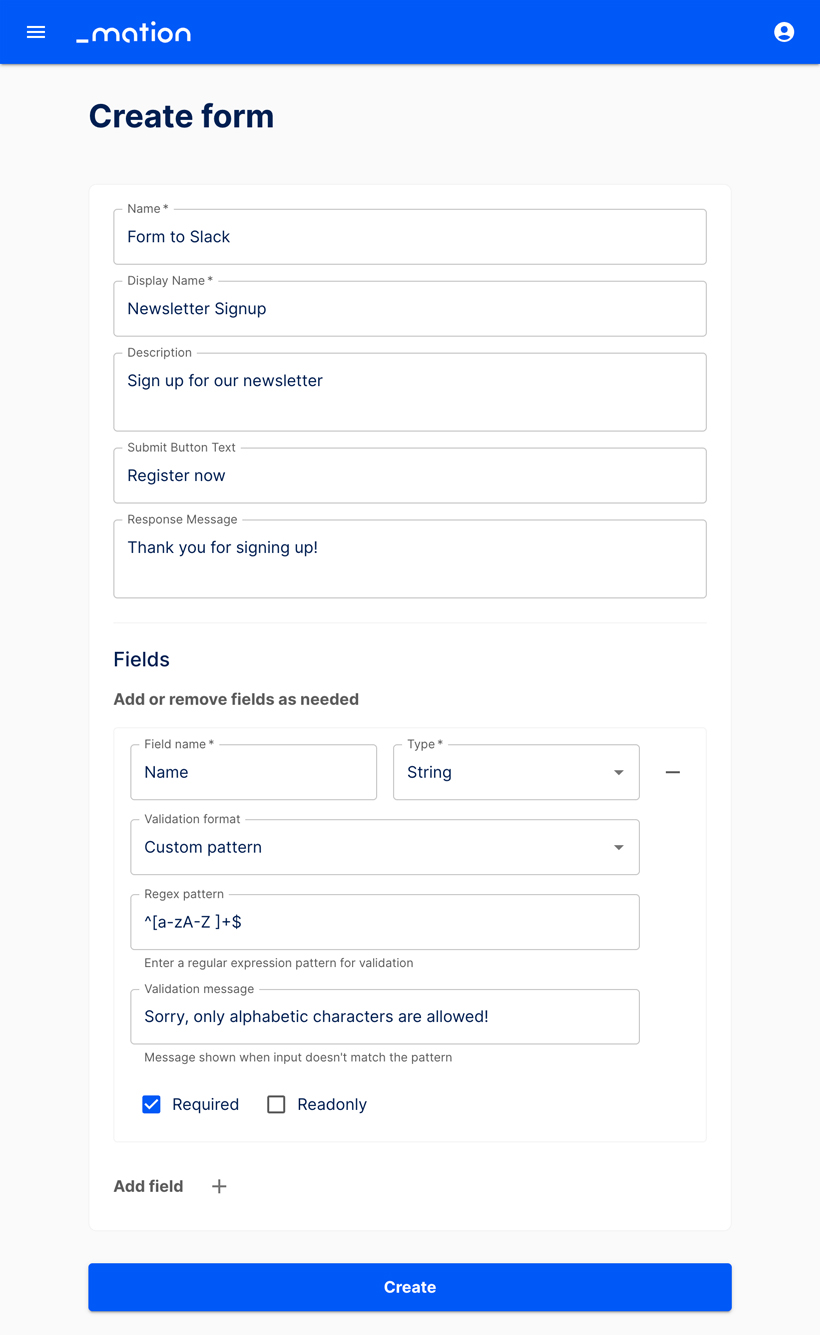
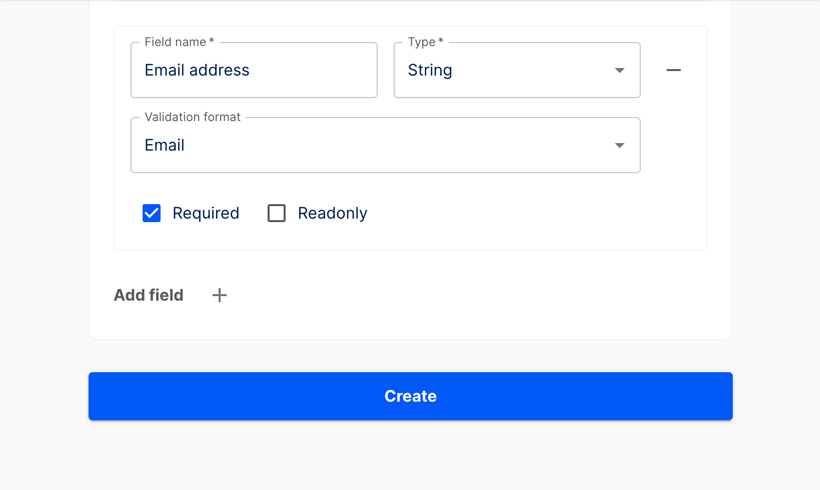
- Add a new field and enter Email address as the Field name. The default type, String, is already selected.
- Let's validate the text input. Choose Email and check the Required checkbox.
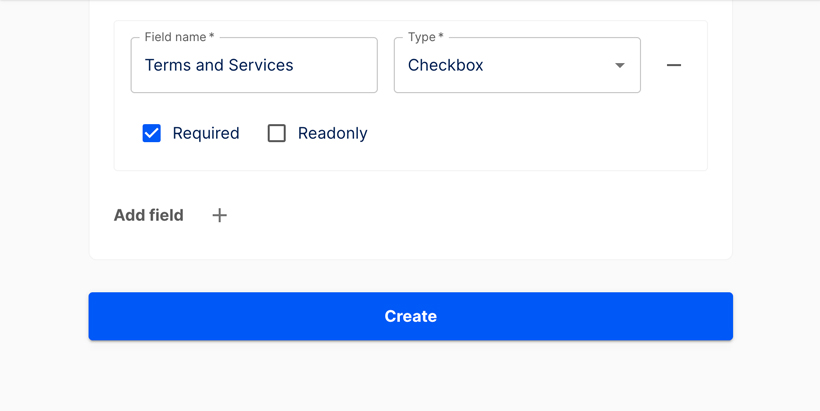
- Add a new field, name it Terms and Services and select Checkbox from the dropdown. Click the Required option.
- Click the Create button.
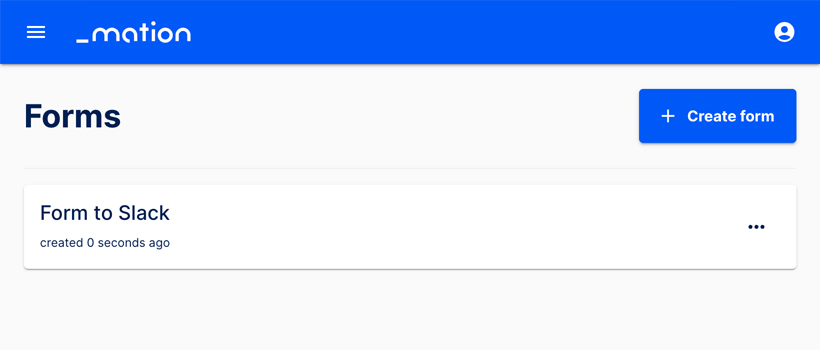
- Your form has been successfully created.
- Start using your new form with Workflow Automation.
Preview the example form
Prerequisites
This guide assumes you have a Slack account and a channel configured to receive data. The basic newsletter example form named Form to Slack with two required text fields and a checkbox has already been set up.
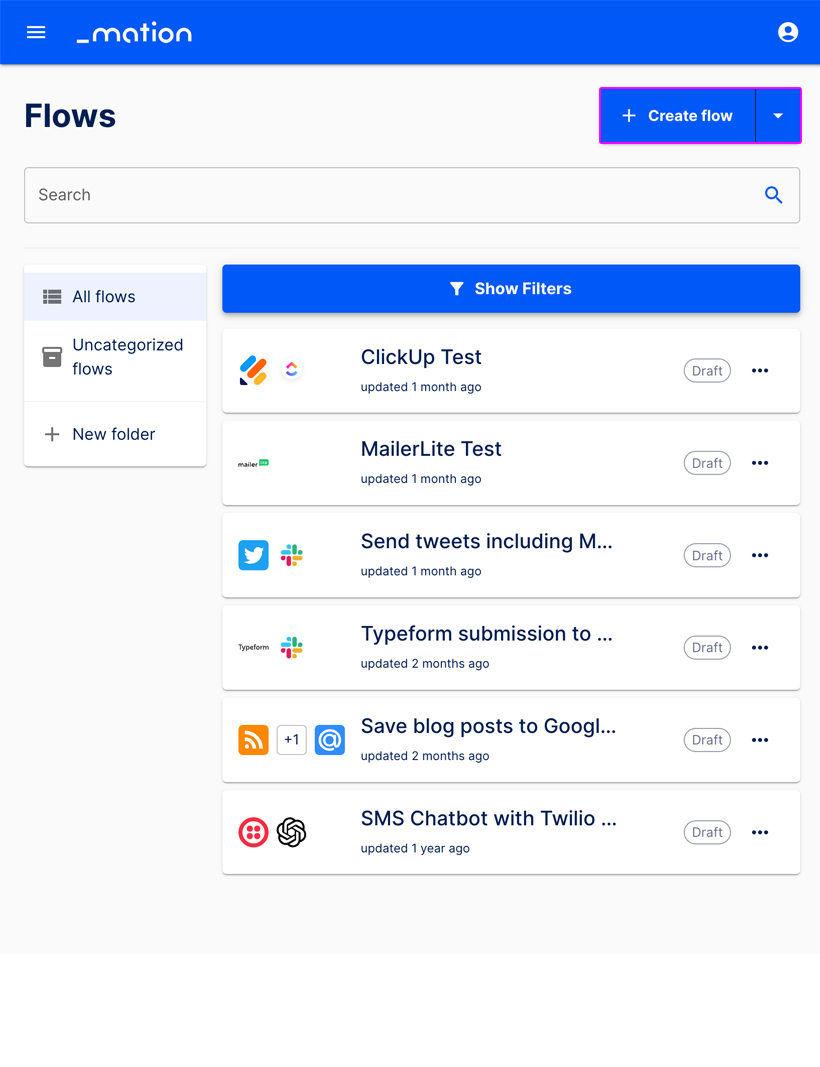
Navigate to the Flows page.
Click the + Create Flow button.
Assign a meaningful name to your flow.
In the Choose app & event section select Forms from the list.
Choose New form submission as the event. Click the Continue button.
The Set up a trigger section opens up.
Select your Form in the Form field dropdown.

Select either Yes or No in the Wait until flow is done dropdown.
INFO
In the Set up a trigger section, you must select Yes in the Wait until flow is done field should you want to either insert a redirect URL (here or in a later Action step) or a response message at step-level.
Leave the Async redirect URL field empty. Click the Continue button.
Go back to the Set up a trigger section.
NOTE
You have to fill in the form first and submit it, otherwise the Test Trigger step will produce an error message!
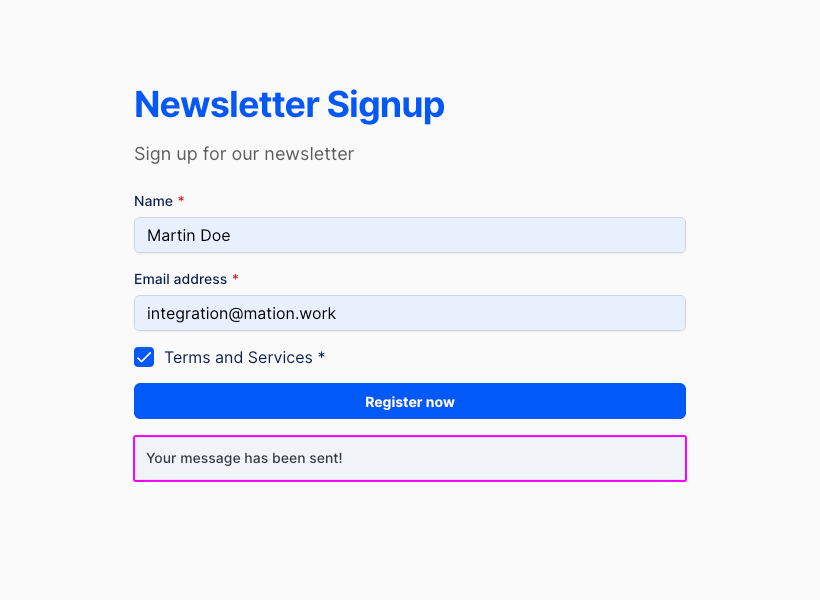
Click the link to preview your form!
A new tab with your form opens.
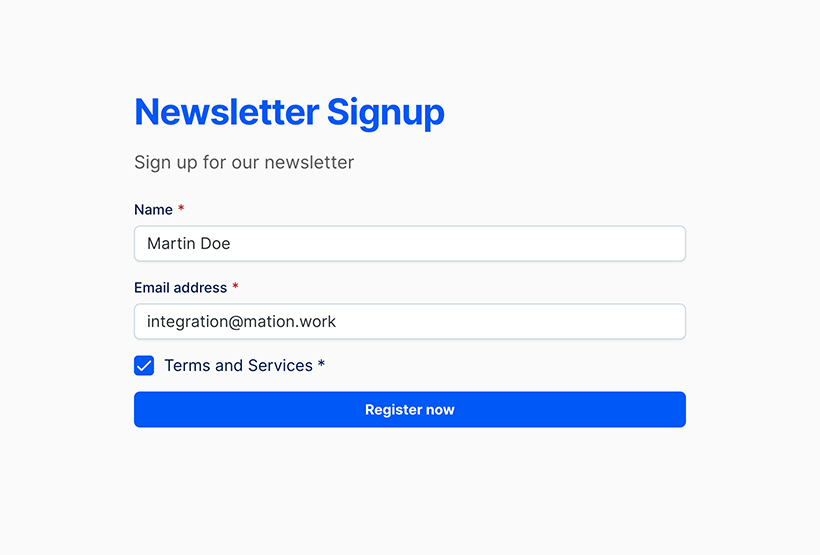
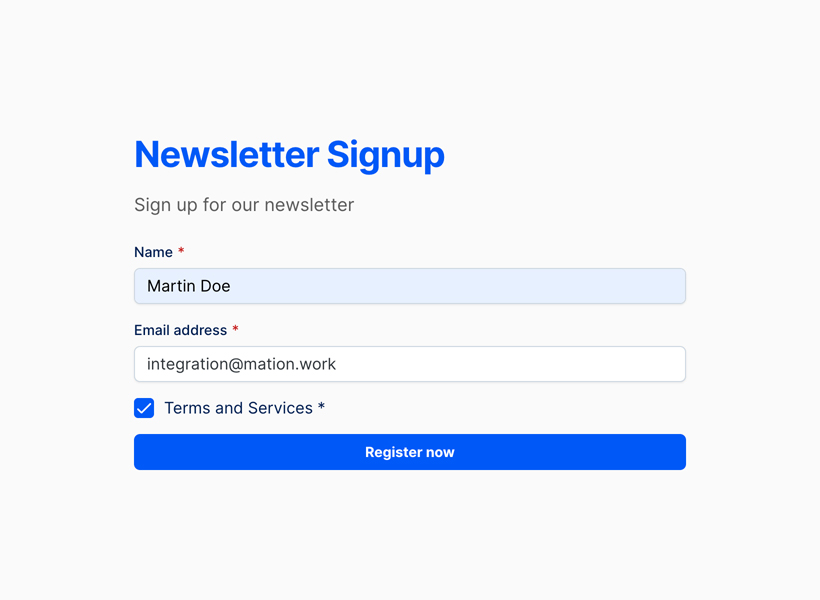
Enter a Name and Email address.
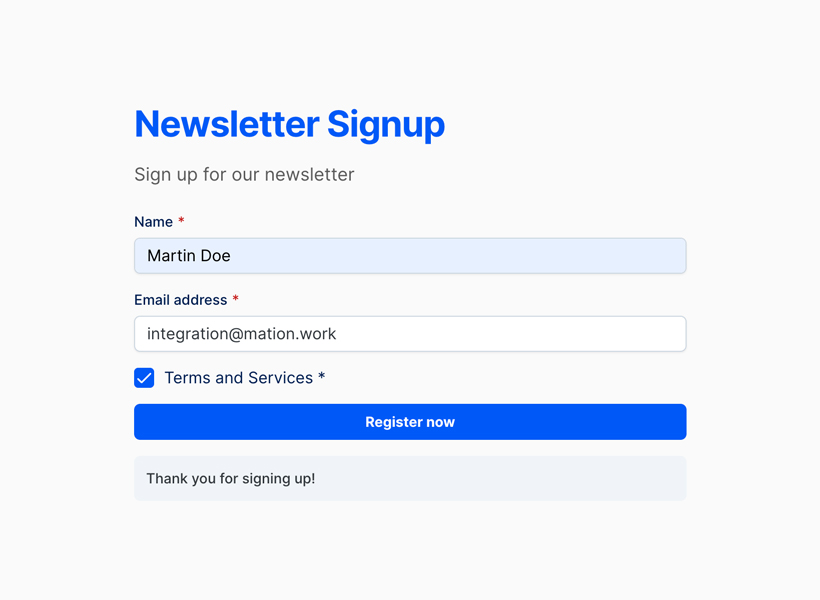
Tick the Terms and Services checkbox and click the Submit button.
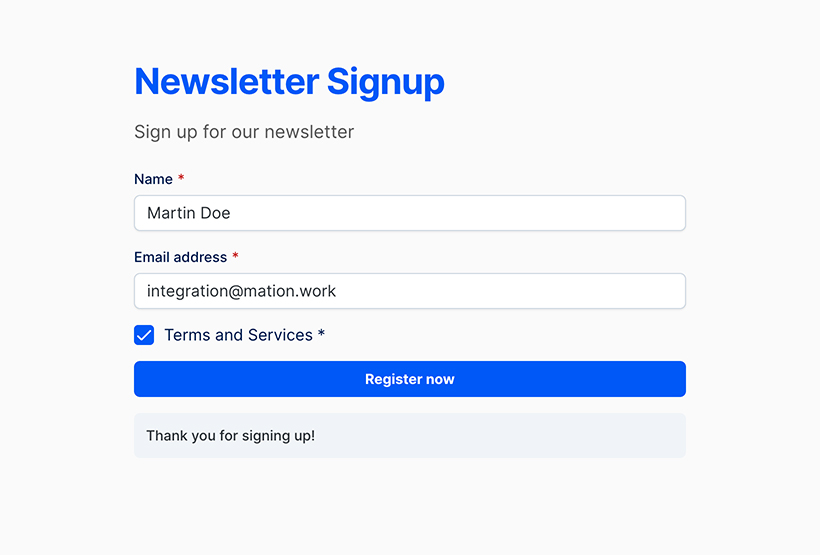
The form has been submitted sucessfully and the Response message is displayed.
TIP
If your only goal is to preview the form, you can stop here. Otherwise, continue setting up the flow.
Click the Test & Continue button to verify everything works as expected.
The trigger has been tested successfully.
Click the Continue button.
Configure the Action step.
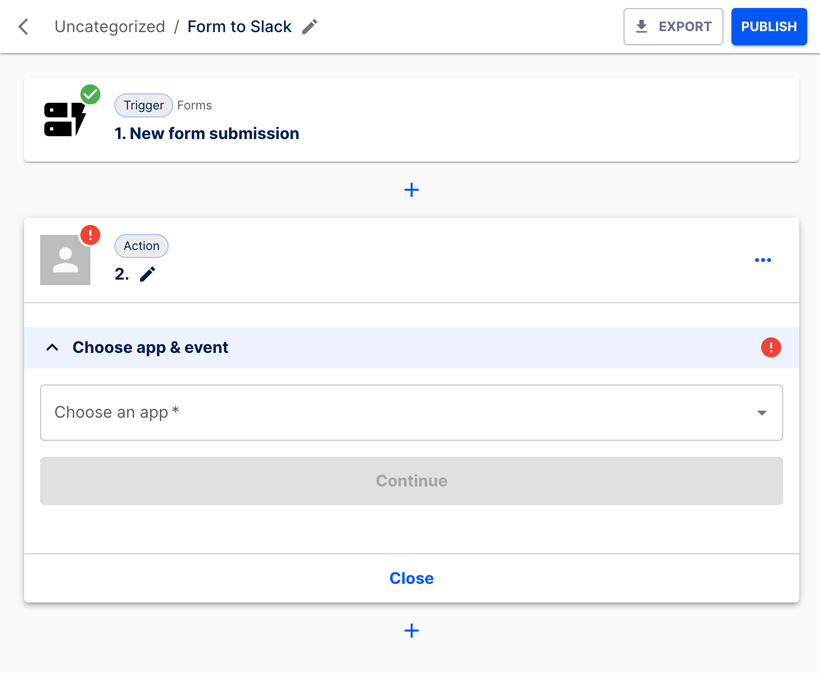
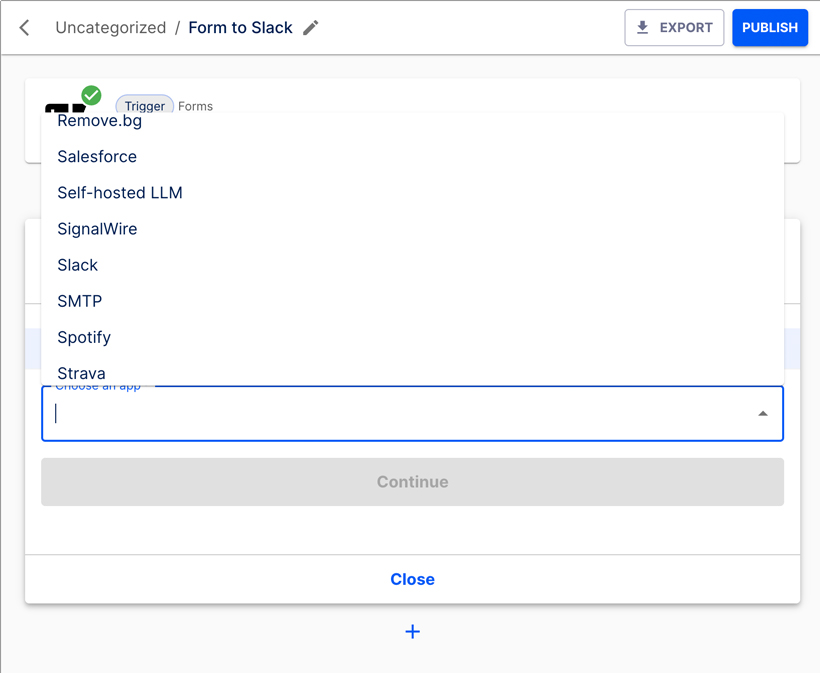
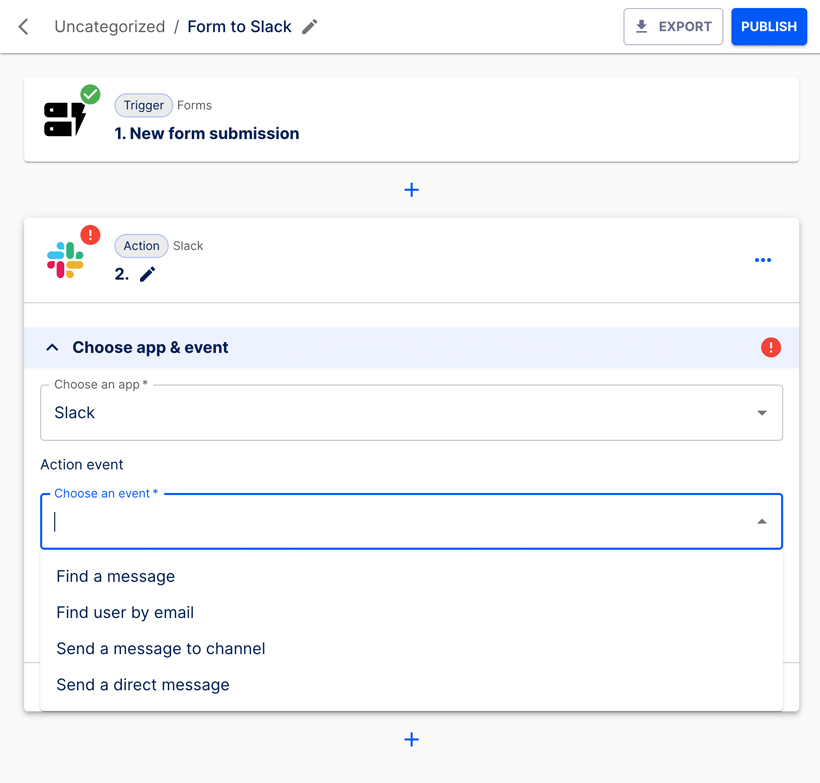
Choose Slack from the list.
Select Send a message to channel as the event.
Click the Continue button.

Choose your Slack connection.

Click the Continue button.
Select the channel you would like to use.

Enter the Message text. Then choose how you would like to send the message in the Send as a bot? dropdown. Available options are SEND AS A BOT? and CUSTOM. Decide if you want to SEND AS A BOT? (Yes/No).
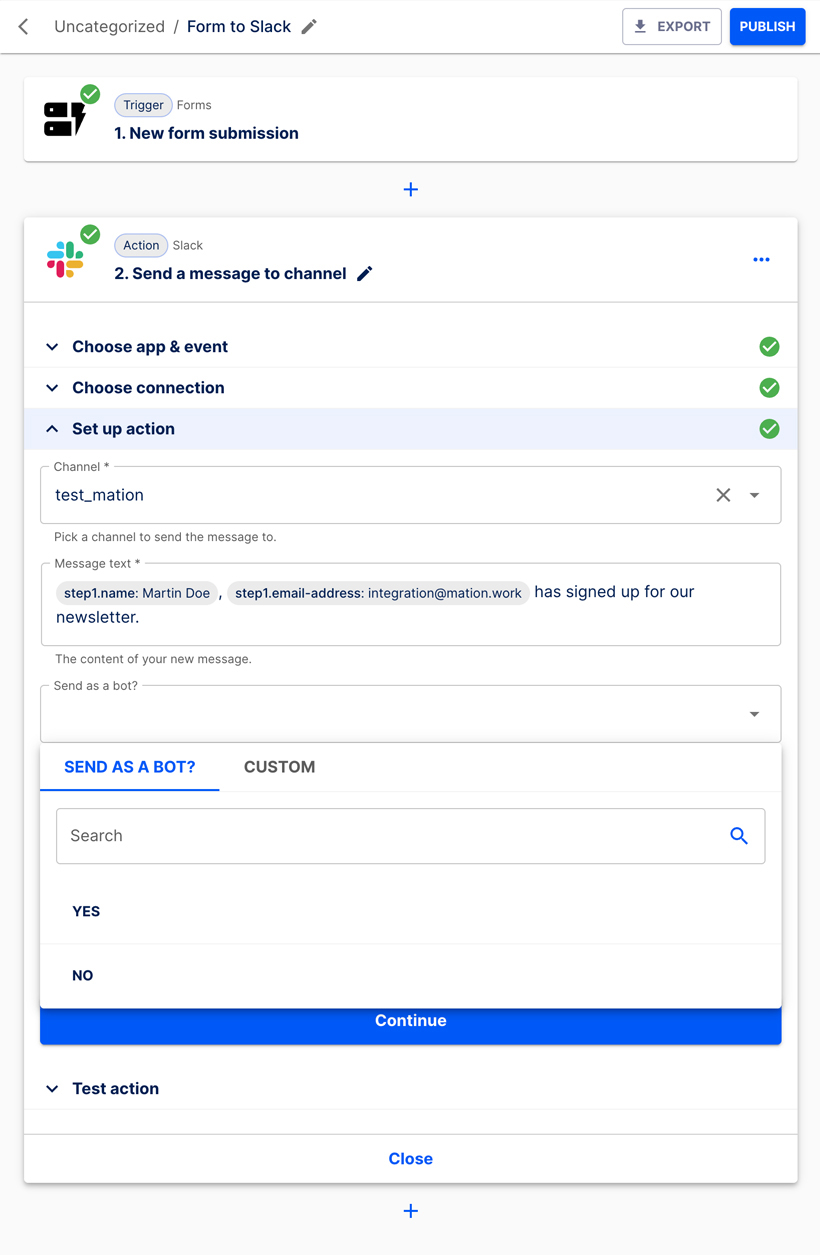 Alternatively, choose CUSTOM if you want to send the content of a submitted form field.
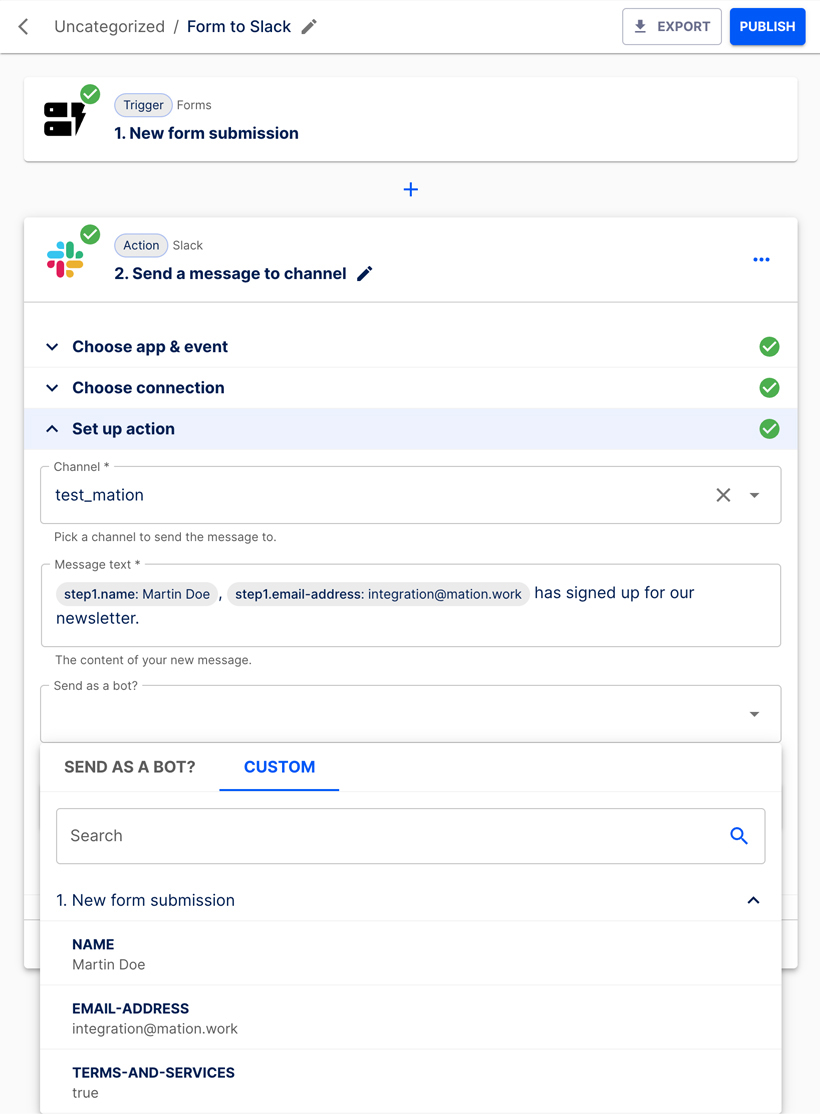
In this case simply select SEND AS A BOT? and choose No.
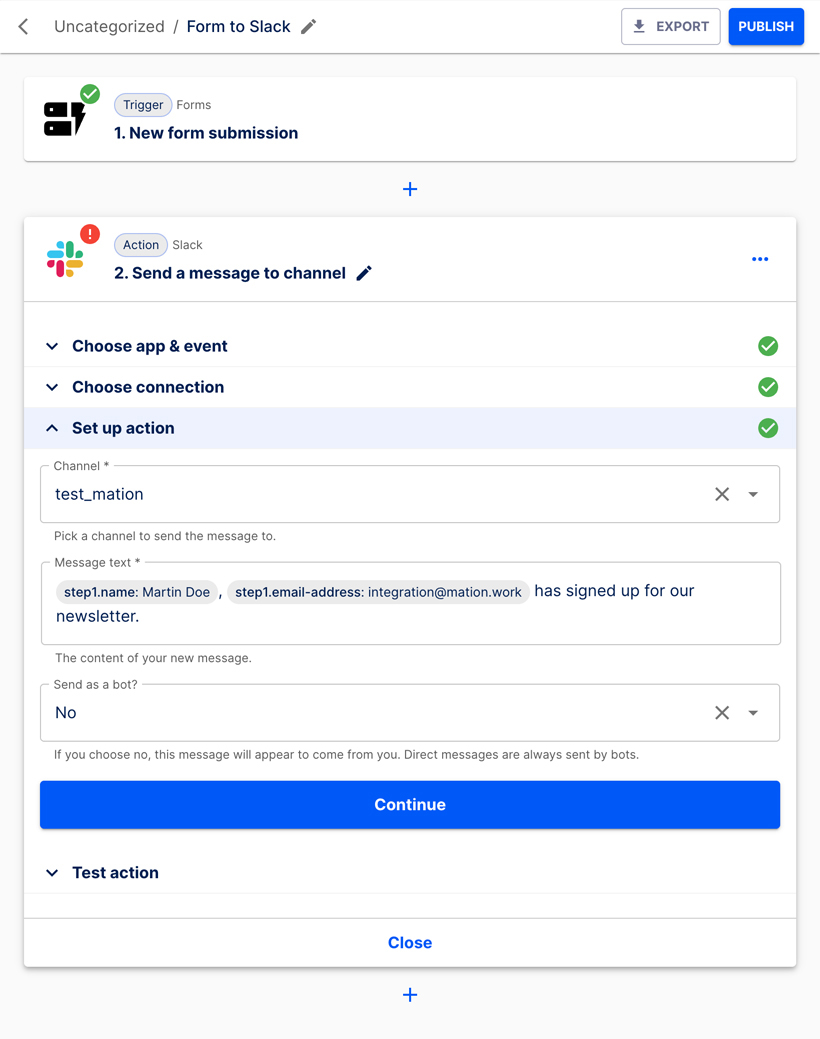
Click the Continue button.
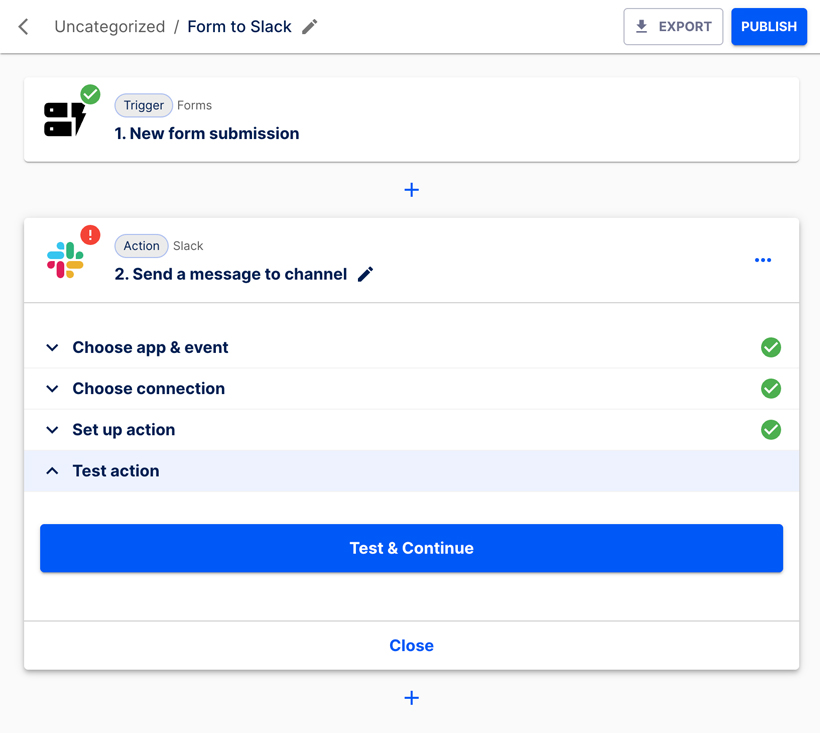
Let's test the Action step. Click the Test & Continue button.
The test is successful.
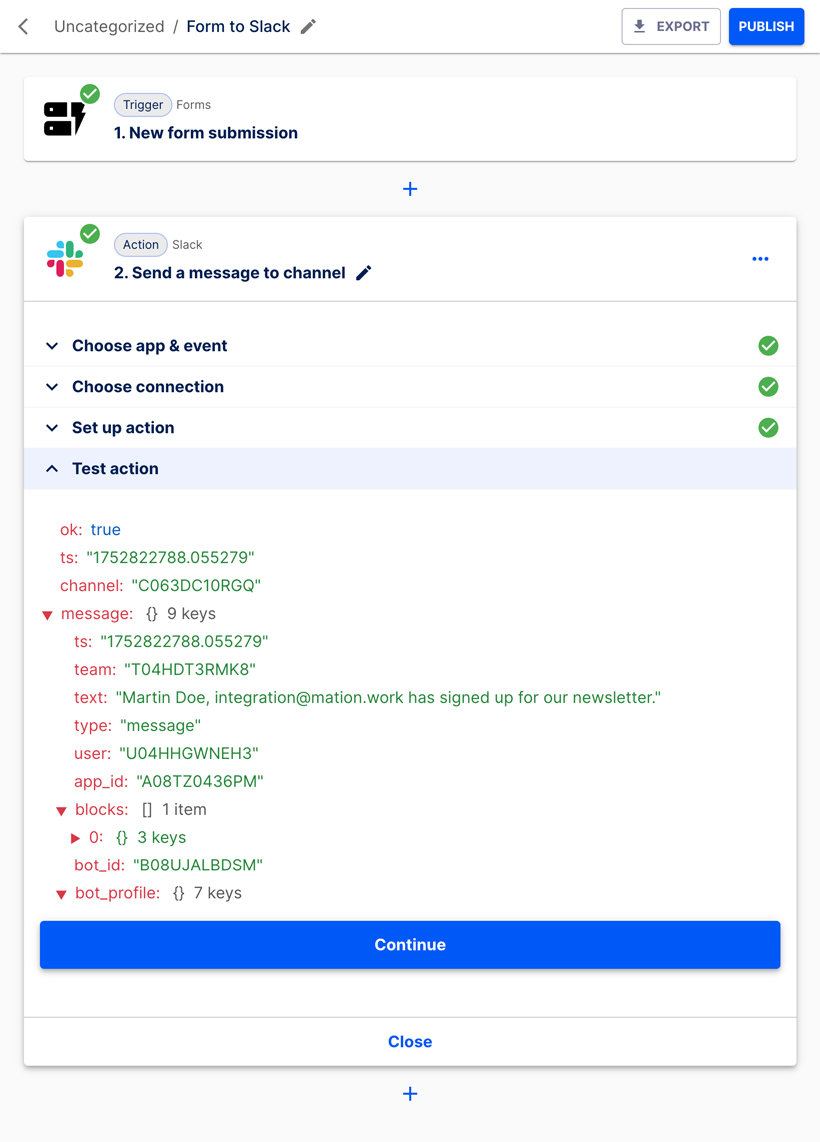
Click the Continue button. The flow is ready for publication.
Click the Publish button.
The flow has been published successfully.