Appearance
Appwrite
Appwrite is an open-source backend server designed to simplify and streamline the development process for web, mobile, and Flutter applications. It provides a complete set of easy-to-integrate APIs for user authentication, database management, storage, and server-side functions. With robust security measures and real-time capabilities, Appwrite helps developers build secure, scalable, and high-performing applications faster. Whether you're a solo developer or part of a team, Appwrite's intuitive interface and comprehensive features empower you to focus on creating great user experiences without worrying about backend infrastructure.
Key Features of Appwrite:
- User Authentication: Supports multiple login methods including email and OAuth.
- Database Management: Real-time database with advanced querying.
- File Storage: Secure and easy file upload, download, and management.
- Realtime Capabilities: Synchronization and updates in real time for collaborative apps.
- Server-Side Functions: Custom functions, cron jobs, and webhooks support.
- Security: Data encryption and strict access control.
- APIs: Extensive APIs for integration with applications.
- Open-Source: Fully open-source backend for flexibility and control.
Further information
Read more detailed information on Appwrite here.
Trigger:
New documents: Triggers when a new document is created.
Connect with Appwrite:
- Log in to your Appwrite account: https://appwrite.io/.
- Click the + Create project button.

- Fill in your Project name and click the Next button.
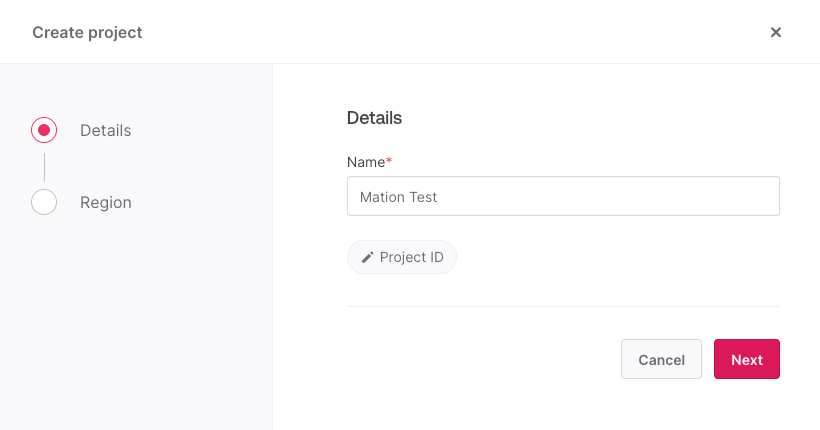
- Choose a deployment region for your project and click the Create button.
WARNING
Make sure to choose the correct deployment region, it cannot be changed later!

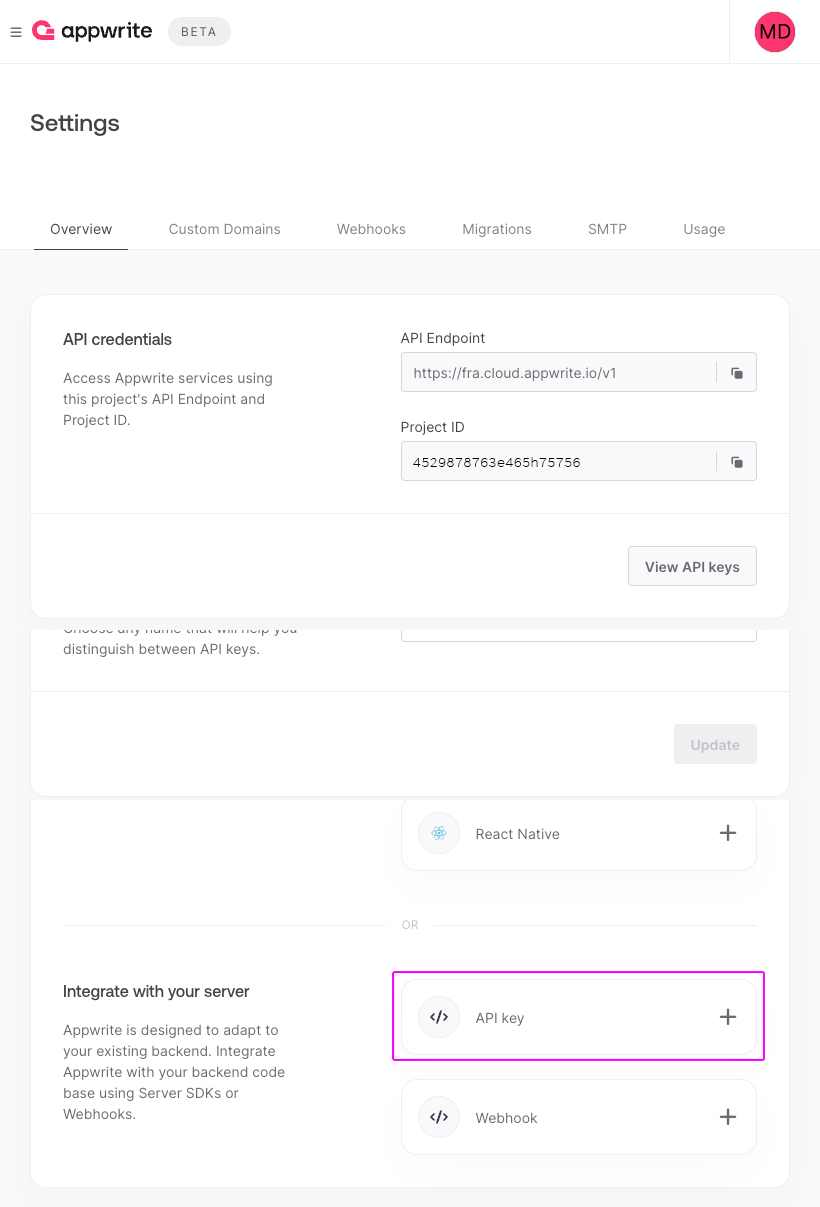
- In the Integrate with your server section click the API key button.
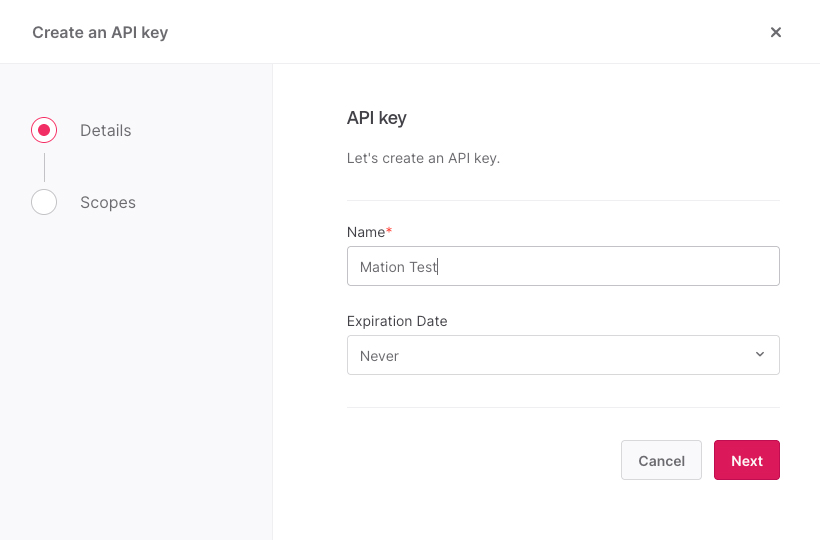
- On the Create an API key page in the Details step, fill in the Name field and select Never for the expiration date. Then click the Next button.
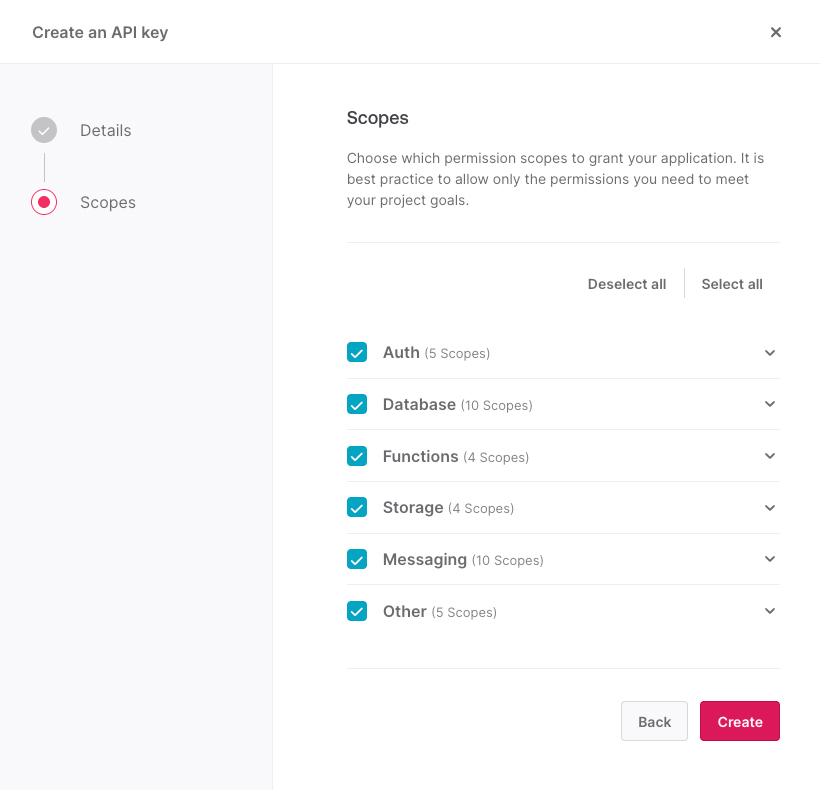
- In the Scopes step click the Select all button. Then click the Create button.
- Copy the
API key secret.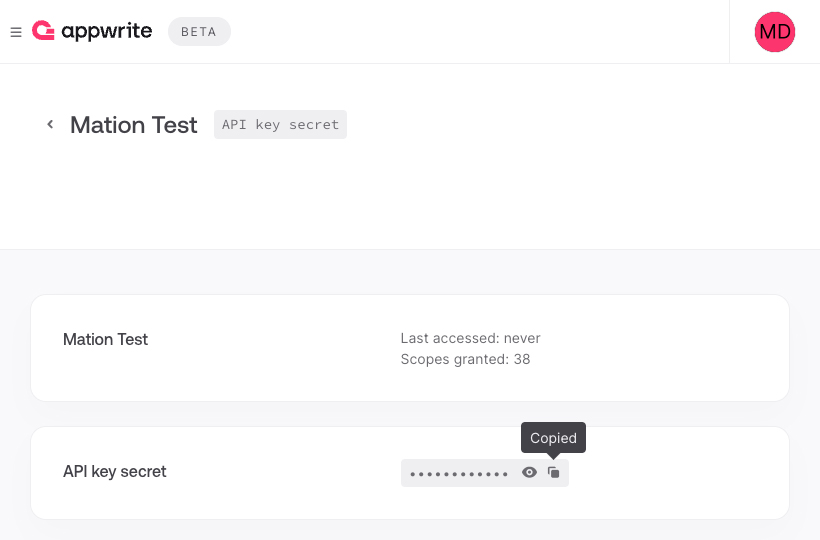
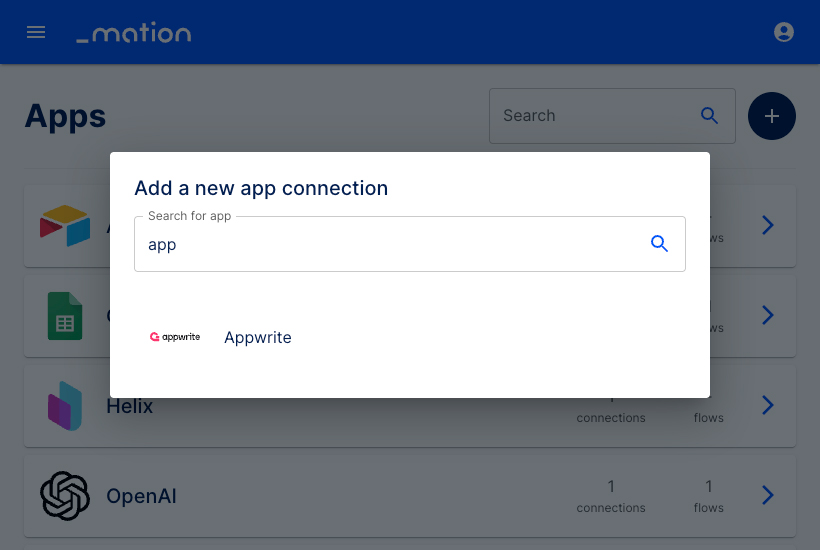
- Go to Workflow Automation and navigate to Apps. Click the + Add Connection button. In the popup, select Appwrite from the list.
- Enter a Screen Name of your choice and paste the
API key secretinto the API Key field on Workflow Automation.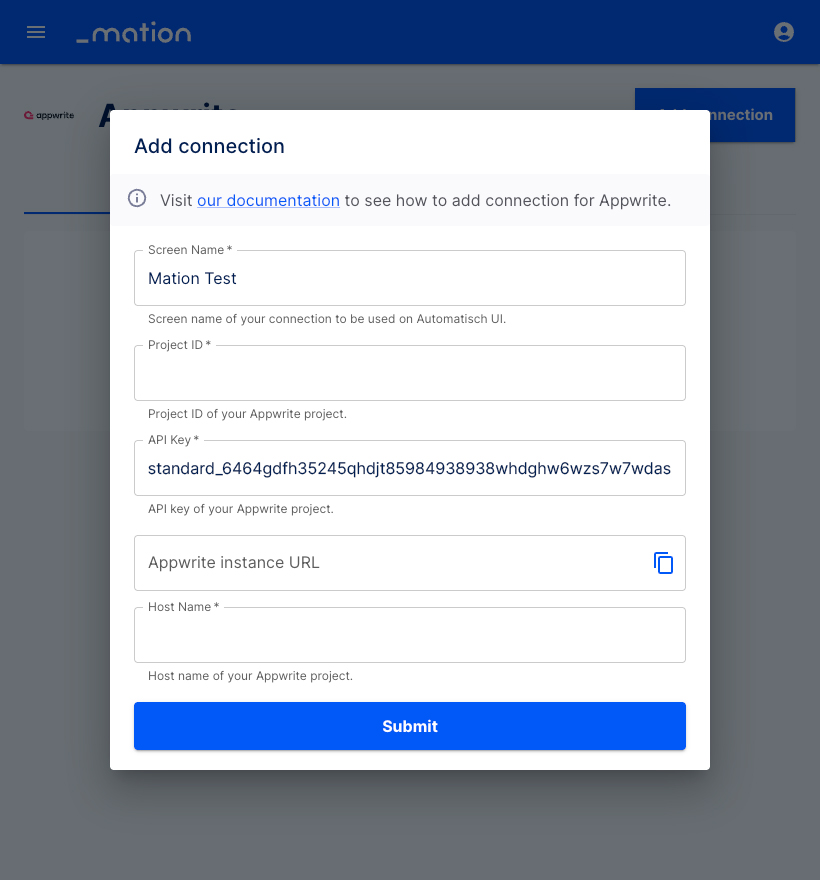
- Go back to Appwrite and navigate to Settings in the menu. Copy your
Project IDvalue.
- Go to Workflow Automation and paste the
Project IDvalue into the Project ID field.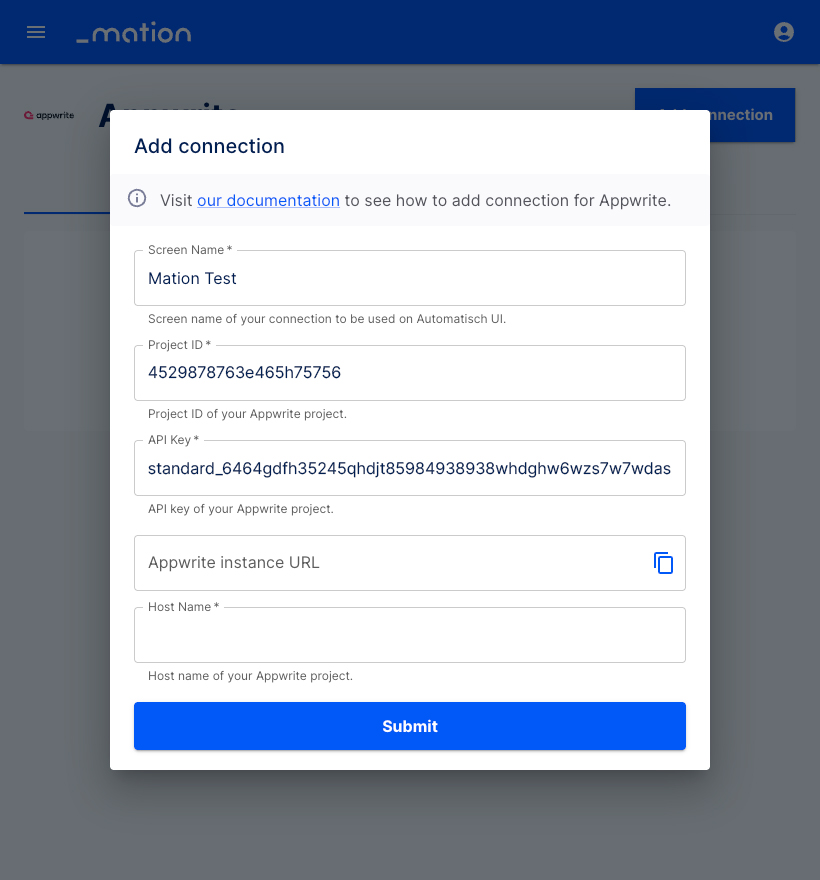
- If you are working on a self-hosted Appwrite project, paste your Appwrite
instance URLinto the Appwrite instance URL field on Workflow Automation. - Enter the hostname of your Appwrite instance URL into the Host Name field on Workflow Automation. It's either
cloud.appwrite.ioor the hostname of your instance URL.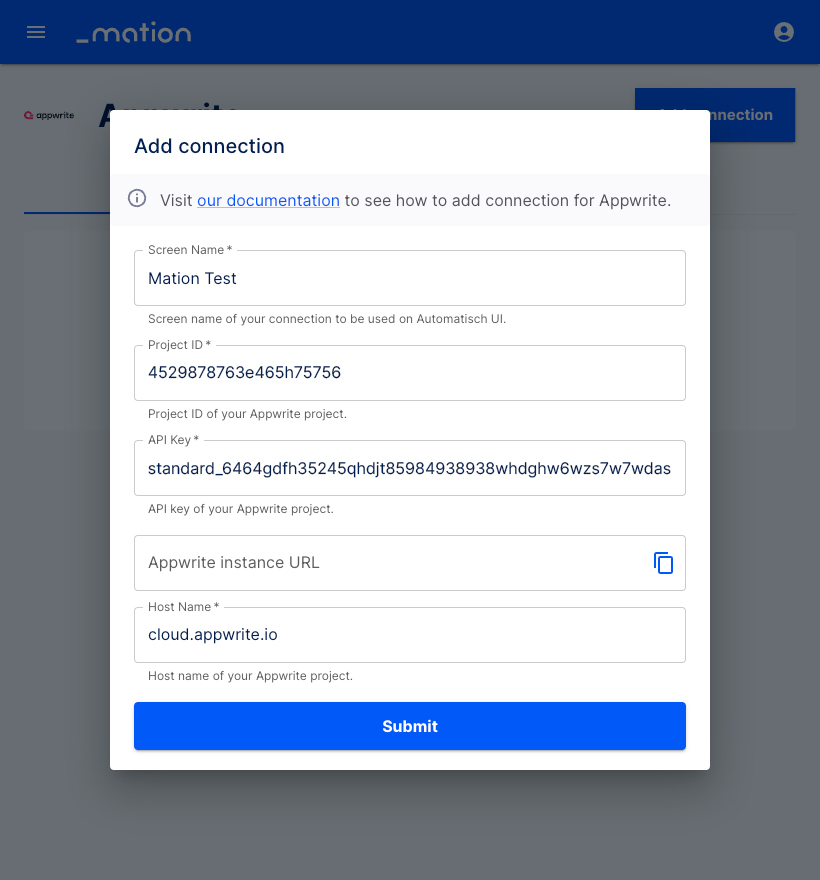
- Click the Submit button.
- The connection with Appwrite is now established.
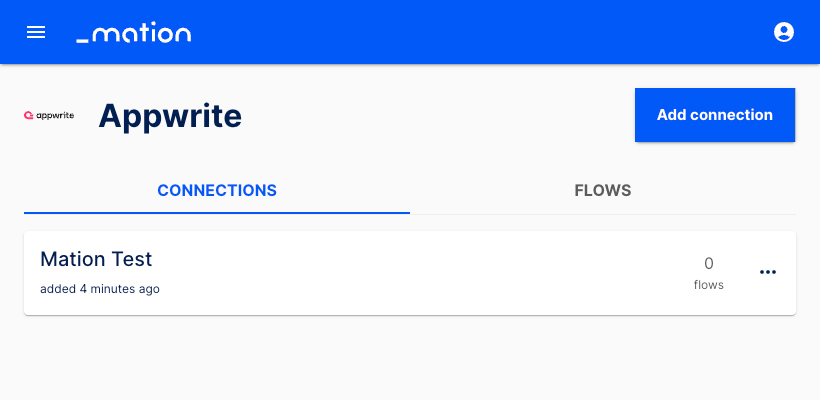
- Start using your new Appwrite connection with Workflow Automation.