Appearance
Zendesk
Zendesk is a customer service software and support ticketing system that helps businesses manage customer interactions across phone, chat, email, social media, and other channels. It's designed to improve customer relationships by providing a streamlined and efficient way to handle support requests and queries. It's known for its ease of use, scalability, and ability to provide a unified customer view, making it a popular choice among businesses of all sizes for customer support and engagement.
Key features of Zendesk:
- Multi-channel Ticketing System: Manages customer interactions across various communication channels.
- Automated Responses: Provides automated replies to common customer inquiries.
- Knowledge Base Management: Enables creation and maintenance of a self-service knowledge base.
- Customer Satisfaction Tracking: Monitors and measures customer satisfaction levels.
- Integrations with Business Tools: Seamlessly integrates with a variety of other business software.
- Reporting and Analytics: Offers detailed reporting tools for analyzing support activity.
- Customization Options: Allows customization of workflows, views, and customer interactions.
- AI-Powered Chatbots: Utilizes AI chatbots for automated customer service interactions.
- Real-Time Chat Support: Enables live chat support for instant customer assistance.
- Scalability: Adaptable to both small businesses and large enterprises.
Further information
Read more detailed information on Zendesk here.
Action:
Create ticket: Creates a new ticket.
Connect with Zendesk:
INFO
Pop-up windows must be allowed for this browser session to enable the connection of this third-party app with Workflow Automation.
Log in to your Zendesk account.
Fill in the
Zendesk Subdomain URLwith your dashboard URL, for example:https://<yourcompany>.zendesk.com.
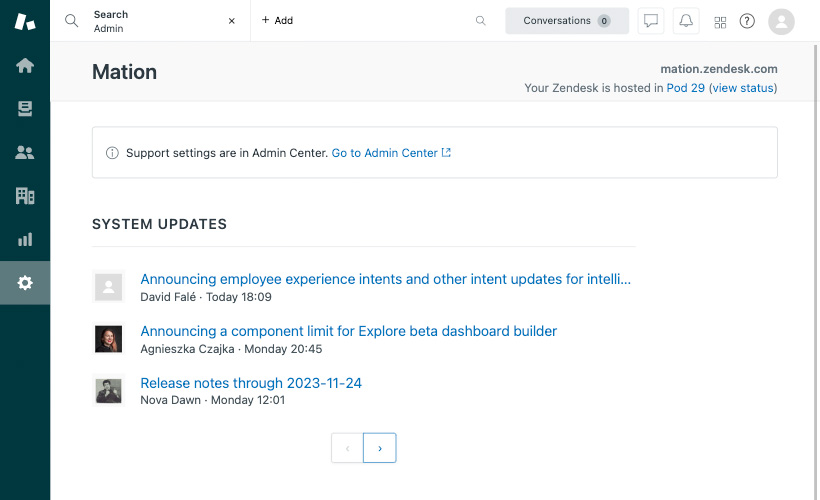
Go to your Zendesk dashboard and click the gear icon in the left sidebar navigation.
Click the
Go to Admin Centerlink or enter your URL manually, e.g.https://<yourcompany>.zendesk.com/admin/home.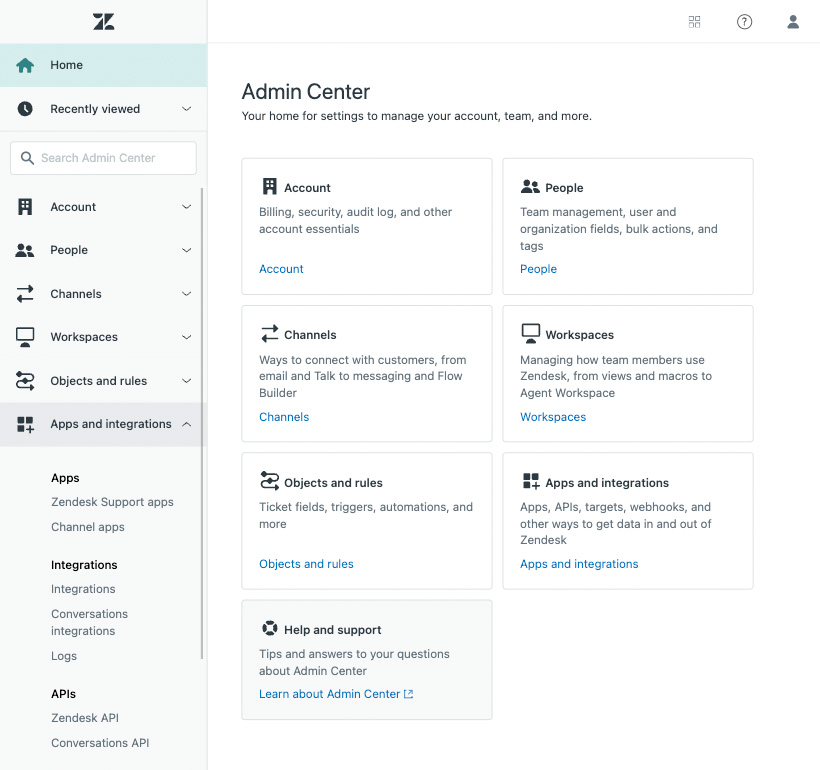
Click the
App and integrationslink in the Apps and integrations tile, or navigate to Apps and integrations in the sidebar.In the sidebar navigate to Zendesk API.
Check the checkbox and click the Get started button.
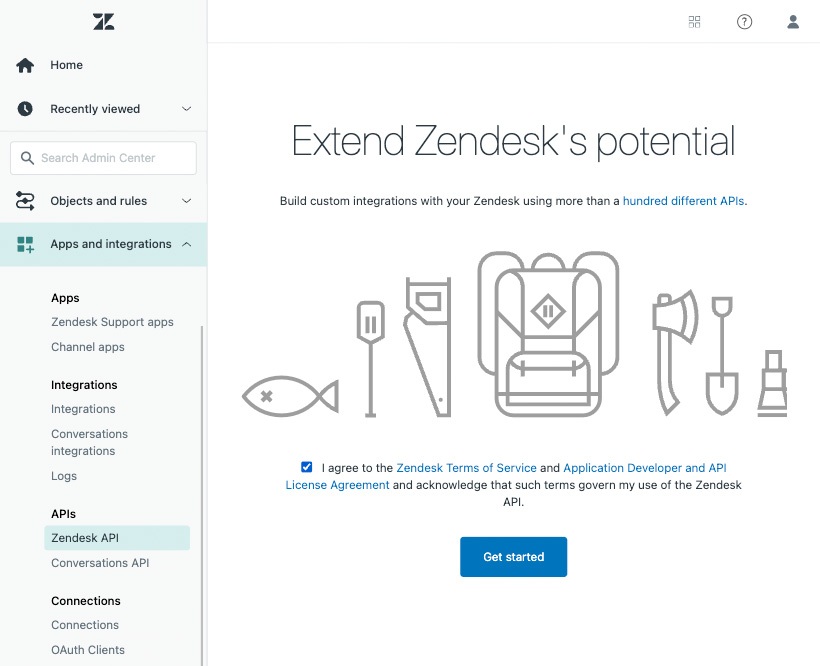
Click the OAuth Clients tab.
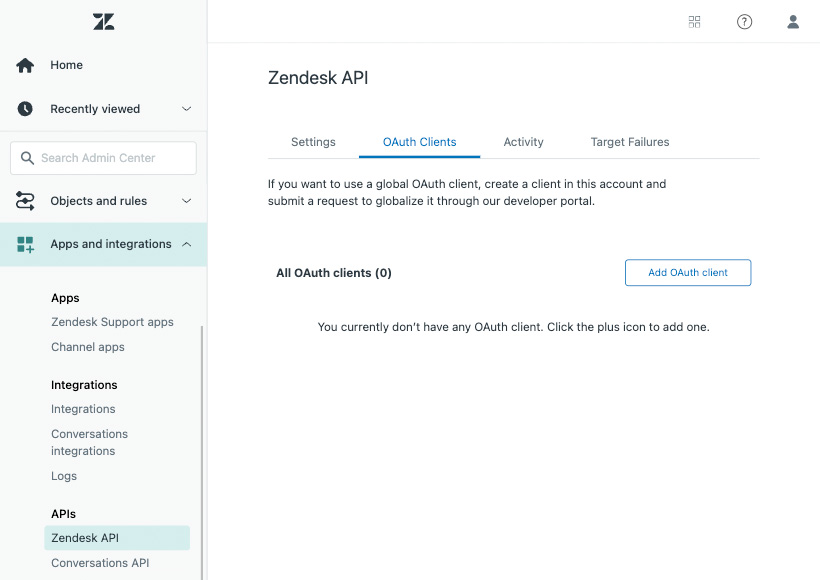
Click the Add OAuth Client button.
Fill in the necessary information in the form.
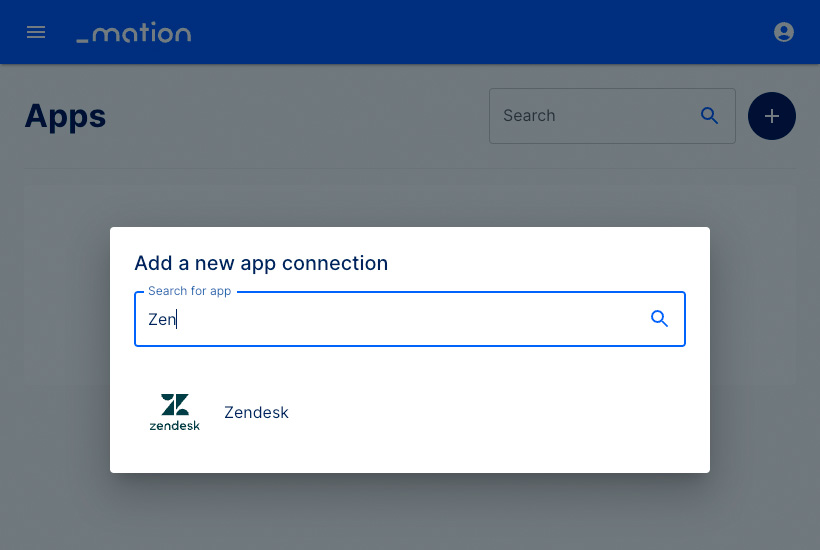
Go to Workflow Automation and navigate to Apps. Click the + Add Connection button. In the popup, select Zendesk from the list.
Copy the
OAuth Redirect URL.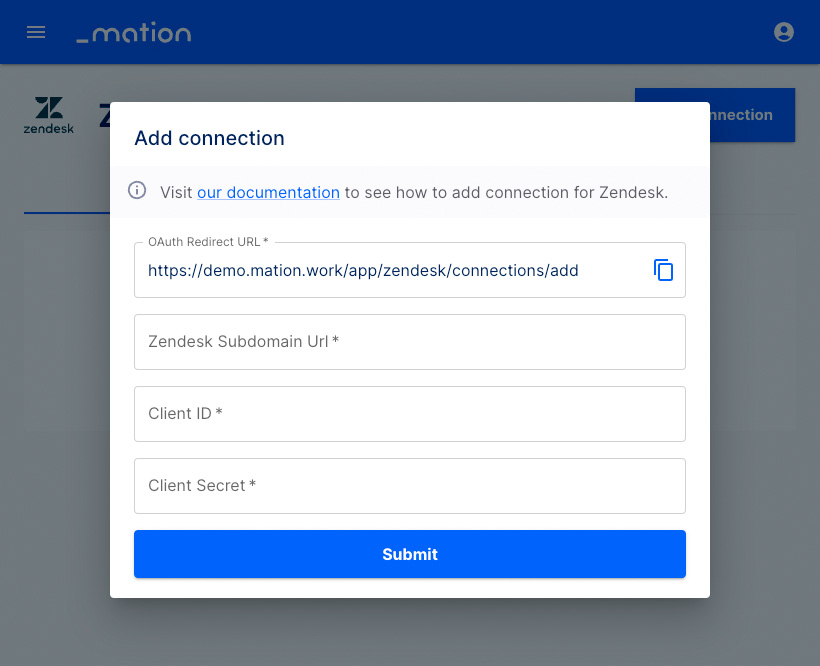
Go to Zendesk and enter a
Unique Identifiervalue of your choice in the Unique Identifier field. Then paste theOAuth Redirect URLvalue into the Redirect URLs field.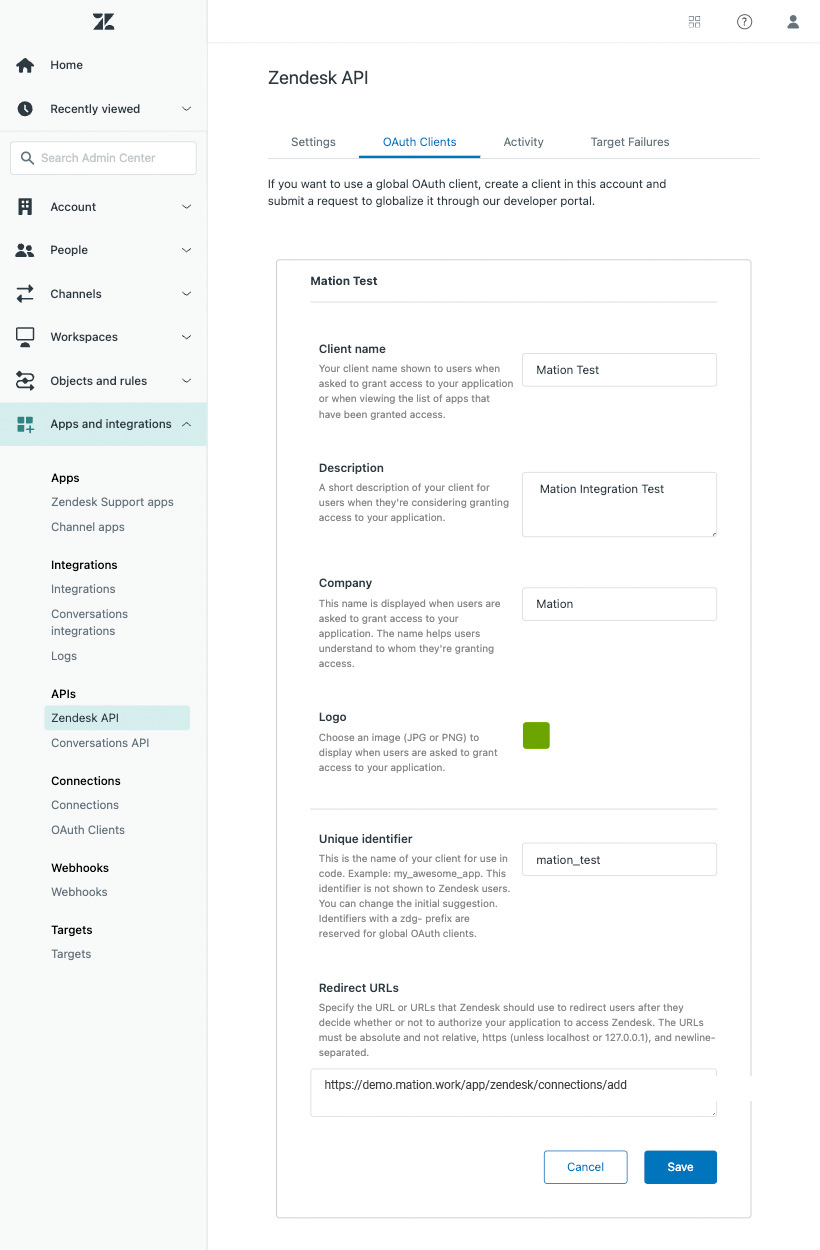
Click the Save button to complete the creation of the OAuth client.
Click the Ok button in the pop-up to reveal your
Secret.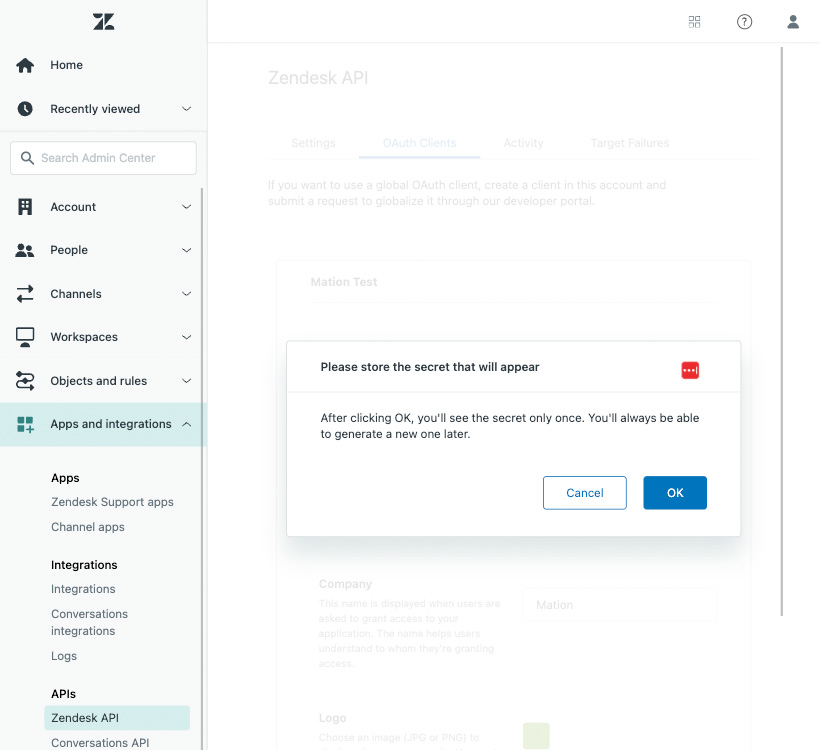
Store the
Secretvalue in a safe place, as you willl only see it once. Don't click the Save button yet.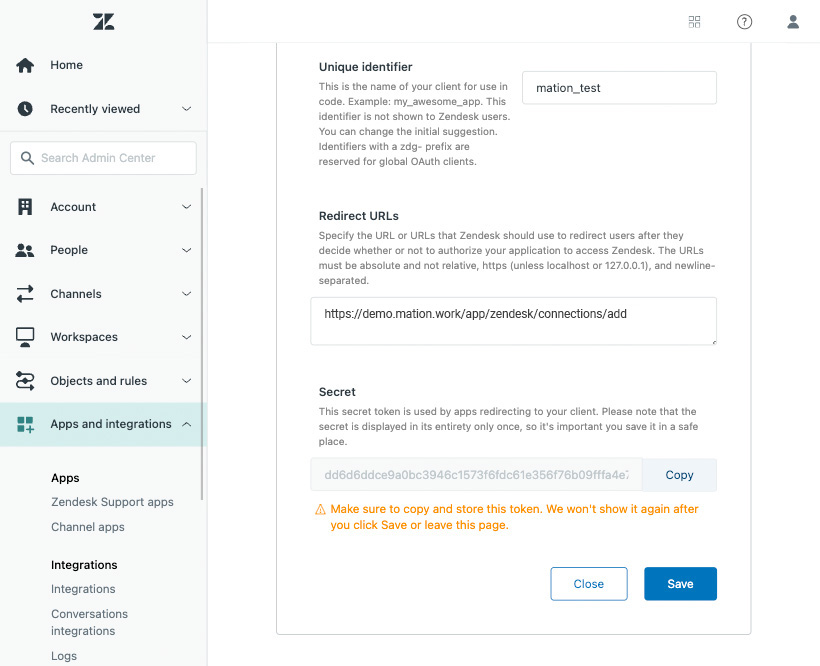
Paste the
Secretvalue into the Client Secret field on Workflow Automation.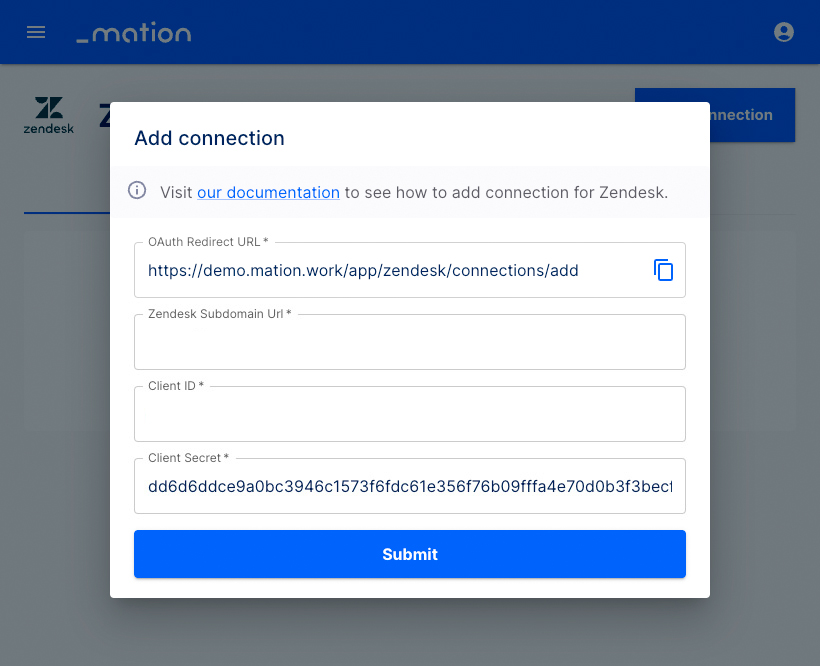
Copy the
Unique identifiervalue on Zendesk. Then click the Save button.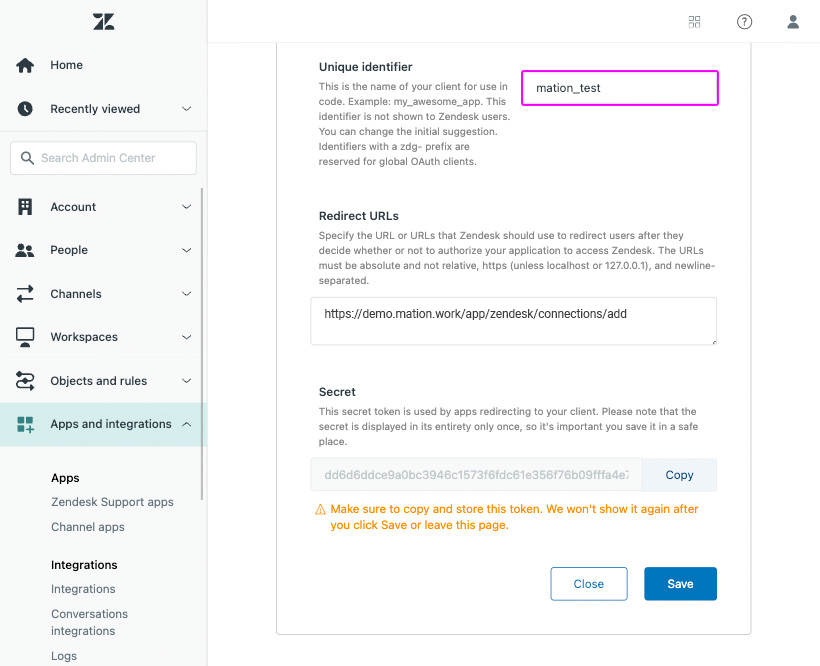
Paste the
Unique identifiervalue into the Client ID field on Workflow Automation.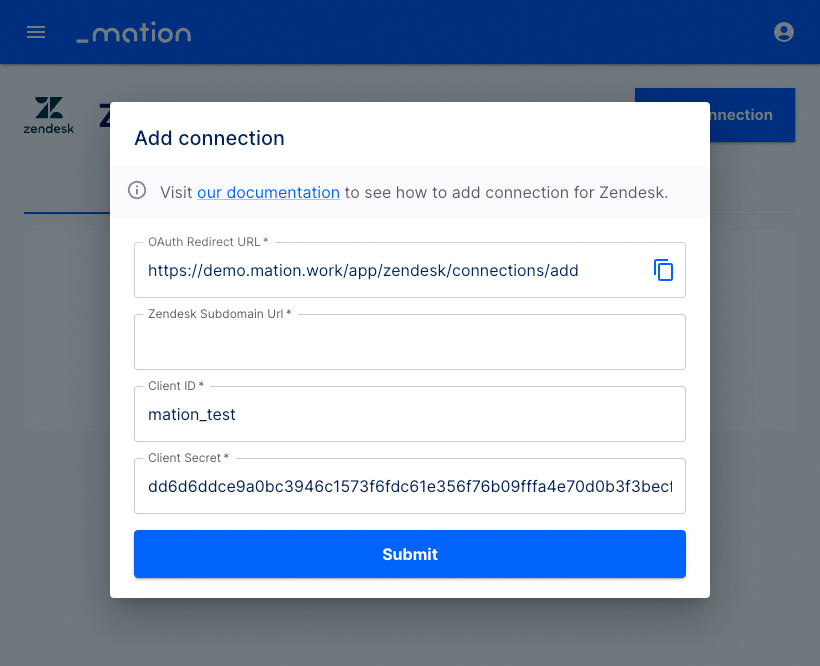
Enter your
Zendesk Subdomain Urlin the Zendesk Subdomain Url field.NOTE
Don't forget the
https://protocol prefix!.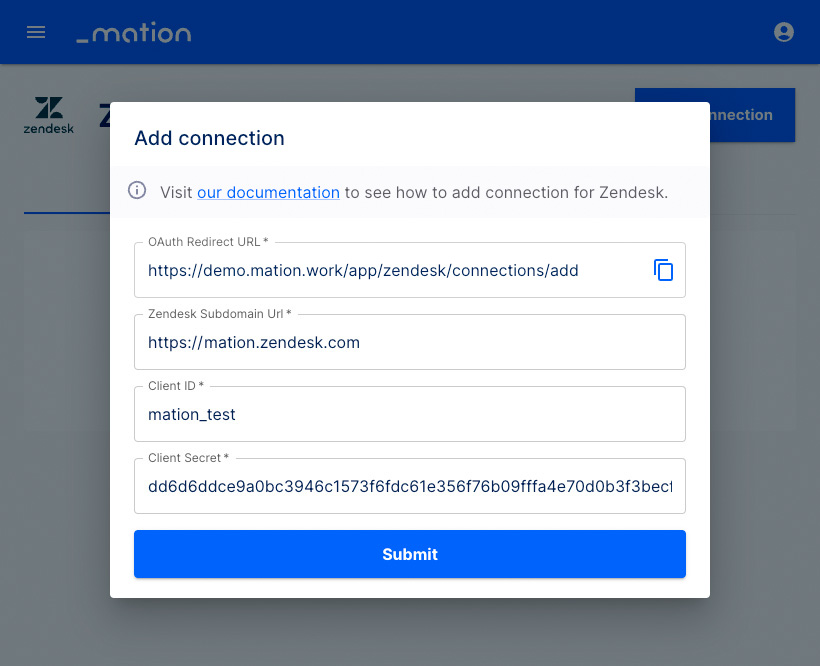
Click the Submit button.
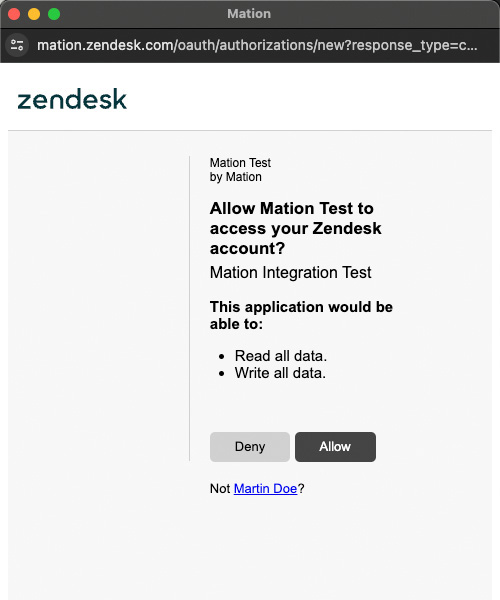
A pop-up window appears. Click the Allow button.
Your Zendesk connection is now established.
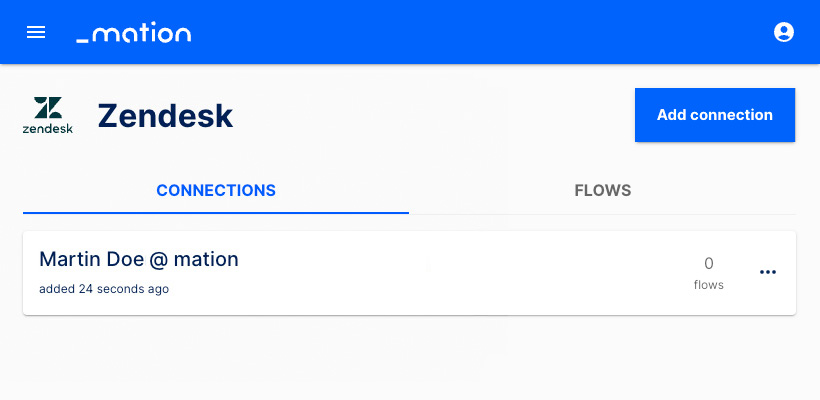
Start using your new Zendesk connection with Workflow Automation.